Guide to Use FileZilla
The File transfer protocol works as one of the most important areas to check on when making direct changes to your website area.
Table of Contents
Whether it is uploading an image or downloading your files for keeping at as the back up the file transferring protocol software works as the best tool.
FileZilla is a very intuitive kind of free program that works with convenience to offer you the proper control over the files you want to make changes on your website.
While you already have downloaded and installed the software or you are still thinking of opting for this software, then a guide to use FileZilla can help you much. Have a look.
Why might you feel the need to use FTP Programs for modification purposes?
As you switch to use the FTP software, you can feel how easily you can access the files directly on your website. It lets you remove, change, upload, or delete the files easily along with the proper modification from your site to the computer.
Thus, the developer flock around these kinds of tools to use them for working on the webpages, going offline. As you create the file, it makes it easier for you to upload them using an FTP hosting account.
On the other hand, these kinds of programs help you with the proper creation of your site’s replica using the system on your computer. It comes with various benefits as you for recovering the file from the corruption due to the malware attacks.
Simultaneously, it lets you create a backup copy for the download of all of the files from the website you are using.
Guide to use Filezilla along with Client:
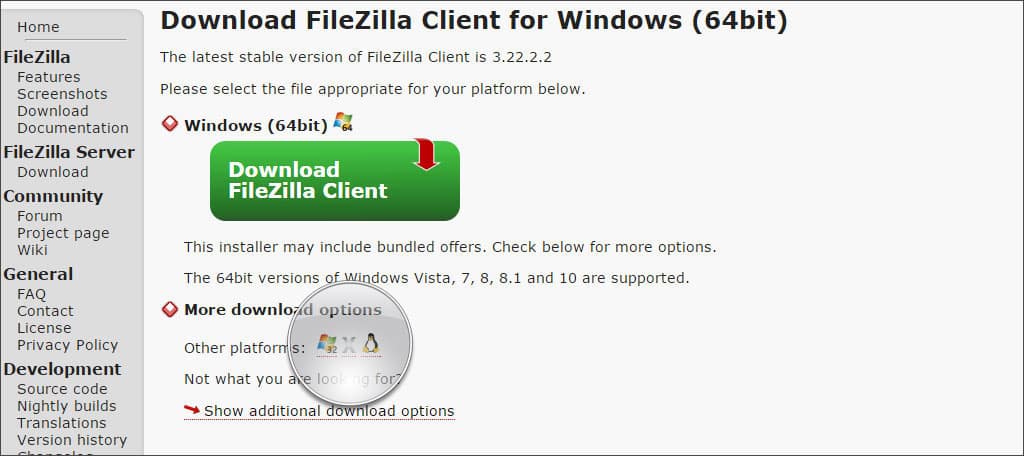
While opting for using Filezilla, you need to ensure the proper downloading and the installing of the software on your computer. You can go to Filezilla-Project.org.
To download the software before moving forward with the guide to use FileZilla. Go for clicking on the button for downloading the clients.
From the next page area, you need to go to select the specific operating system that you usually use on your computer. FileZilla goes completely compatible with operating systems like Windows 64-bit, 32-bit, Linux, and Mac OSX.
As you are done with downloading the software, go for the instructions as per the guide to use FileZilla.
How to connect your server along with the Quickconnect?
Quickconnect works with FileZilla, which gives you quick access to your website files. For this, you need to properly know about the login credentials of the FTP account.
A proper guide can show you how to do this easily for connecting it to your server. Here is the method that you can easily follow:
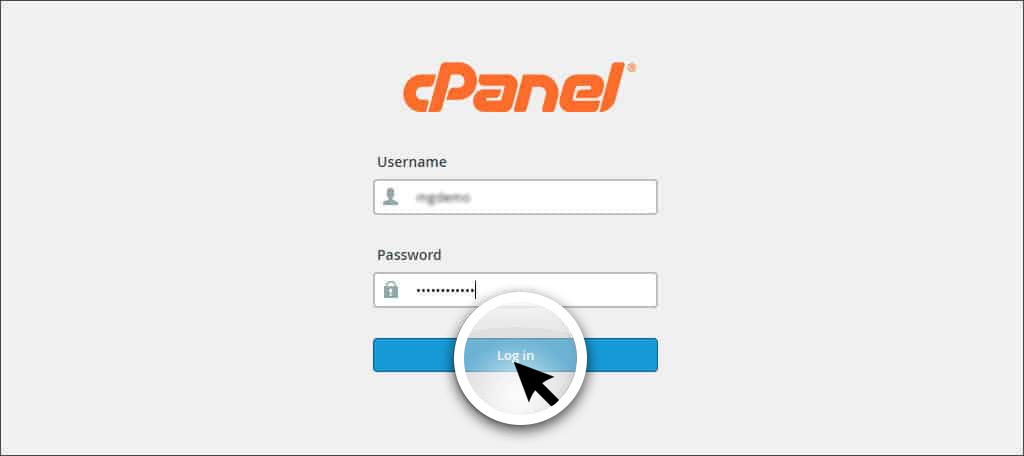
Step 1: Start with logging into your cPanel host. In case you are not having access to the cPanel, you can easily contact your web hosting provider for the issues to get access.
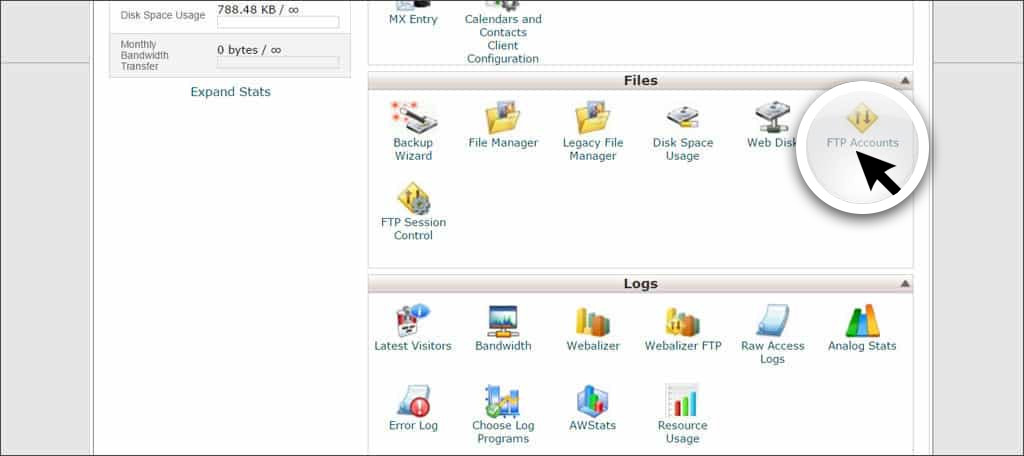
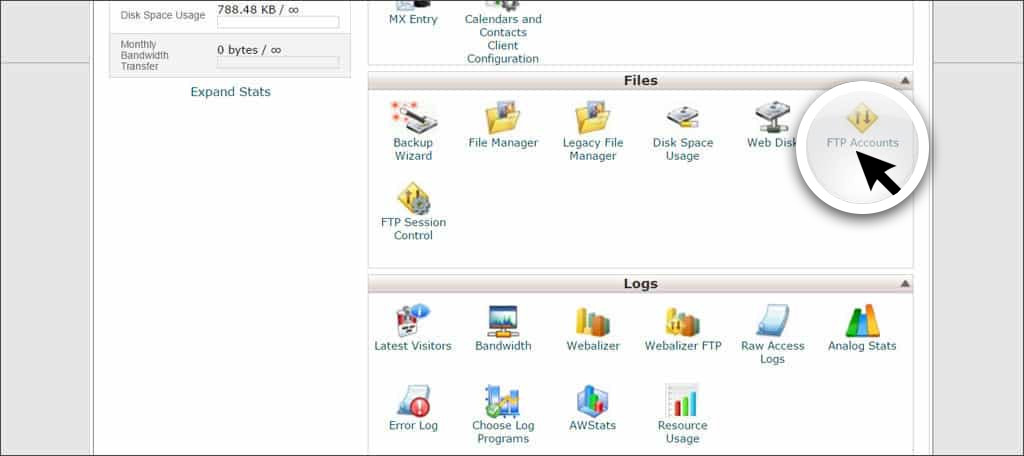
Step 2: Now, you need to scroll down towards the Files section and click the “FTP Accounts.”
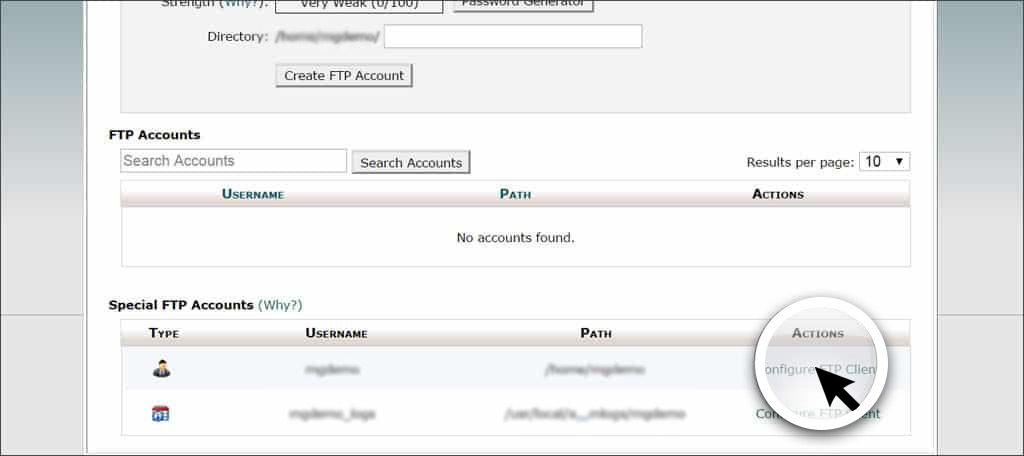
Step 3: As the next window appears, scroll down until you are finding the account for your FTP that you wish to use. In case you do not have any specific website that you want to have your access to, you can create an account here.
Step 4: Now, you need to simply click on the link for “Configure FTP Client.”
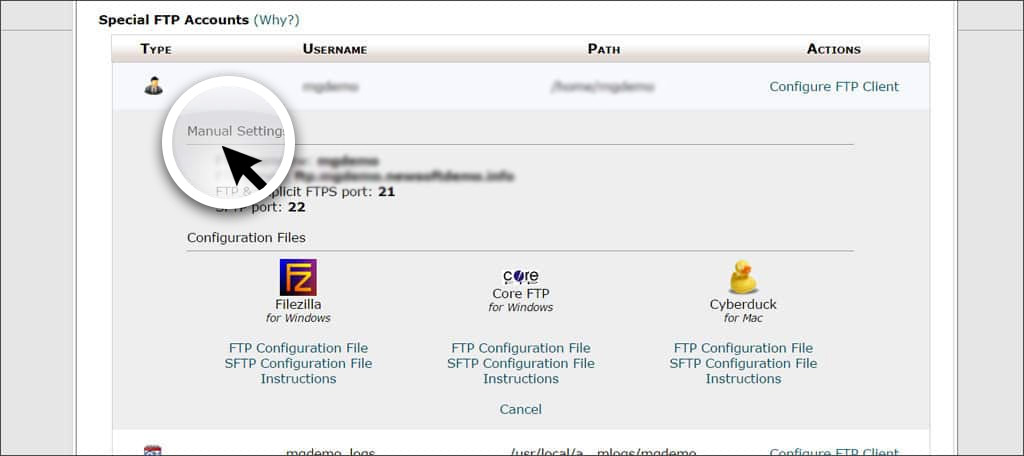
Step 5: Have a look at the user name, server, and the port that comes under the manual setting on this page. You can also opt for downloading the FTP configuration file, which is specifically present on the FileZilla, in case you are a Windows user.
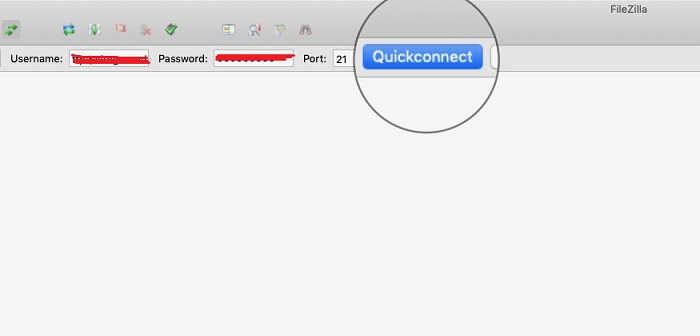
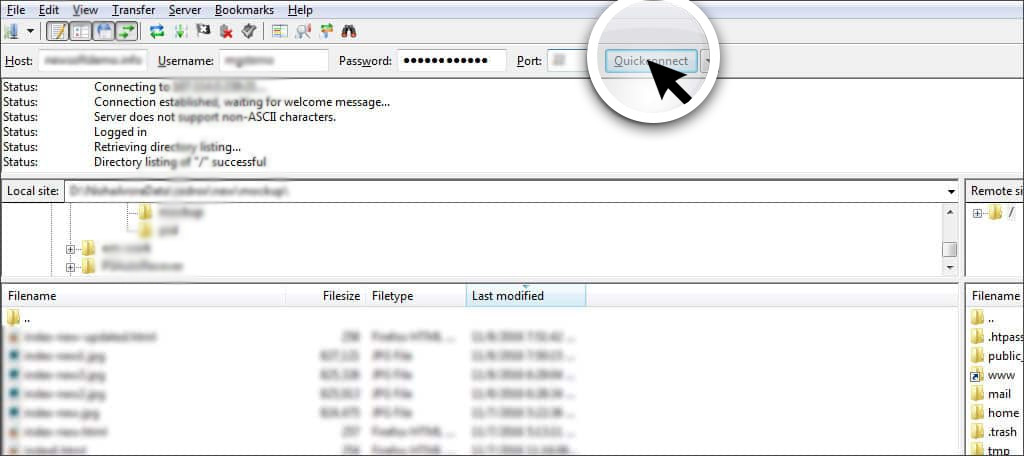
Step 6: As you have the fields in the FileZilla properly filled out, now you need to click on the “Quickconnect” button. You can now clearly have access to all the files present on your website.
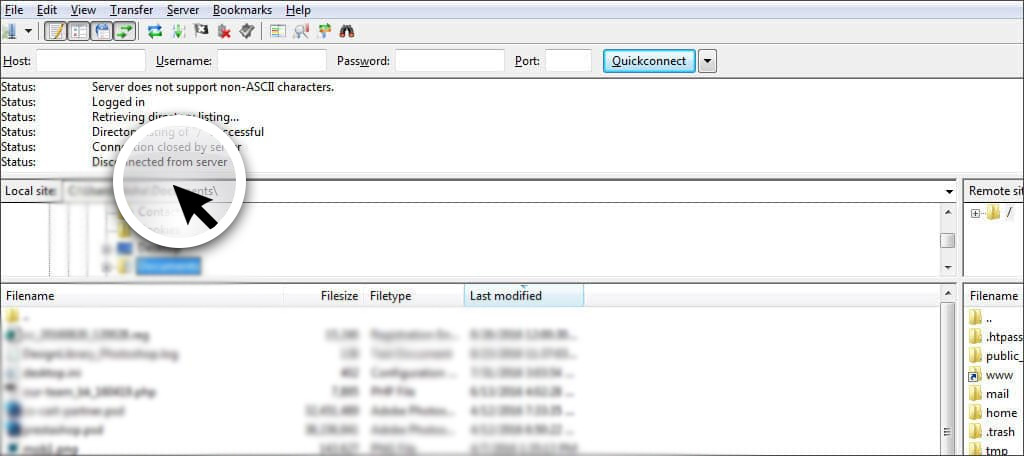
In FileZilla – guide to use FileZilla, the local files come on the left side of the computer. On the other hand, the remote site comes on the right pertains to the actual website you are using.
How to connect your server along with the FTP Configuration File?
In case you have downloaded the FTP configuration file from the cPanel area, you need to automatically go for the setup of the FileZilla.
As per the by-default setting, the use of these methods requires the password before you can simply connect it. In this guide to use FileZilla, we are going to show you how you can do this easily by changing it. Have a look:
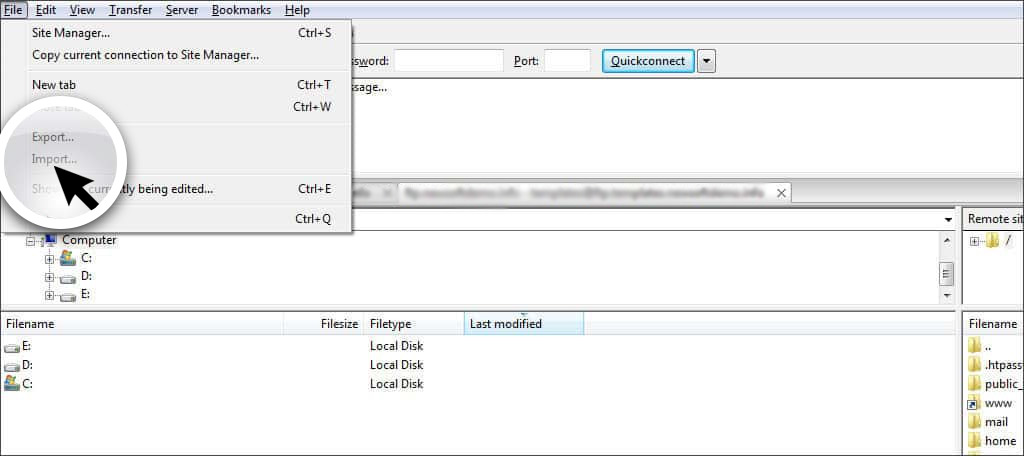
Step 1: For using the config file, you need to go to the ” File” section from the FileZilla and then simply select the “Import” from here.
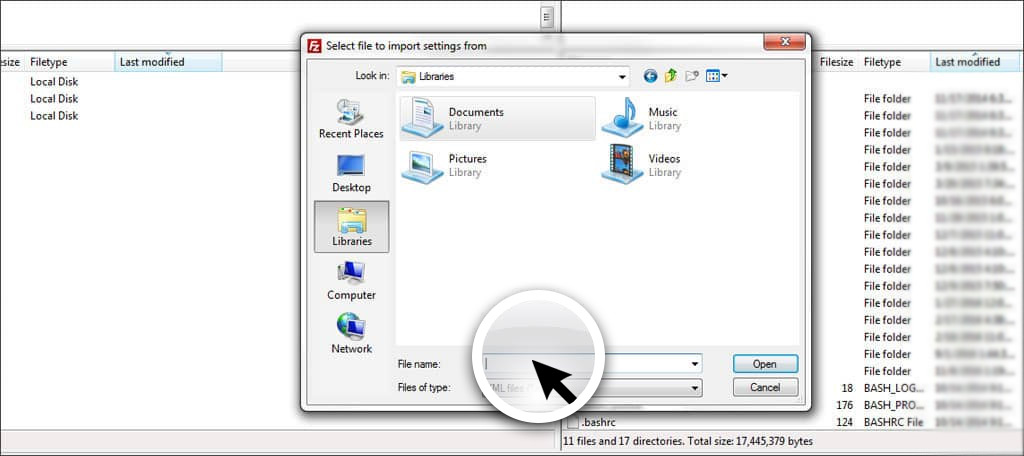
Step 2: Now, you need to find the FTP when the import window opens. Find the FTP file that you have downloaded. It is going to be an XML file.
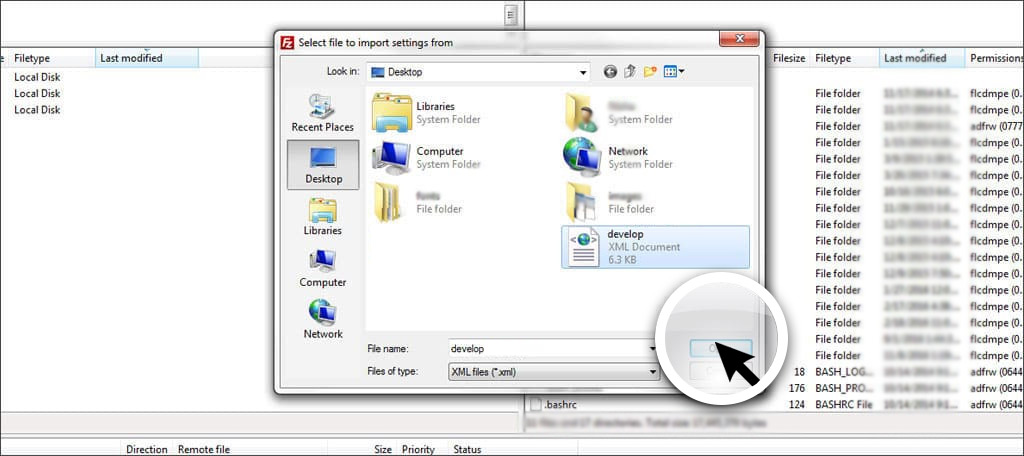
Step 3: From here, you need to select the file and simply click on the “Open” button from this window. The FileZilla is going to add all the other information except the password.
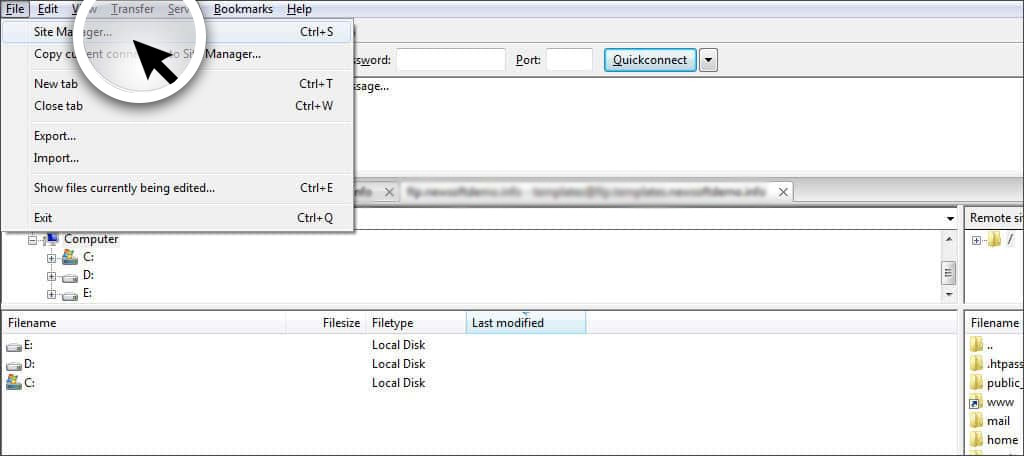
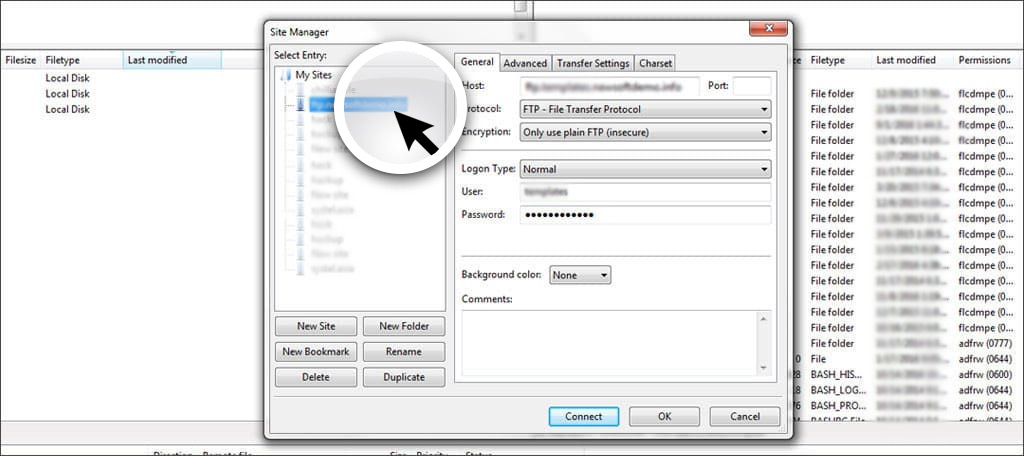
Step 4: Now, you need to go to the “File” in FileZilla. But this time, you need to go to select the ” Site manager.” It is going to be the very first option in the drop-down menu.
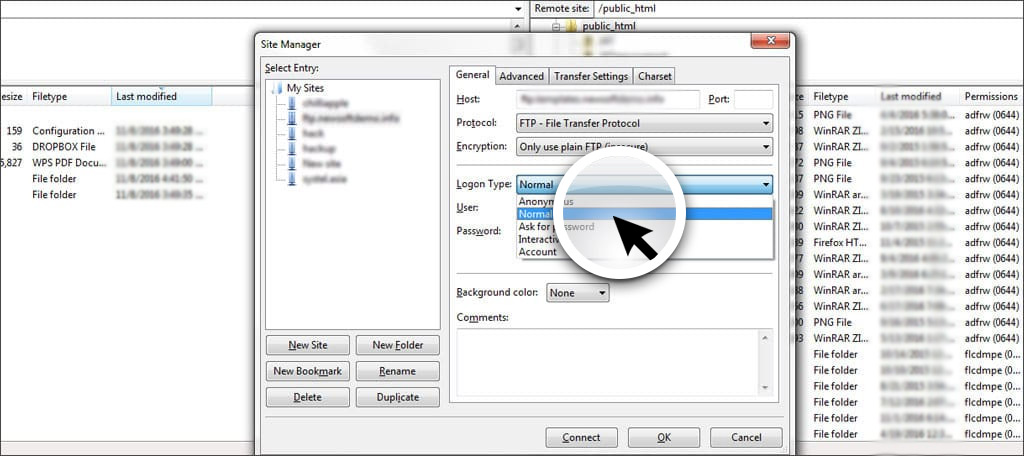
Step 5: From here, you can see an entry near the “My Sites” available for your website. From the right side, you need to simply find the “Logon Type” control.
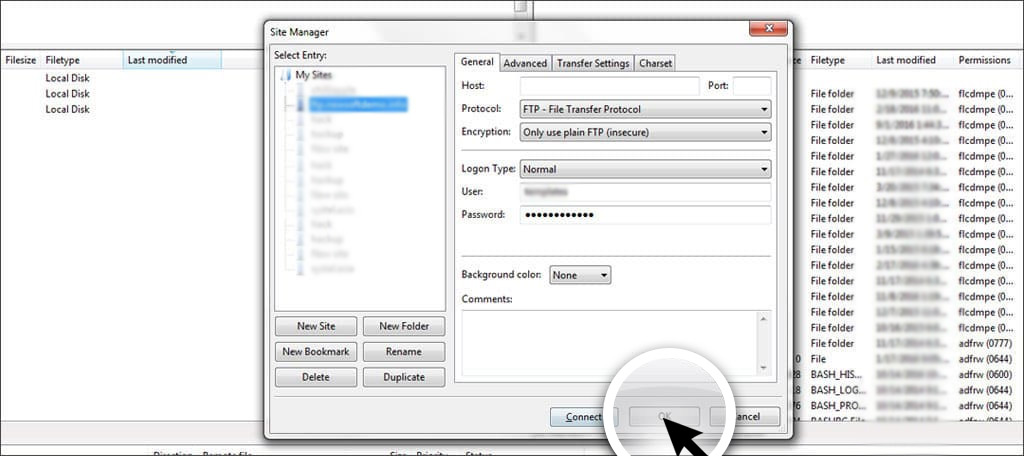
It is going to be set along with the “Ask for Password” as the default option. Here you need to click on the drop-down window and then go to select the ” Normal.”
Step 6: Now, you can simply enter the password for the FTP account you are using. As you are done, simply click on the “OK” to save your changes accordingly.
Now you can go for connecting it to your web host without going for the typing of the password every time you use it.
How can you manage your files?
This guide to use FileZilla also rightly discusses how you can simply manage the files using this software. As you are capable of connecting it with the web host server, managing your file comes the next.
You must be careful while using it for the remote site area changes that can corrupt the website. This can result in the web pages which are no longer working properly.
Creating the local site:
The best way to use your FileZilla is to have a local site properly prepared for your computer. This works like a folder on your computer, which will hold all your data on your website.
It works better when you use it as a single folder to keep the files separated and easy to find. Here is how you can do this:
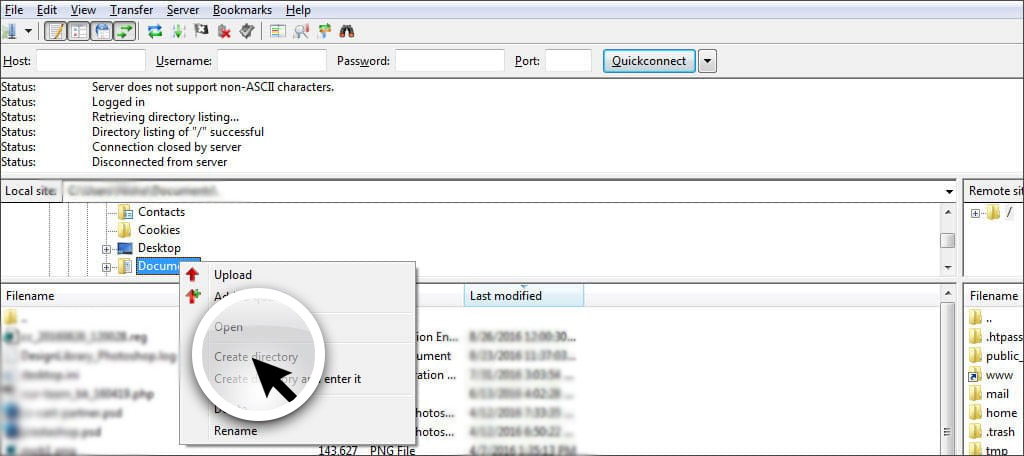
Step 1: Use the navigation from the ” Local Site” to find the area where you want to save all of your website files. Here it is better to use the “My Documents” area for your job.
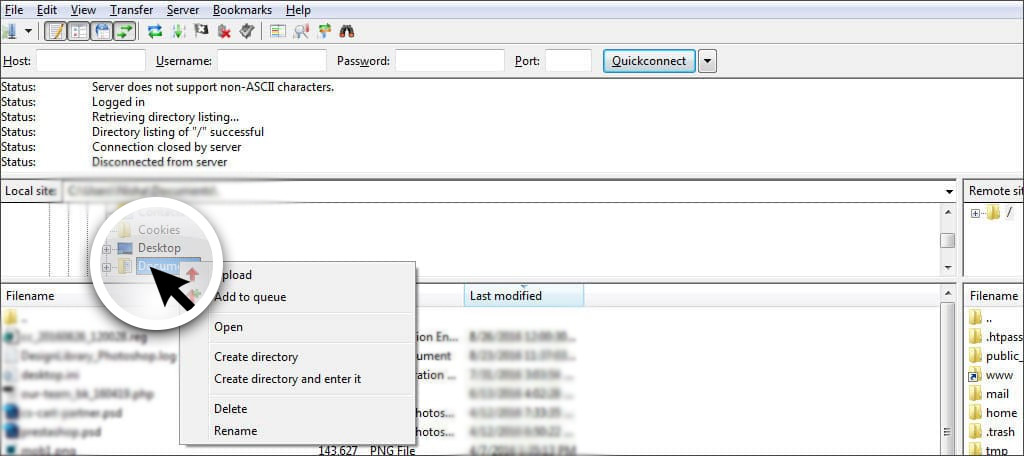
Step 2: Simply right-click on the “My Documents” from the local site area from the FileZilla window.
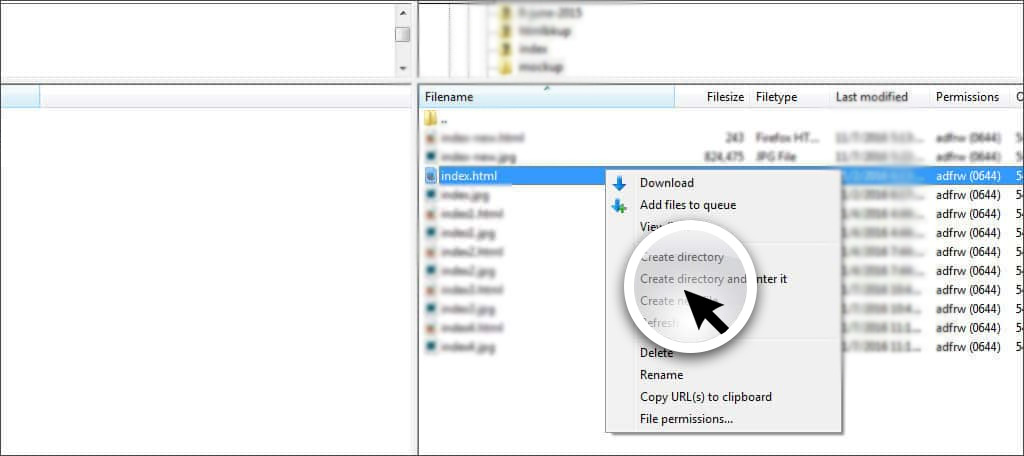
Step 3: Now, you need to go to find the option that can ” Create a directory and enter it” and then simply click on it.
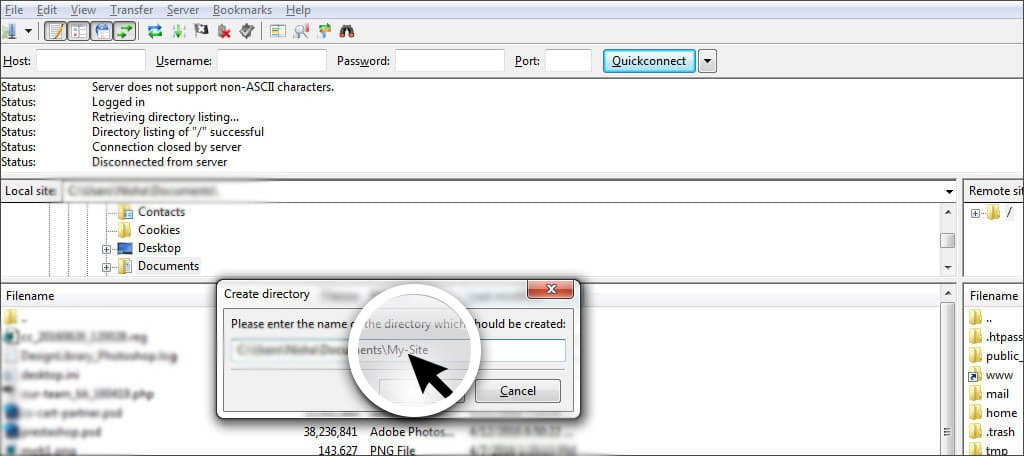
Step 4: This is going to come up with a small window with the name to the new directory. For this, you can go to “MySite.” The directory is going to be named like –
“C:\Users\Your Name\ Documents\MySite.”
It may be different in case you are using a different operating system.
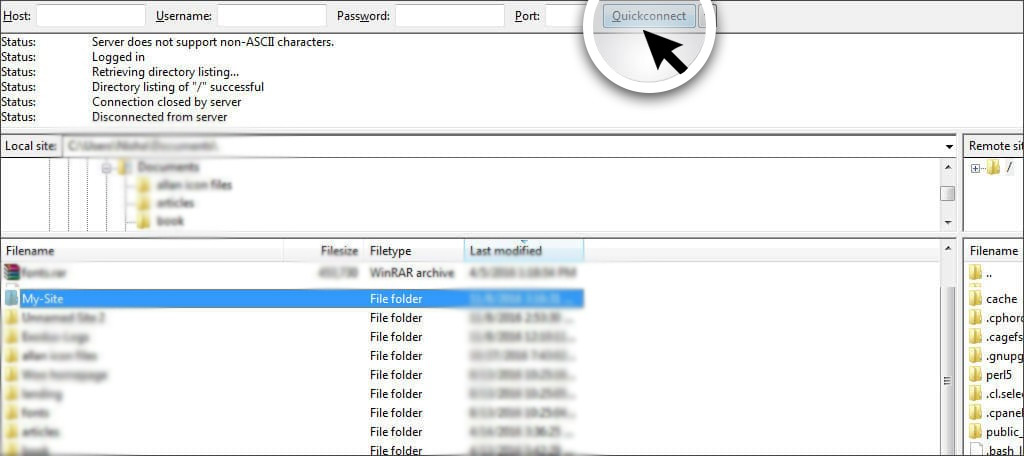
Step 5: Now, you can simply click on the OK button to save it properly. Then connect with your website using the Site Manager or the Quickconnect Controls.
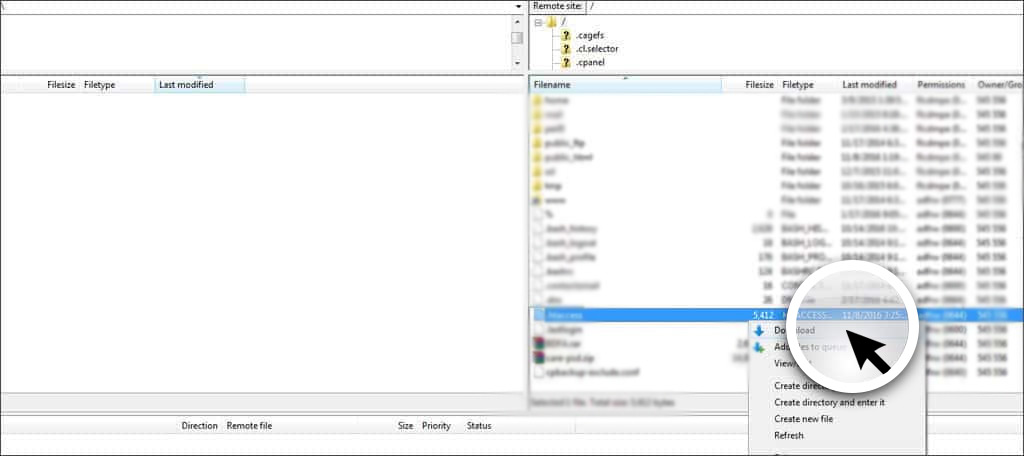
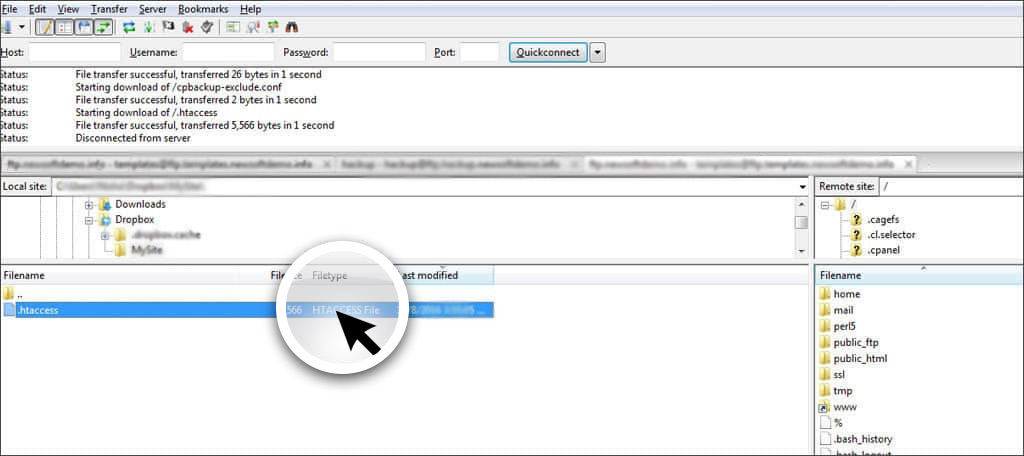
Step 6: As you are done making the connection, you need to copy the “.htaccess” file using the website to the computer.
You can simply hold it down and left-click on the .htaccess from the remote site window and the right, then simply drag it towards the local site window from the left.
As you drop it, you can see the FileZilla is automatically going to download the file and going to place it near the new folder.
This file also works in another way. You can simply drag and drop the file from the local area to the remote windows.
The FileZilla is automatically going to upload it to the site. This eases out the backing up of the site that you want to copy and save to your system on the computer.
Can you use this through Dropbox?
Those who use the Dropbox Cloud system, backing up is easier for them using the web files. Without creating the local site folder under “My Documents,” you can simply go for creating the folder for your site in the Dropbox area. This can usually find by going to the-
“C\Users\ YourName\dropbox.”
This will give you a cloud-based backup for your website while you go dragging the files in the new folder.
Read: How To Backup WordPress to Dropbox or Google Drive For Free
How to edit your Files?
This guide to use FileZilla also sheds light on how do you edit the files using this software. FileZilla usually does not come with the ability to copy and move the files from your website. You can go for the direct edits to the files from the system.
In case you know programming, you can go for some modifications using the coding. Here is how can you access the editing features:
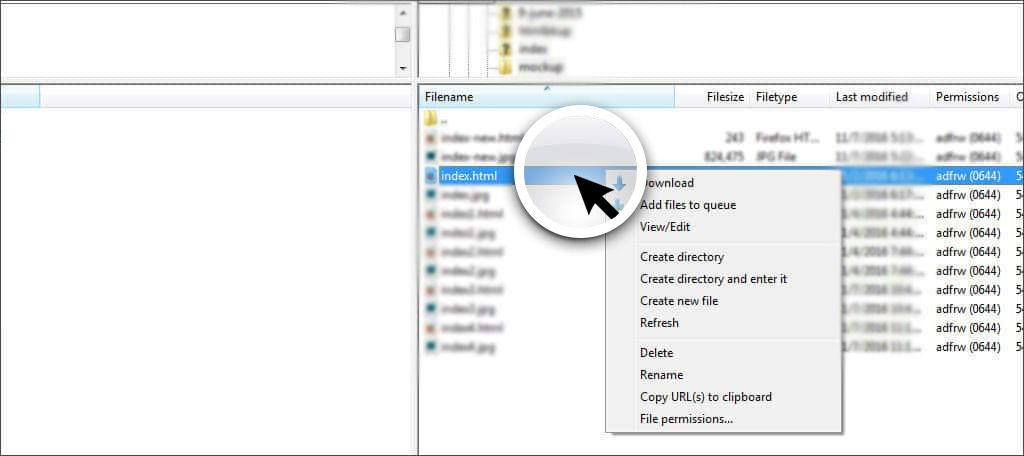
Step 1: Connect with your website using FileZilla. From the remote side of your window, you need to locate the file that you want to edit.
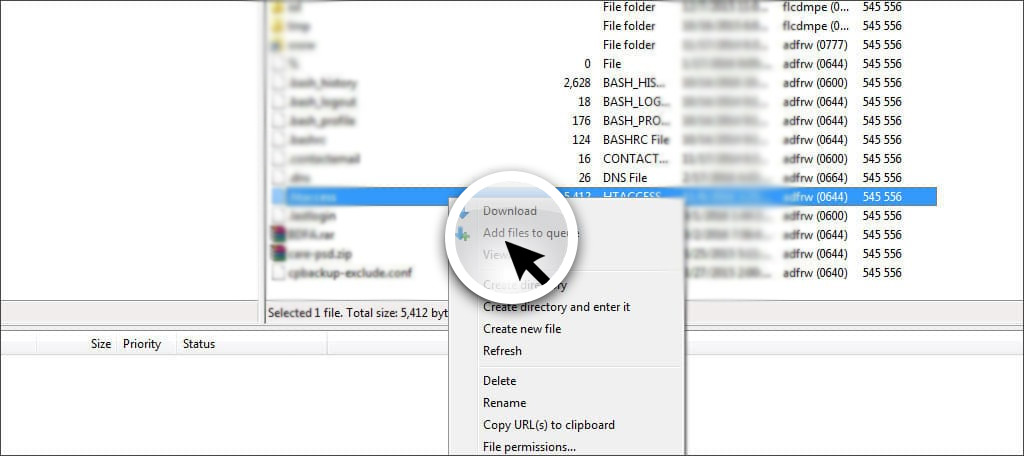
Step 2: A window with several options is going to come. For editing purposes, you need to click on the “View/Edit” option, which is available in the window.
Step 3: You can see a window saying “No program associated with filetype.” The first option which is going to be available by-default is for using the notepad in the form of an editor.
This option for the Windows computer may appear as different for the Mac and Linux. Simply click on “Ok” to complete.
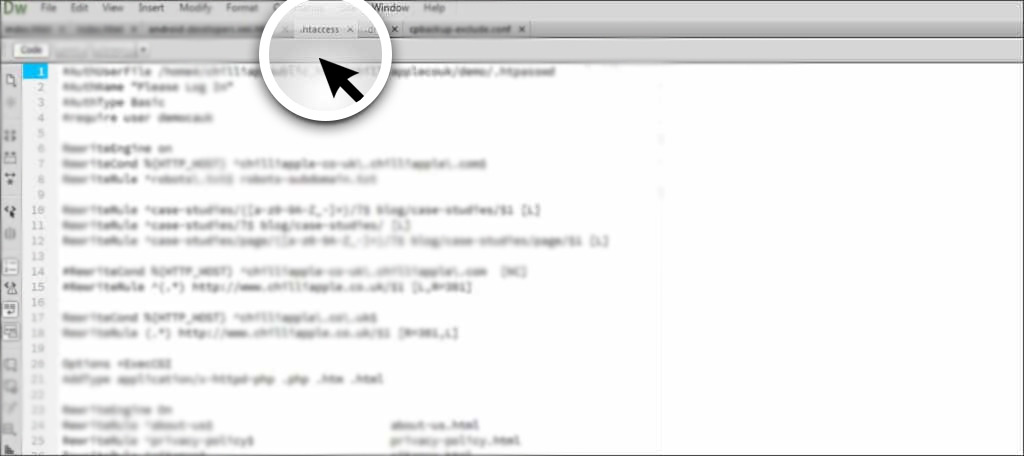
Step 4: Notepad or the default HTML editor is going to load. It is going to show you the existing contents in the file.
Step 5: As you are done making the changes, save this file to the folder you created for the website.
However, any changes you make will not affect the website unless you drag the new file from the local to the remote site in FileZilla.
It is better to save the original copies of your filers in a specific archive folder. It is risk-free in case something goes wrong. Also, it saves a lot of time in fixing the programming errors and any kind of issues, as it gives you the copy to recover.
How to change the file permission?
The file permission refers to the hosting that the servers used for identifying how the files are behaving on the internet. You can turn them into writable, readable, and executable. The permissions are specifically set for the owners, groups, and for public access.
If you want to change the permissions, you can easily right-click on the file or the folder in the question. Then you need to select the “File Permission,” which is located at the bottom area of the list. It is going to open up along with a small window where you can set the permissions manually.
Be careful while you set the permission. In case it is set incorrectly, you can give away public access to your website, which can lead to hacking of your website.
How can you create new files and folders online?
The software comes with the feature for creating new files and folders directly on the website. This helps you much when you want to upload a new page or create a folder to hold the documents on other files. Here is how can you create it:
Step 1: Firstly, you need to connect your website. Then simply right-click on the file or a folder from the remote site window.
Step 2: You need to find the option to ” create a new file.” Then click it. A small window will open where you can enter a name. You need to give this new file a name along with the extension.
What do you do when you want to create a new folder and go into it to add a new file?
Here is what you need to do:
Step 1: Right-click on a file from a remote view and simply select the “Create a directory and enter it.”
Step 2: It is going to open a small window from where you can give the folder a new name. As you click on the “OK,” a new directory is going to open. Here you can add files.
The web URL does not use the empty spaces as the characters. This means something like “My Pet Picture” needs to be “MyPetPicture.” You can consider using hyphens or underscores to mark the separation in words.
How to do the manual transfer?
In some of the cases, you might need to do the manual transfer, which is much more efficient for single files.
FileZilla comes with the ability to either upload or download them to specify. This is much useful guide to use FileZilla in case you are unable to keep a consistent FTP connection.
The manual transfer can easily be set up for using the current server that you selected for choosing one from the site manager. You can also easily select the access for a custom server for transferring a temporary file.
From the bottom area of the window, you are going to see an option to start the transfer immediately. After checking it, the transfer is going to start soon after you click the “OK” button at the bottom.
How do you disconnect from the FTP?
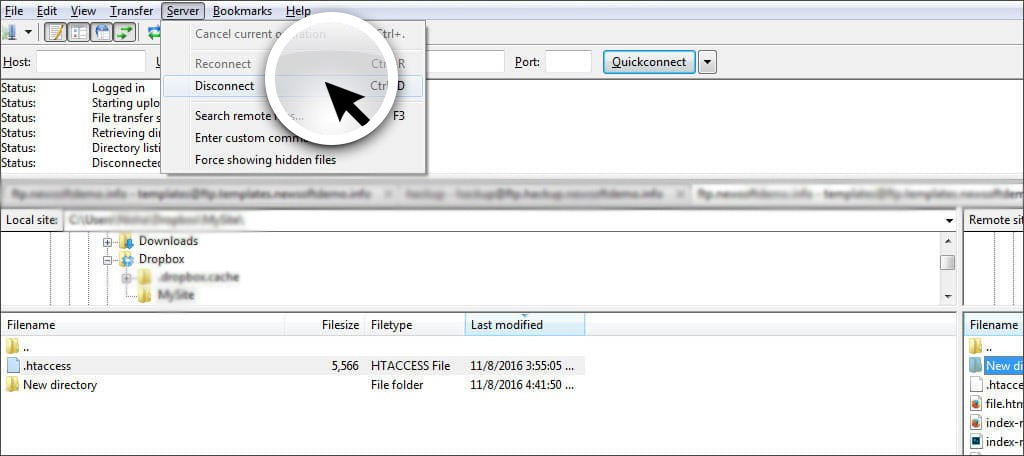
If you want to disconnect from the FTP sessions, you need to click on the “Server” from the toolbar of FileZilla. Then simply click on the “Disconnect.”
In case it takes extended time, the software may simply disconnect from the server.
After closing FileZilla, it is going to end the session. Make sure that there is no other file in the process of transferring.
A better understanding of the Site Manager:
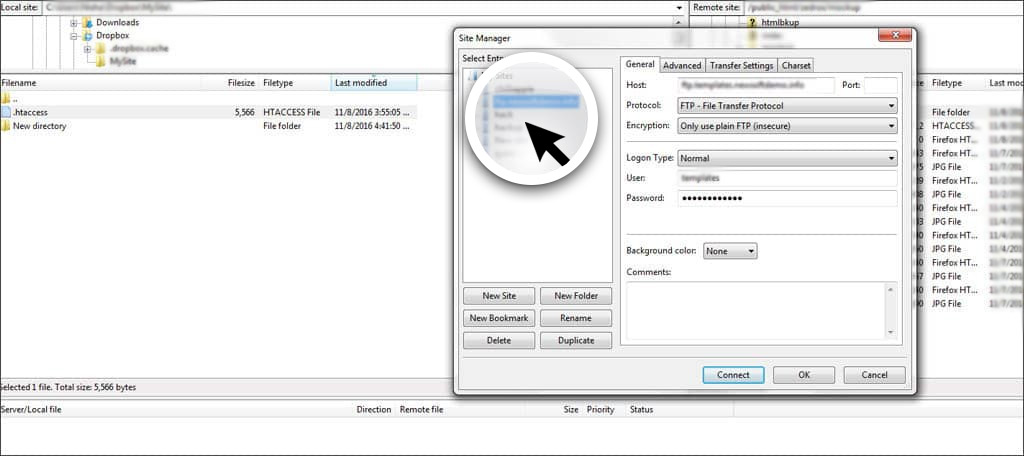
In case you want to use the software properly, you need to understand the site manager first. Hence the guide to use FileZilla gives you a better understanding. The software will permit you to store an unlimited number of sites.
This is efficient when you want to manage a large number of domains. This area comes with seamless customization for all of its settings. Here is what you can do in the Site Manager area:
Port:
The port is the place where your FTP connects. Most of the accounts are going to use port 21 by default. But this can change based on the security or the firewall that you are using.
Host:
The host acts as the host for the FTP account. It is usually like “ftp.your_domain_name.com.”
Protocol:
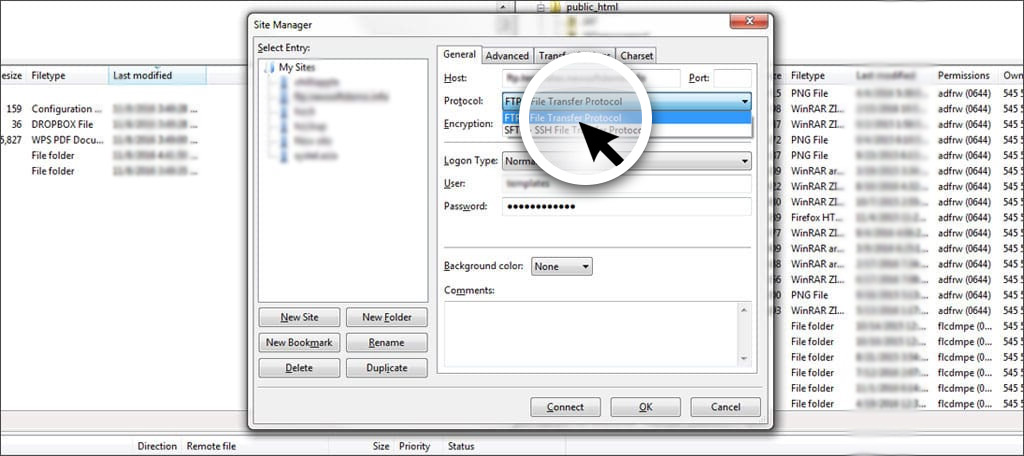
Filezilla is going to use the FTP as the default protocol; however, if you have the option to switch to SFTP., which is a secured method to transfer the files using a secure channel.
Login type:
There are various types of logins for FileZilla. In case you set this to “Normal,” you can input the password and the username to save it in your system.
Setting it to the “Ask for password” needs you to enter the password anytime you try to log in to the FTP account. This is ideal for using when you are on a public computer.
Encryption:
The type of encryption that you are going to use depends on the security that your host server provides. Most of the systems tend to use FTP. In case your system is having other forms of security, you may need to change this method based on the settings.
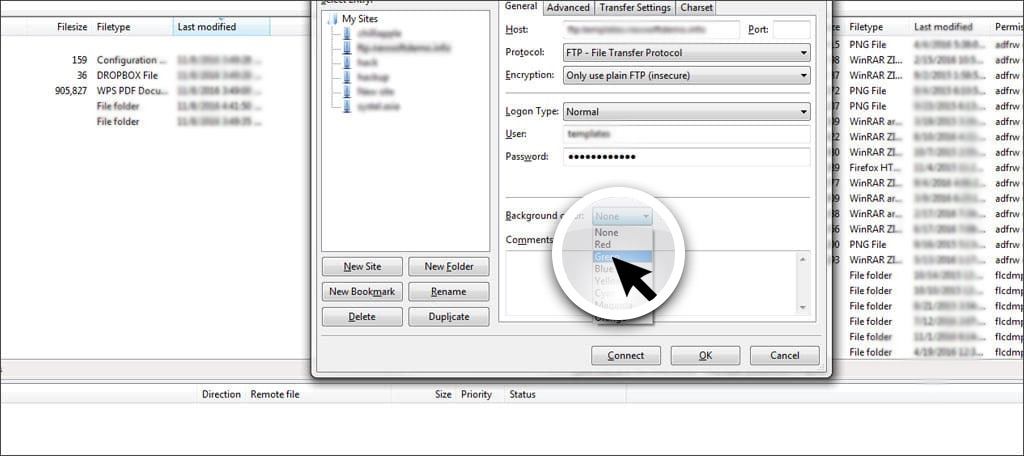
Background color:
If you want to give it a new look to each of your websites, then you can go for the individual background colors.
The Advanced Tab:
From this tab, you can access for selecting the specific type of server. This is normally set to auto-detect. It is better to keep the default setting in case you are not using the server type.
The default local directory can be used automatically to connect with your folder, which is stored on your computer.
Conclusion:
Learning how to use FileZilla lets you have better control over your website. It lets you make direct changes to your site using your desktop or laptop in no time.
Also, there are options for backing up all your files using this software. If you are looking for a stable system, then FileZilla is undoubtedly the best partner for you. Hope this guide to use FileZilla is helpful for you.


