WordPress is a fairly easy-to-manage CMS. However, you cannot be sure that everything will go according to your plan. When things go wrong, you need something that can guide you in the right direction.
Table of Contents
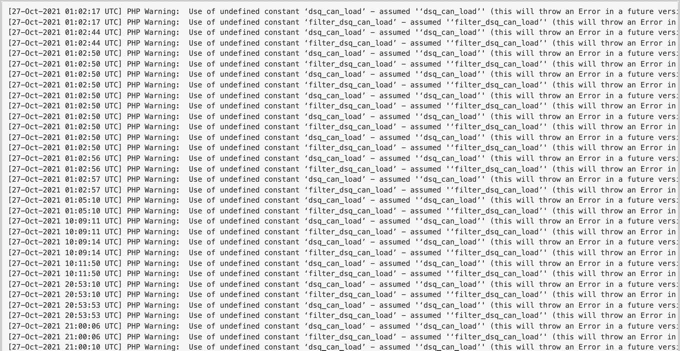
Error logs for WordPress can report to the administrator what is causing the errors. This makes the life of your maintenance team extremely easy.
All the problems that can happen on your website are now easier to troubleshoot. However, sometimes these error logs are now on by default and they need to be turned on manually.
Most businesses are not even aware of the existence of error logs on the platform. They don’t know how it can benefit them and that they are not turned on by default.
A positive side of this story is that error logs for WordPress are easy to enable and view. Overall, they make troubleshooting any WordPress site extremely easy.
It is difficult to assess an initial error message because one problem can have many causes. The error log provides a far more accurate and in-depth description of what is going wrong.
An error log helps you know whether a plugin or theme is causing the problem or if it is your site’s server. Cyber attacks are becoming extremely popular and some of the most popular attacks like DDOS attacks overload the site’s server so that it can stop functioning. If your web server has been attacked by a cyber attack, then not much can be done by you or the service provider.
Websites can also have errors when the servers are temporarily down. If your service provider is not up to the task, you should consider making a switch.
Basically, there are a lot of reasons that your website can have an error in loading. To ensure that your website keeps running error-free, you need to learn how to create and access error logs for WordPress.
How to create error logs for WordPress?
Step 1: Find the WP-config.php file
Go to the cPanel of your website. Before you make a move, it is necessary to create a backup of your site to restore a WordPress site. This way if you make any mistake, you can always load the previous version.
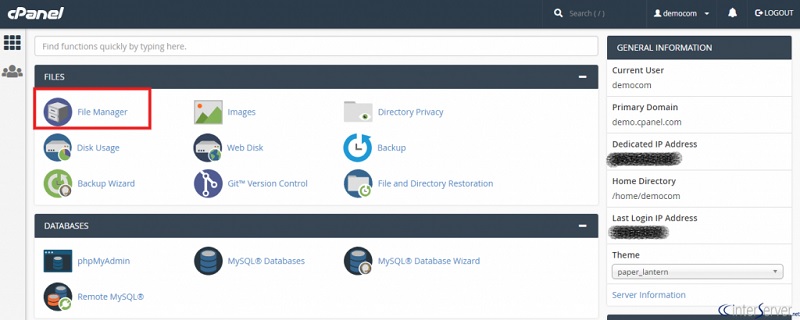
Once you log into the cPanel, click on the file manager. The file manager provides access to all the files that are related to your website. Find the wp-config.php file in the file manager.
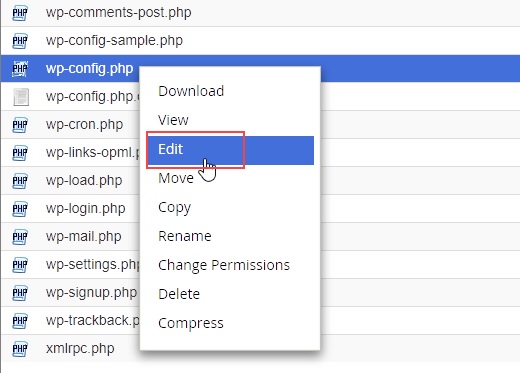
Click on the public_html directly. Select the edit option after right-clicking the wp-config.php file. After this, a pop-up window will appear to warn you about creating a backup before proceeding further.
Click on the edit button. A new tab will open which will contain all the code from the wp-config.php file.
Step 2: Activate debug mode
Scroll to the bottom of the code. Paste the following code before the ending.
define( ‘WP_DEBUG’, true );
define( ‘WP_DEBUG_LOG’, true );
It is possible that the first line is already present in the code but if its value is false, you should set it to true. With the help of the first line, WordPress can now debug errors.
While with the second line, you can create an actual log or record of all the errors that you encounter on your site.
You can see the errors in your error log, but you can also get notifications about such errors in your WordPress cPanel. Once the code has been inserted into the file, save the changes, and leave.
Now you will have to view the error logs to assess any problems.
Where can you find the error logs in WordPress?
The error logs can be found in the wp-content folder. When you get to the folder, go to the debug.log file. This contains information on the different errors that your web pages have encountered.
If everything has been going smoothly for your website, you will not see this file. It only appears, when one of your web pages has an apparent error. If you see this file, you should get to work and decide how you plan to resolve the error.
If you ever feel like you don’t need the error logs, you have to go back to the wp-config file and change the value from true to false. Then, everything will be back to how it was before. Having the debugging mode is recommended if you have an in-house team that handles the different aspects of your website.
By following these steps, you can enable debug mode and create an error log for your WordPress website. If you are working alone on your website, this should help you stay on top of things. Because if things go wrong, it will take you a long time to figure out how to get your site back online.
How can you access your error logs?
There are two types of error logs when it comes to a WordPress website. One has to be activated and the other is already active in default mode and can be accessed through the cPanel.
Since they are found in the cPanel, these error logs are focused more on the hosting environment. While the ones found on WordPress report mostly all errors related to your site.
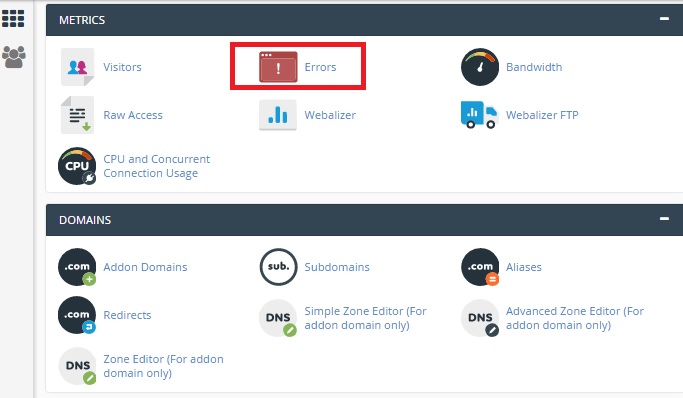
Go to the metrics section of your cPanel and click on the errors option. This file will display up to 300 errors or 2 MB worth of data.
The error log has different information like date, time, and IP address, but typically people are looking for the error message. Because that can reveal the type of error your website encountered.
Once you discover the most common errors that your site faces. You can fix them off one by one. One of the most common errors found on the cPanel error logs is file not found errors.
In this case, you can fix the error by changing or adding the link to the file. Files are often moved around on a website, so it is common that such errors will take place. However, you have to make these changes on cPanel while you change the site on the front end. This way your site is in sync and can run perfectly when a visitor loads it on their device.
Providing a good customer experience is the key to gaining new customers and retaining the old ones. You can do all that by creating and accessing the existing error logs.
Why it is necessary to have access to error logs?
You will face many WordPress errors that can create downtime for your site and decrease customer satisfaction. An error log will reveal which script, plugin, theme, or file is causing the error.
If you have all the information, your team can proactively work to stop any downtime or improve recovery efforts when your site faces downtime.
It is absolutely worth it to activate the error logs because they will tell you which type of error is harming your website.
An additional bonus is that they will also reveal which error happened because of the web host. So, you will know exactly when to switch your web host and move on to a more reliable service provider.


