You need to know how to add a free Live Chat option in your WordPress blog.
Table of Contents
A Live Chat option is necessary for any business website selling products or offering services.
The same is applicable for a blog because blogs get many questions and queries in their comment sections or online forums.
After reading a blog post, readers have a lot of questions in their minds which they like to clarify before buying an affiliate product or availing an affiliate service listed.
Why Is Live Chat Option Necessary For A Blog?
In today’s scenario, people have no time to waste. They want everything instantly. So if your competitors are providing a faster service, common readers would not care about.
Gone are the days when people used to raise tickets through the contact page or ask questions on forum pages and wait with uncertainty for a reply.
Instead of getting quality answers, they would probably get bullied or trolled by other wicked readers. Therefore, most of the big bloggers are having Live Chat option, so it is necessary to follow the trend to become big.
It helps in convincing readers to buy an affiliate product or service. It is more like talking to customers in an offline store or meeting a fan or follower.
It will build the trust factor and increases your sales of affiliate products as well as in-house digital products.
But the reasons most blogs do not have it is because the bloggers think that it would need further investment.
So, here is the good news, you can add a free Live Chat option in your WordPress blog.
You will be able to promote your yourself along with your blog and those who would be chatting with you, they would definitely become your subscribers for the lifetime.
Personal one-to-one communication is always better than replying in the comment section or answering in a forum.
How To Add A Free Live Chat Option In Your WordPress Blog
Tawk.to Live Chat
Tawk.to is 100% free of cost WordPress plugin for live chat which allows unlimited operators to operate free of cost.
All you have to do is signup at tawk.to and then download the plugin from above and use the credentials of sign up there to authenticate.
Go to tawk.to and then login to manage the colors and widget settings etc.
It is extremely simple and easiest and best way for free to get a live chat for your WordPress blog or website and we definitely recommend it because we have used it before on our website as well.
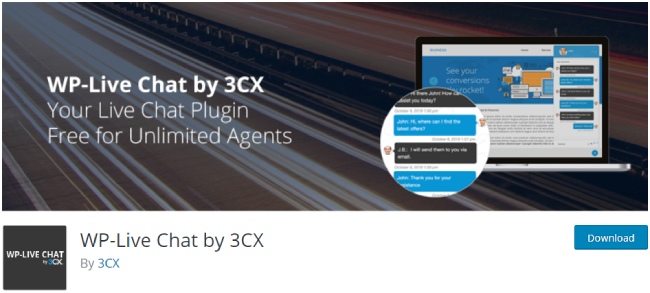
WP-Live Chat by 3CX
This is an amazing plugin that you can use to add a free Live Chat option in your WordPress blog. Go to Plugins from the Admin Dashboard and click on Add New. Search for the plugin, and it is updated recently which has made it completely flawless. Install the plugin and activate it. On activation, it will add the menu option Chat Rooms in the left menu on your Dashboard.
Click on WP-Live Chat by 3CX in the left menu and then press on Add New. In the right-hand screen, provide a name for your chat room and click on Publish button. But this is created in the background.
It is time to showcase it to the visitors of the blog so that they can access it.
Go to Appearance from the Dashboard and click on Menus. Go to the top right corners of the new screen and there you will see the button Screen Options. On clicking that, it will open a drop down and enable Chat Rooms under Show On Screen.
You will see the option Chat Rooms just below Pages. Click on that, and all the chat rooms you created will appear. Select the one you want to make it appear on the menu and then press the button Add to Menu.
It is important to note that only the users who are registered on your website, they will be able to initiate a chat with you. So, non-registered casual readers will not be.
This is a great way to register readers on your website, and you can make a post on it so that readers know about this registration and chatting part.
Another point to note is that this plugin may not be available for some web hosts as it requires accessing core PHP files.
ProProfs Chat
It is another complete plugin for you to add a free Live Chat option in your WordPress blog effortlessly. As a matter of fact, it is more advanced than Chat Room plugin we mentioned above. It is also available in several price bands, but here we are going to discuss its free version.
The only disadvantage of the free version is that it allows one operator only. You are likely to be the sole owner and operator of your blog, and hence, it is a perfect option for you.
It has no limitation on the number of conversations you can have at a time. You can also get emoticons which are not available with Chat Room mentioned above. But you can have only 300 chats per month, and it is worth trying out rather than just having no chat options in your blog.
The most advanced feature of the plugin cum web tool is that you can be the one who would start the conversation with your visitors. You may do so after monitoring real-time behavior and understanding that the person can be a potential buyer.
To install it, you have to download it on your hard drive and upload that on your web server. For that, go to Plugins on your Dashboard and click on Add New. On the top of the screen, you will find the button Upload Plugin.
Click on that and upload the plugin file you downloaded from ProProfes Chat and press Install Now button. Once done, Activate the plugin and get started. In the case of any query, you can have a live chat with their representative.
Alternative Methods of Live Chat – Add Tweet Button
If you remain active on Twitter most of the time, you can have a tweet button where users can tweet you to start a conversation.
Step 1 – Go to your Twitter buttons page. Select the option Mention. This will open a setting screen below it.
Enter your twitter handle, and in Tweet text field, you can enter a hashtag to get your access.
You can add multiple hashtags depending on the multiple categories you have on your blog. This will help to sort different niche questions later.
Make other settings as per requirement and copy the code provided.
Step 2 – Go to your Dashboard and then to the Appearance on the left menu. Click on Widgets and drop a text widget on the sidebar where you want to place and paste the code inside it.
Now, your visitors can tweet you, and you can reply them instantly. But it is recommended to use the first two methods unless you face some internal problems with either of them.


