One must know how to use the most advanced form builder for WordPress so that he can create advanced contact forms easily.
Table of Contents
Every website must have a proper contact form so that the users can contact them easily.
Even though social media and other contact options are available like direct call and WhatsApp, but a contact form is still the best and most used method by which users contact the admin or support team.
It is indispensable for any professional website for lead generation.

WPForms
It is the most popular and most advanced form builder in WordPress. It is very user-friendly and has all the powerful and advanced options that a form builder can possibly have.
It is available free as well as in premium version. If you want some advanced features, you need to buy the plugin and offer your users and yourself the best experience possible. In this article, we will illustrate how to use the most advanced form builder for WordPress.
Features Of WPForms
Before you can learn how to use the most advanced form builder for WordPress, you need to understand the capabilities of the plugin.
• They provide drag and drop interface for creating any required form. There is no need of using any code.
• There are unlimited pre-built templates present for all the different types of forms possible that you can use and make slight modifications wherever required. It will save a lot of time and make your form look professional.
• All the forms that you make with WPForms are mobile-friendly and fully responsive. As a matter of fact, they show equally well on all browsers as well.
• When it comes to advanced features, it has smart conditional logic through which you can set conditions for different fields as per your requirements.
• There are options for instant replying to messages received, and you can see all the messages for different categories(based on criteria set) under one screen.
• There are options to embed the forms anywhere on your website like posts, pages, and even sidebars.
It provides protection against spam, has support for the payment gateway and can be used for creating multi-page forms, subscription forms, and registration forms.
How To Use The Most Advanced Form Builder for WordPress?
You need to install and activate its plugin. Go to the Dashboard and head over to Plugins on the left menu. Click on Add New options and search the plugin ”Contact Form By WPForms”. Install and activate it and then follow the following steps.
Adding A New Form
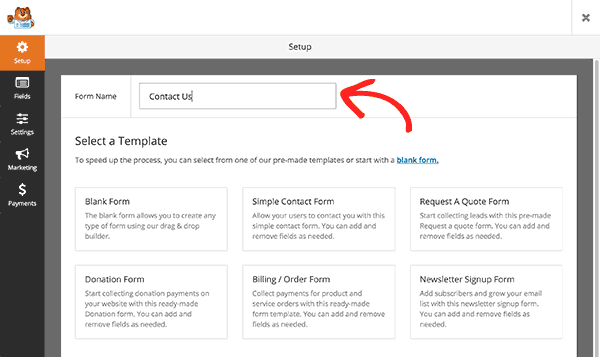
Once you activate the plug, the option WPForms will appear in the left menu of the Dashboard. Go to that and click on Add New option from the drop down. This will launch the new screen called WPForms Form Builder. Enter a name for the form and get started.
Step 1 – Select a template for which you want to create the form like blank form, request a quote form, donation form, order form and likewise. If the form you are looking for is not on the list or you want to create a customized form, go for the blank form.
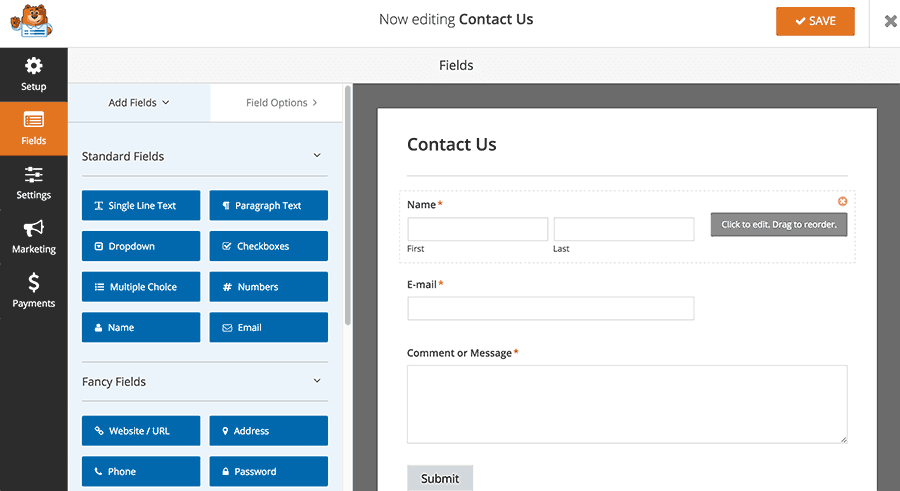
Step 2 – After selecting the template, in the next screen, you have to build the form with required fields. The screen is divided into two parts, the left part contains all the different types of fields to be used while the right part is the form you are creating.
On the right side, a few necessary fields may already be present. Whatever field you want to insert, insert them for the left side options. All the possible fields are already created there with validation, and all you need to do is to click on them so that they get inserted at the bottom of the right screen.
Once all the fields are done, you can drag and drop them to make them sequential. You can also modify any field by clicking on it. Just in case a field is not present that you need, you can create it yourself by going to the left screen and clicking on the tab Add fields.
Enter the label, format, description and other advanced options and finish it. Once it appears under Field Options, click on it to insert on the right screen. Once everything is done, click on Submit button.
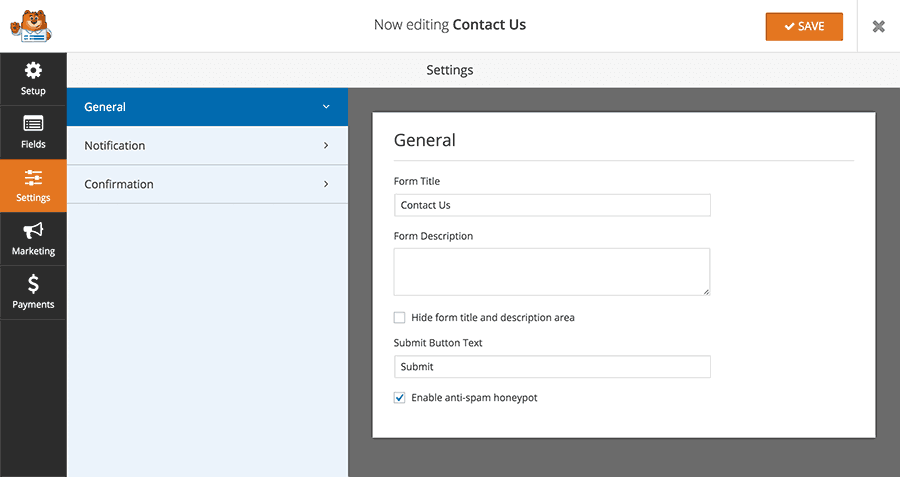
Step 3 – You will move to the next tab Settings. There are three sections namely –
General – you can set the name of the form, write the description and set the label of the button in the form.
Notification – This is where you can set your email address where you would receive a notification every time someone contacts you through the form.
Confirmation – This is where you can set the message to be shown to the user after clicking the submit button in the form.
When everything is done, click on Save button.
How To Add The Form In WordPress Page or Post?
To use the most advanced form builder for WordPress effectively, you have to add the form you created either in a page or post.
For that, open new or existing post or page from Dashboard and place your cursor on the body of the page or post where you want to place the form. Then click on Add Form button beside Add Media button and select the form you created by its name and add it. Publish the post or page, and you will see the form live.
Adding Addons –
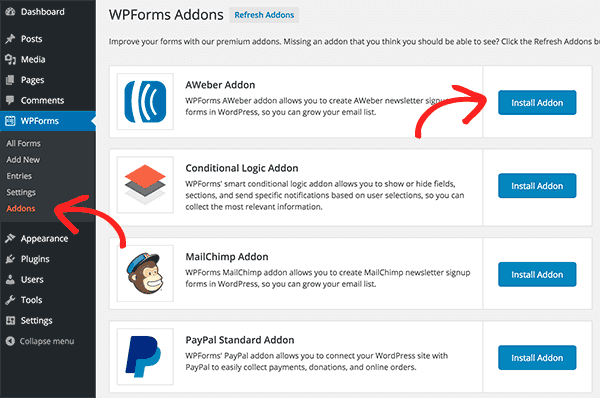
If you want to use the most advanced form builder for WordPress to its full potential, you need to install the addons that come with it. Go to Dashboard and place the mouse pointer on WPForms and click on Addons.
If you are using subscription form, you would need Aweber or Mail Chimp Addon so that the email addresses get collected for email marketing.
If you are using donation form, you would need Paypal Addon to accept a donation.
But the most important Addon is Conditional Logic Addon through which you can make your fields react according to the way the user select the value of different other fields. This is exactly what makes the form advance.
Go ahead and put up the best form as per your requirement and provide the best support system for your visitors.


