Selling diamonds or jewellery with WooCommerce can be a competitive business. To make your online diamond store a success, you need to create the ultimate customer experience so that users can easily compare and buy your diamonds.
Table of Contents
It’s vital to display information about each diamond in an easy to understand, streamlined way. When browsing your site, customers should be able to find diamonds by filtering for criteria such as carat, color and clarity, and buy using WooCommerce without any hassle.
The built-in WooCommerce store layouts aren’t really set up for selling diamonds. You can sell diamonds more successfully by adding the WooCommerce Product Table plugin to your site.
The plugin will list the diamonds on sale in a simple and effective way. Customers can interact with your site with ease, meaning they stay engaged and are less likely to buy from another supplier.
What is a WooCommerce Product Table?
WooCommerce Product Table is a WordPress plugin that allows online stores to display diamonds, jewellery and other products in a table on their website.
Each diamond will be shown on a separate row of the table. You’ll be able to easily customize the information in the table.
WooCommerce Product Table plugin is easy to use even if you’re inexperienced in website design. And even better, it works with any WooCommerce-ready theme, including all of our own eCommerce themes.
It will take the styling from your theme, creating lists of diamonds that fit beautifully with your overall design.
Why choose WooCommerce Product Table for sell diamonds?
Believe it or not, the way you display diamonds on your site can actually have quite an effect on your conversion rates and sales.
WooCommerce Product Table is easy to set up, and faster than hiring a web designer or expert to create an overcomplicated, personalized table.
There’s no point in lengthening this process (or spending more) when all you need is a product table that looks professional and gets your diamonds sold.
WooCommerce Product Table is a great WordPress plugin for selling diamonds. Most WooCommerce diamond stores provide a wide range of diamonds, either listed as individual products or as single products with multiple options/variations.
Customers need to be able to choose variation options such as carat, clarity and color.
By using the easy-to-operate filter dropdown options and widgets available in WooCommerce Product Table, you’ll be able clearly display the different carat, color, clarity and cut possibilities for each diamond on your site.
Customers can view all the information about each diamond, make an informed decision on which to buy, and quickly add the product to their cart.
They can then easily buy and pay online via the standard WooCommerce checkout, which allows for many payment options such as PayPal and credit/debit card.
Adding data about your diamonds for sale
With a WooCommerce product table, you’ll be able to include all the relevant information about your diamonds. Sell diamonds with WooCommerce, you’ll need to include a wide range of categories, tags and attributes to ensure your customers know exactly what they’re purchasing.
The plugin supports all the standard WooCommerce product data such as categories, tags and product attributes. You can even add extra ways of categorizing your diamonds such as WooCommerce custom taxonomies. This is how to add the main types of data about your diamonds:
Categorize your diamonds in WooCommerce
For any diamond seller, there will obviously be a wide range of category options for the diamonds sold on your site.
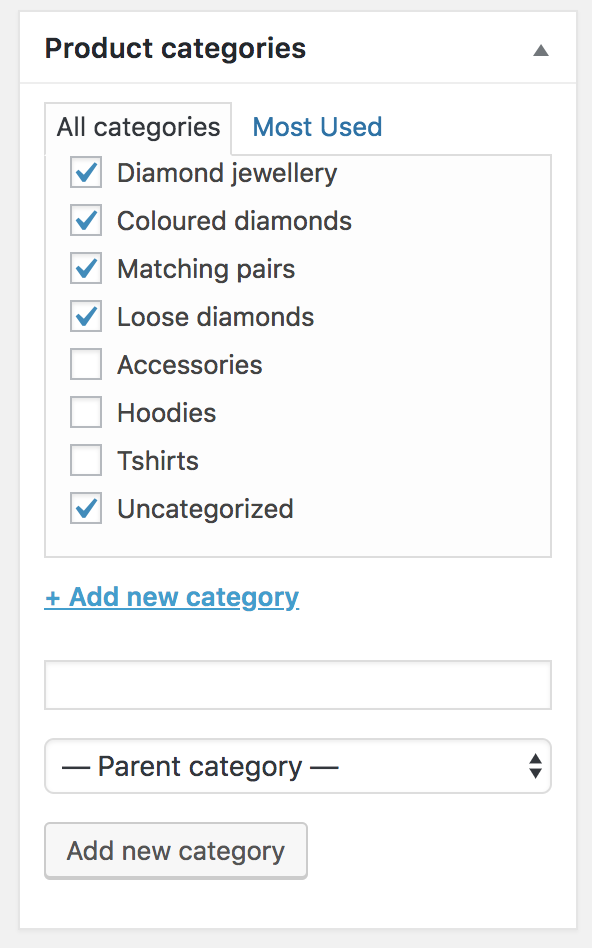
From colored loose diamonds, through to bespoke engagement ring designs, you’ll need to cover every category within your table.
It’s easy to add categories through the ‘Add new category’ button under the product categories tab, or directly on the Add/Edit Product screen.
Add custom attributes
Attributes are ideal for storing specific details about the diamonds being sold on your site. You can either list them for information purposes only, or use them to create product variations (more on this later).
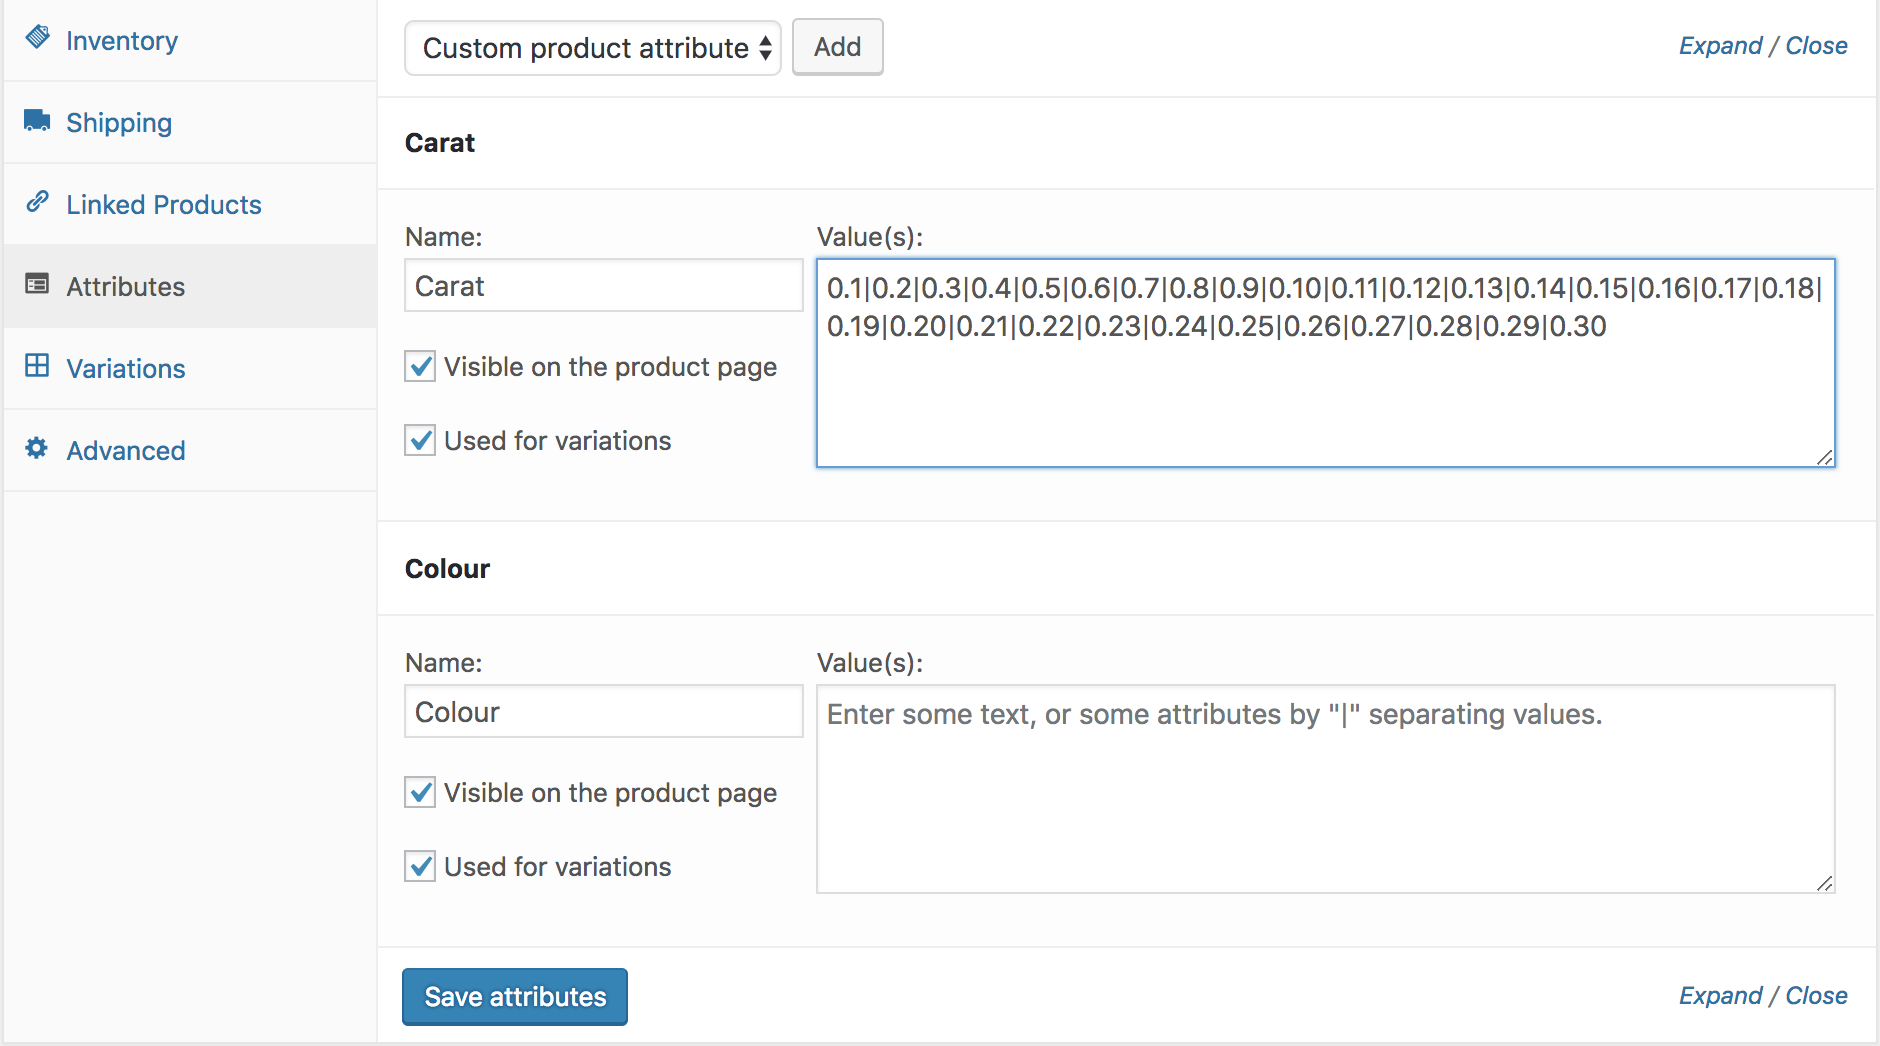
Create your attributes via the WooCommerce > Attributes section in the WordPress admin. Once you’ve done that, you can select them in the ‘Product Data’ section when you create each product.
This is for selling diamonds in WooCommerce, where there are a wide range of possible combination of quality, color and carat.
In the diamond-selling shop used within this screenshot, there are options to buy diamonds of a carat weighing between 0.1 and 0.30.
Create variations from attributes
After you’ve entered the product attributes for your diamonds, you can use these attributes to create variations. Each variation is basically an option that customers can select to get the diamond they want.
Customers will be able to select the options from dropdowns within the product table itself. Or if you prefer, you can list each variation on its own row in the table.
When you create a product, select ‘Used for Variations’ for each of the attributes that you need to use for the variations.
You can then click to the Variations tab (also in the ‘Product Data’ section) and create the variations based on the attributes. Each variation needs its own price, and you can also manage the stock individually.
Add prices
Obviously, fine tuning all of the details listed above is a pointless exercise if customers don’t go forward and make a purchase. To do this, they’ll need all the relevant information.
For this reason, it’s very important to clearly list the prices for your diamonds. This can be done by adding a price column that clearly displays the price in the product table. I’ll tell you how to do this in a minute.
Add an image of each diamond
When selling diamonds, one of the primary concerns for buyers will obviously relate to the appearance of your products. For this reason, you’ll need high quality images of each diamond. Fortunately, WooCommerce Product Table allows you to do just that.
You can also increase or decrease the size of the images. Your preference might depend on the pre-existing layout of your site, or whether you feel the images of your diamonds should dominate the page.
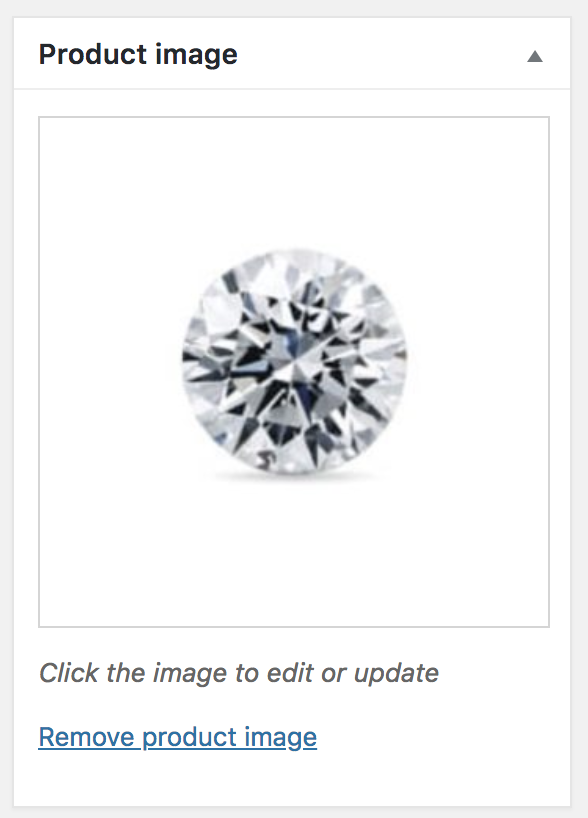
Simply upload the image of each diamond as the main product image. The diamond image will then appear in the image column of the product table.
Most WooCommerce diamond stores keep the images as small thumbnails in order to display more columns of data alongside.
How to display diamonds in WooCommerce Product Table
So far, I’ve told you how to add your diamonds to WooCommerce with all the data that you need about them. Next, you’ll discover how to list your diamonds using the WooCommerce Product Table plugin.
It’s easy to create a product table to sell diamonds online:
- Install the plugin and configure the options on the settings page (WooCommerce > Settings > Products > Product tables).
- Create a new page for your product table. There are alternative ways, such as adding the product table layout to the shop and category templates in your theme, but the simplest method is by dedicating a new page to your table.
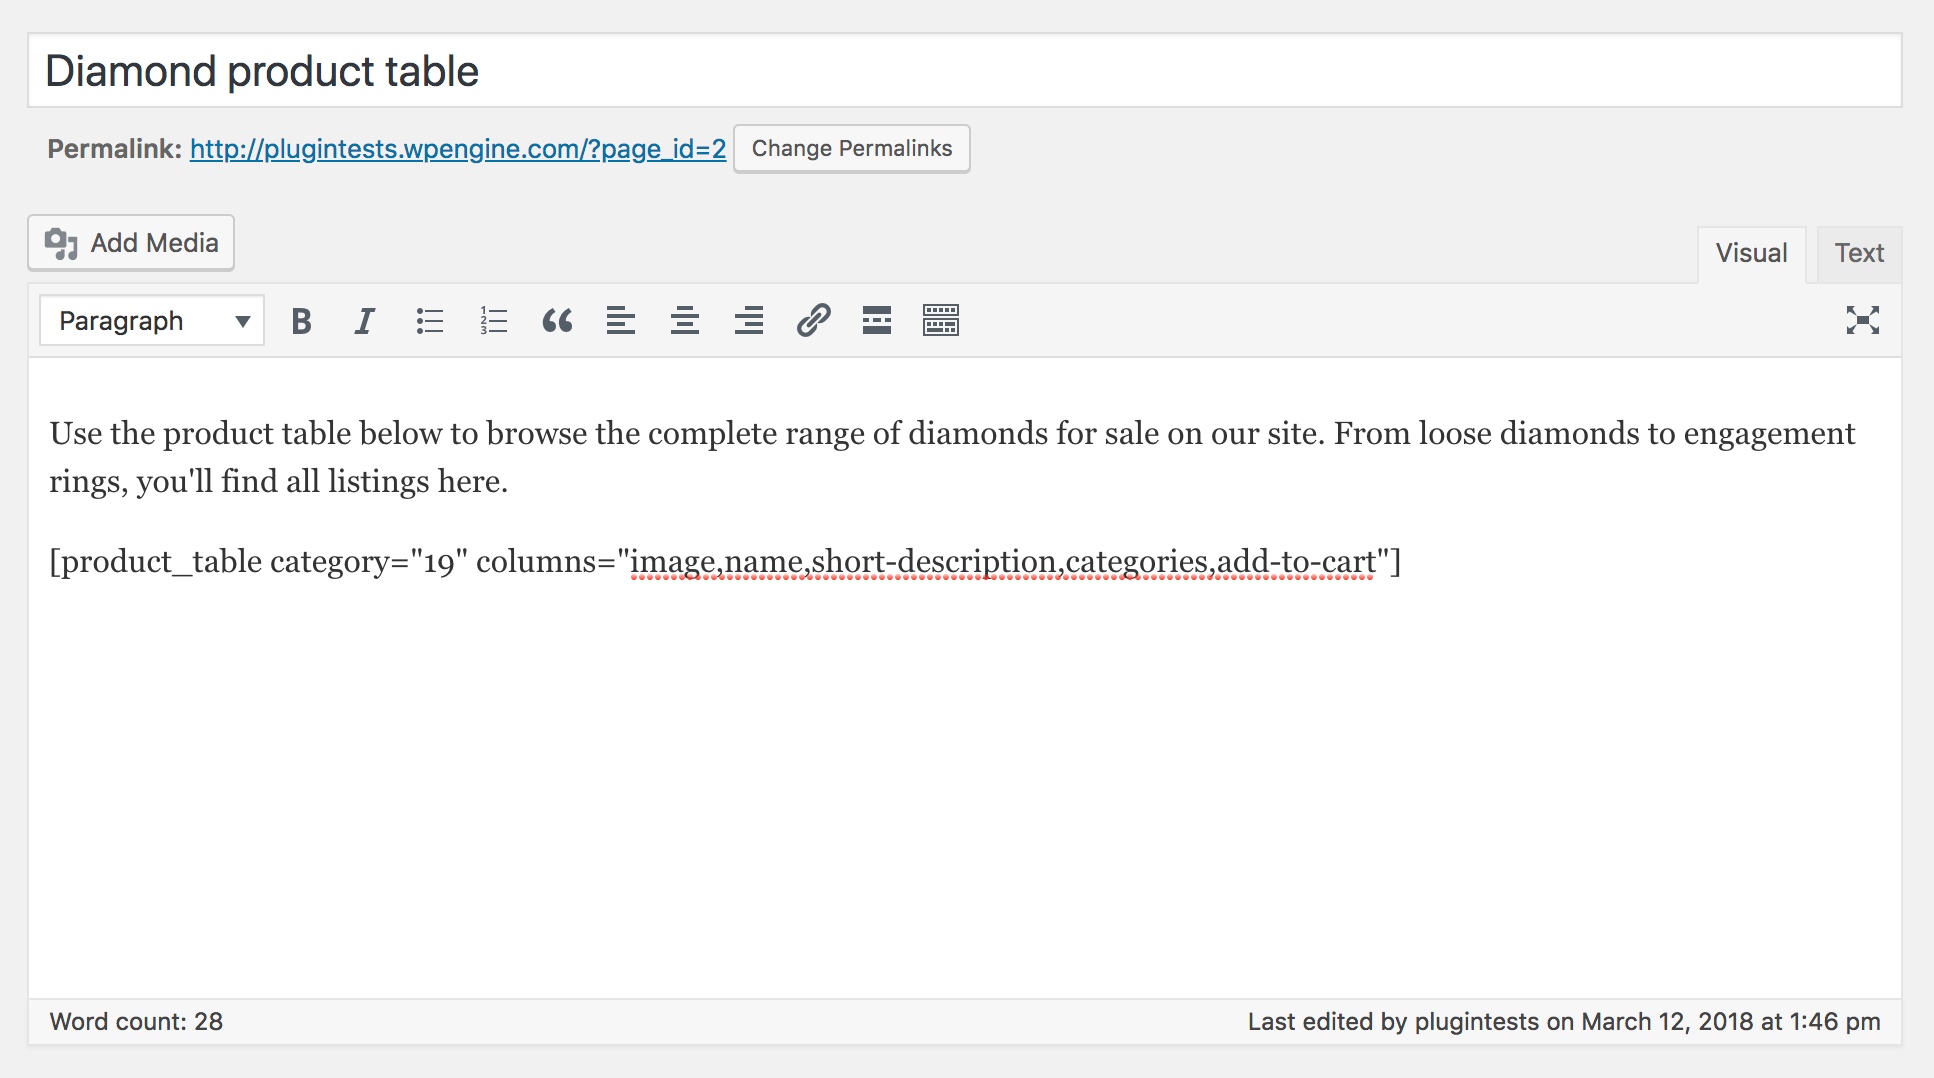
- You’ll need to title your new page first. Call it anything you like, such as ‘diamond product table’ as it includes all diamond products listed on your site.
- Add a simple product table shortcode anywhere on your site –
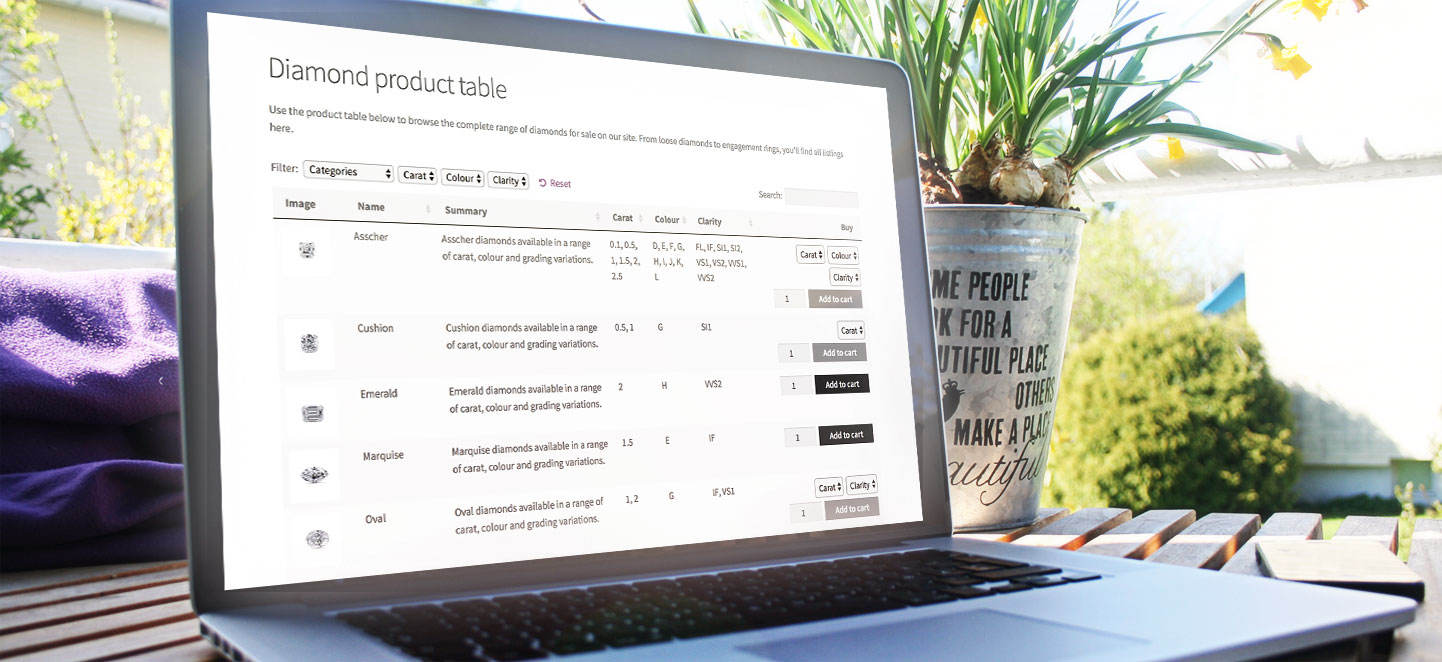
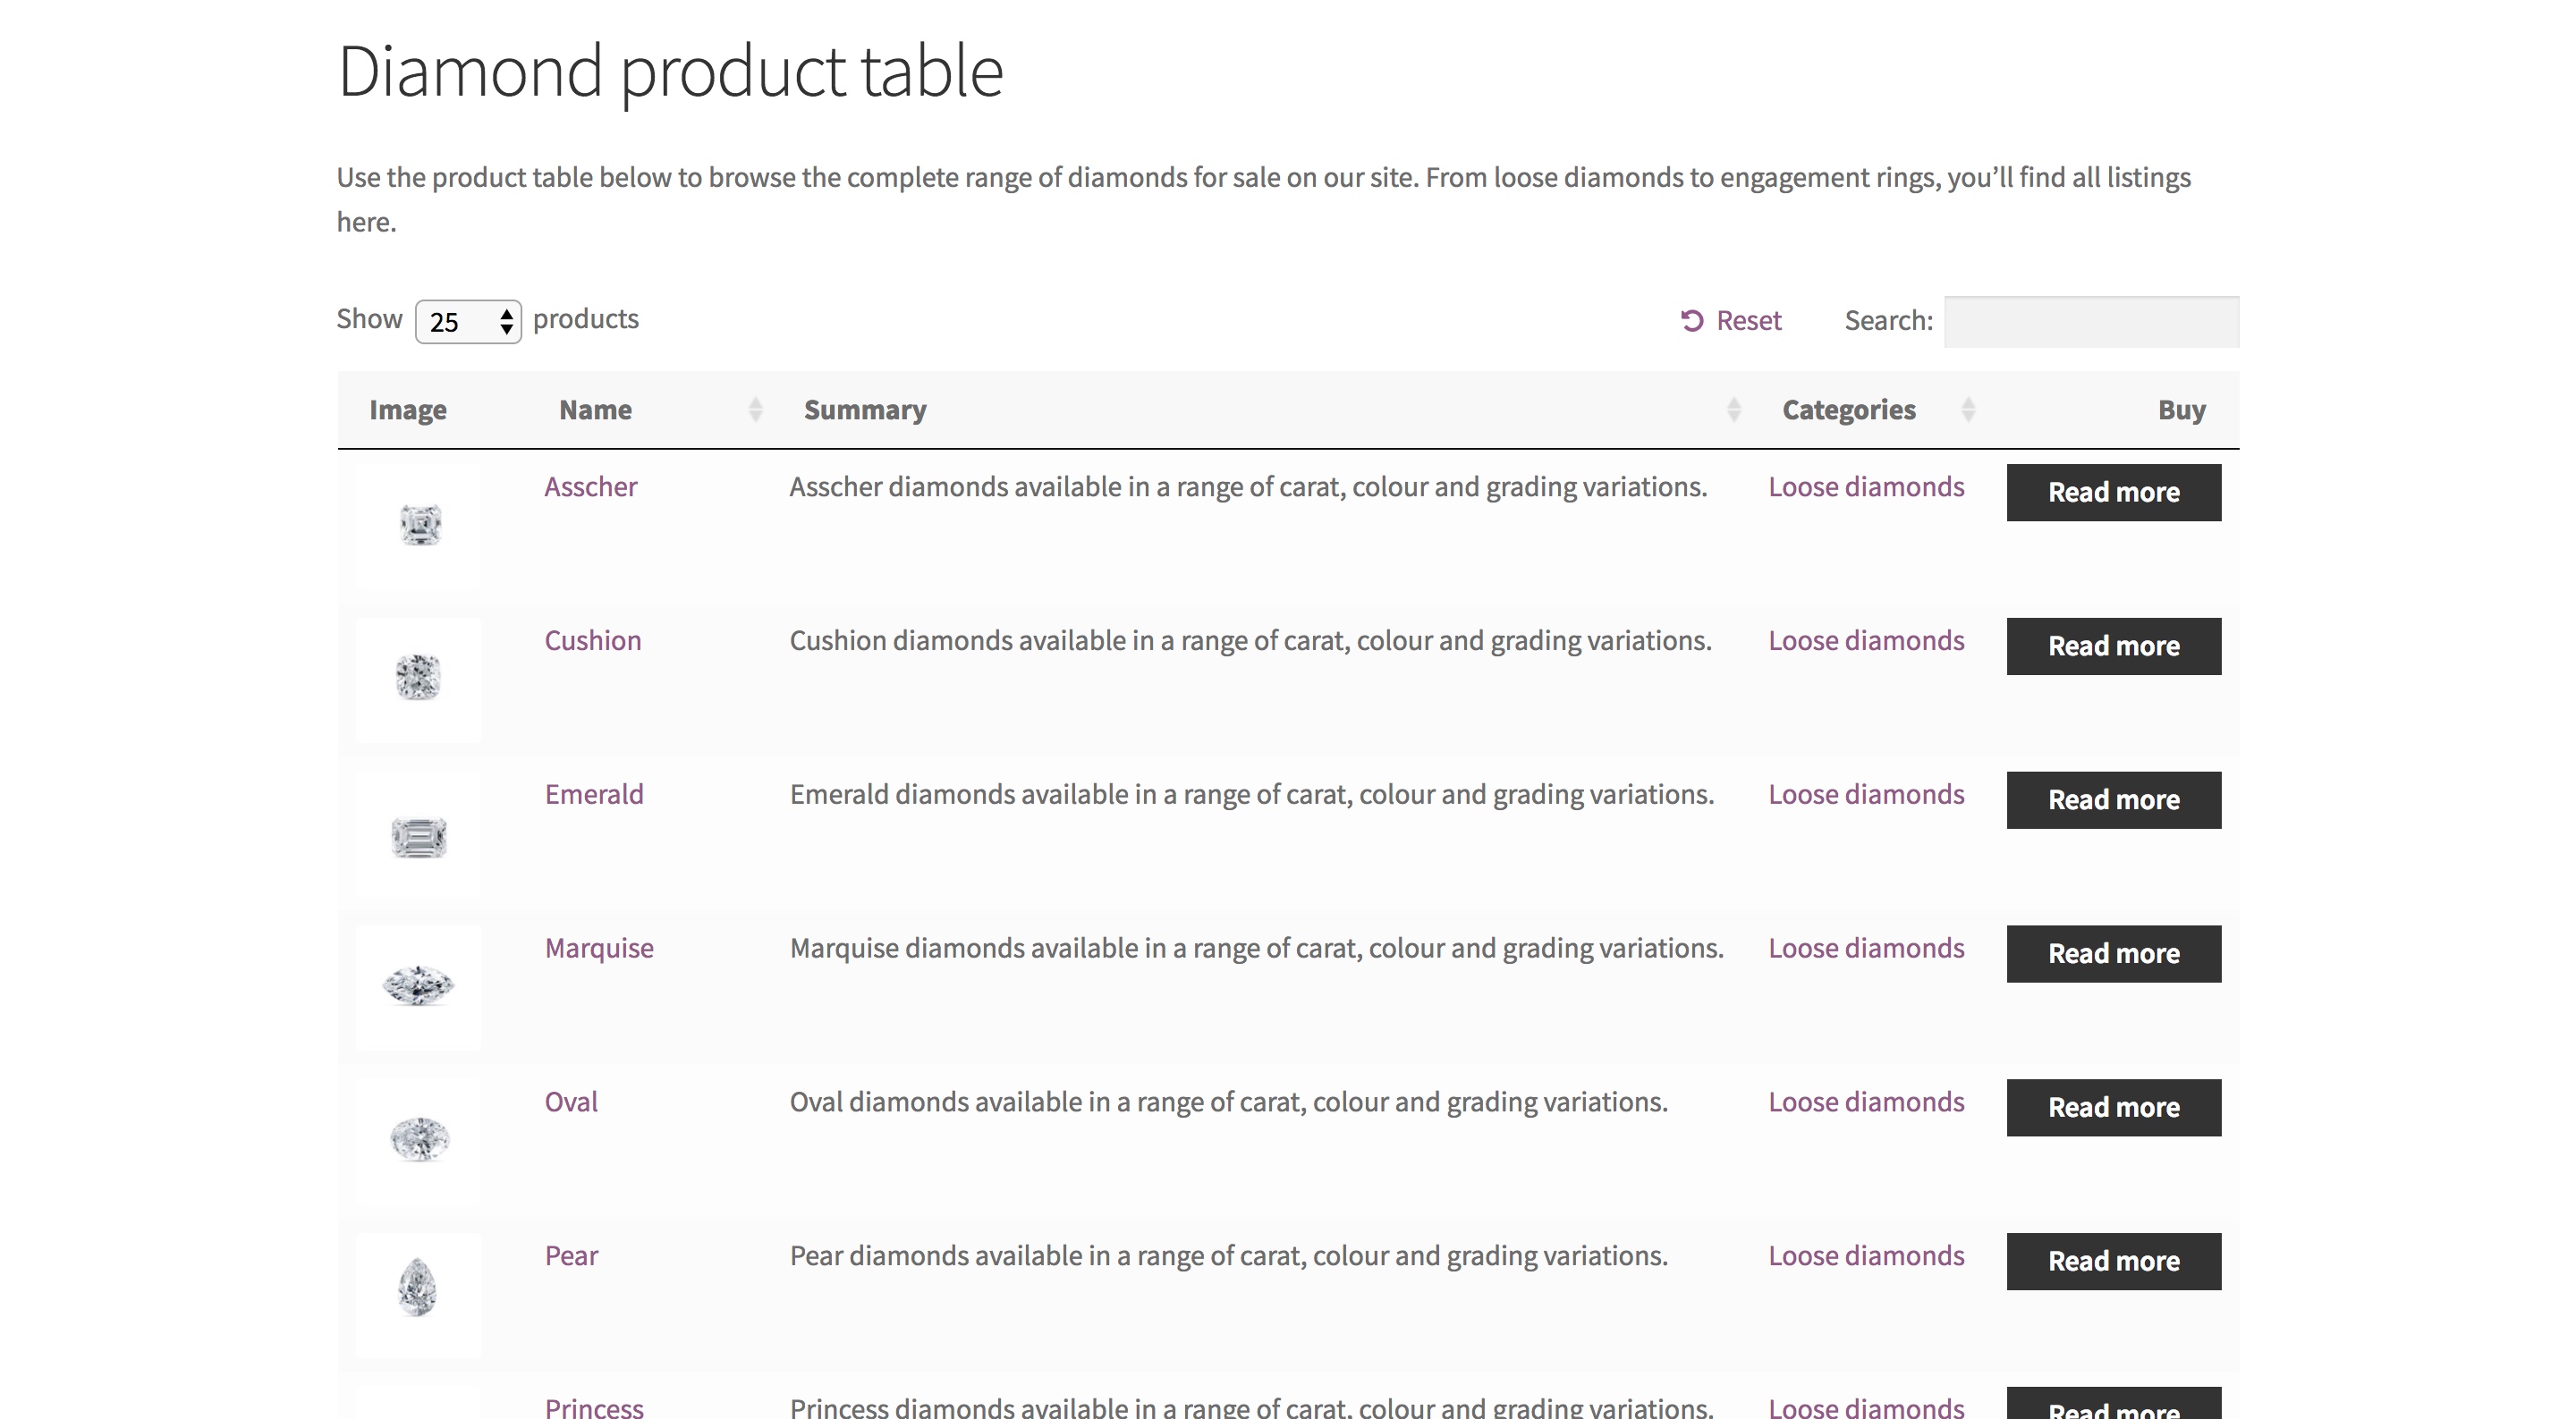
[product_table]. A fully operational product table listing your diamonds will then be added to your site:
Fine-tune your list of diamonds
Although this simple list of diamonds will get the job done, it doesn’t display add to cart buttons or the options for each diamond from the attributes and variations.
For example, when selling loose diamonds, you’ll want customers to be able to select quantity amount as many customers will be jewellers or retailers requiring more than one diamond.
To do this, go back to the plugin settings page and make any changes to your list of diamonds for sale.
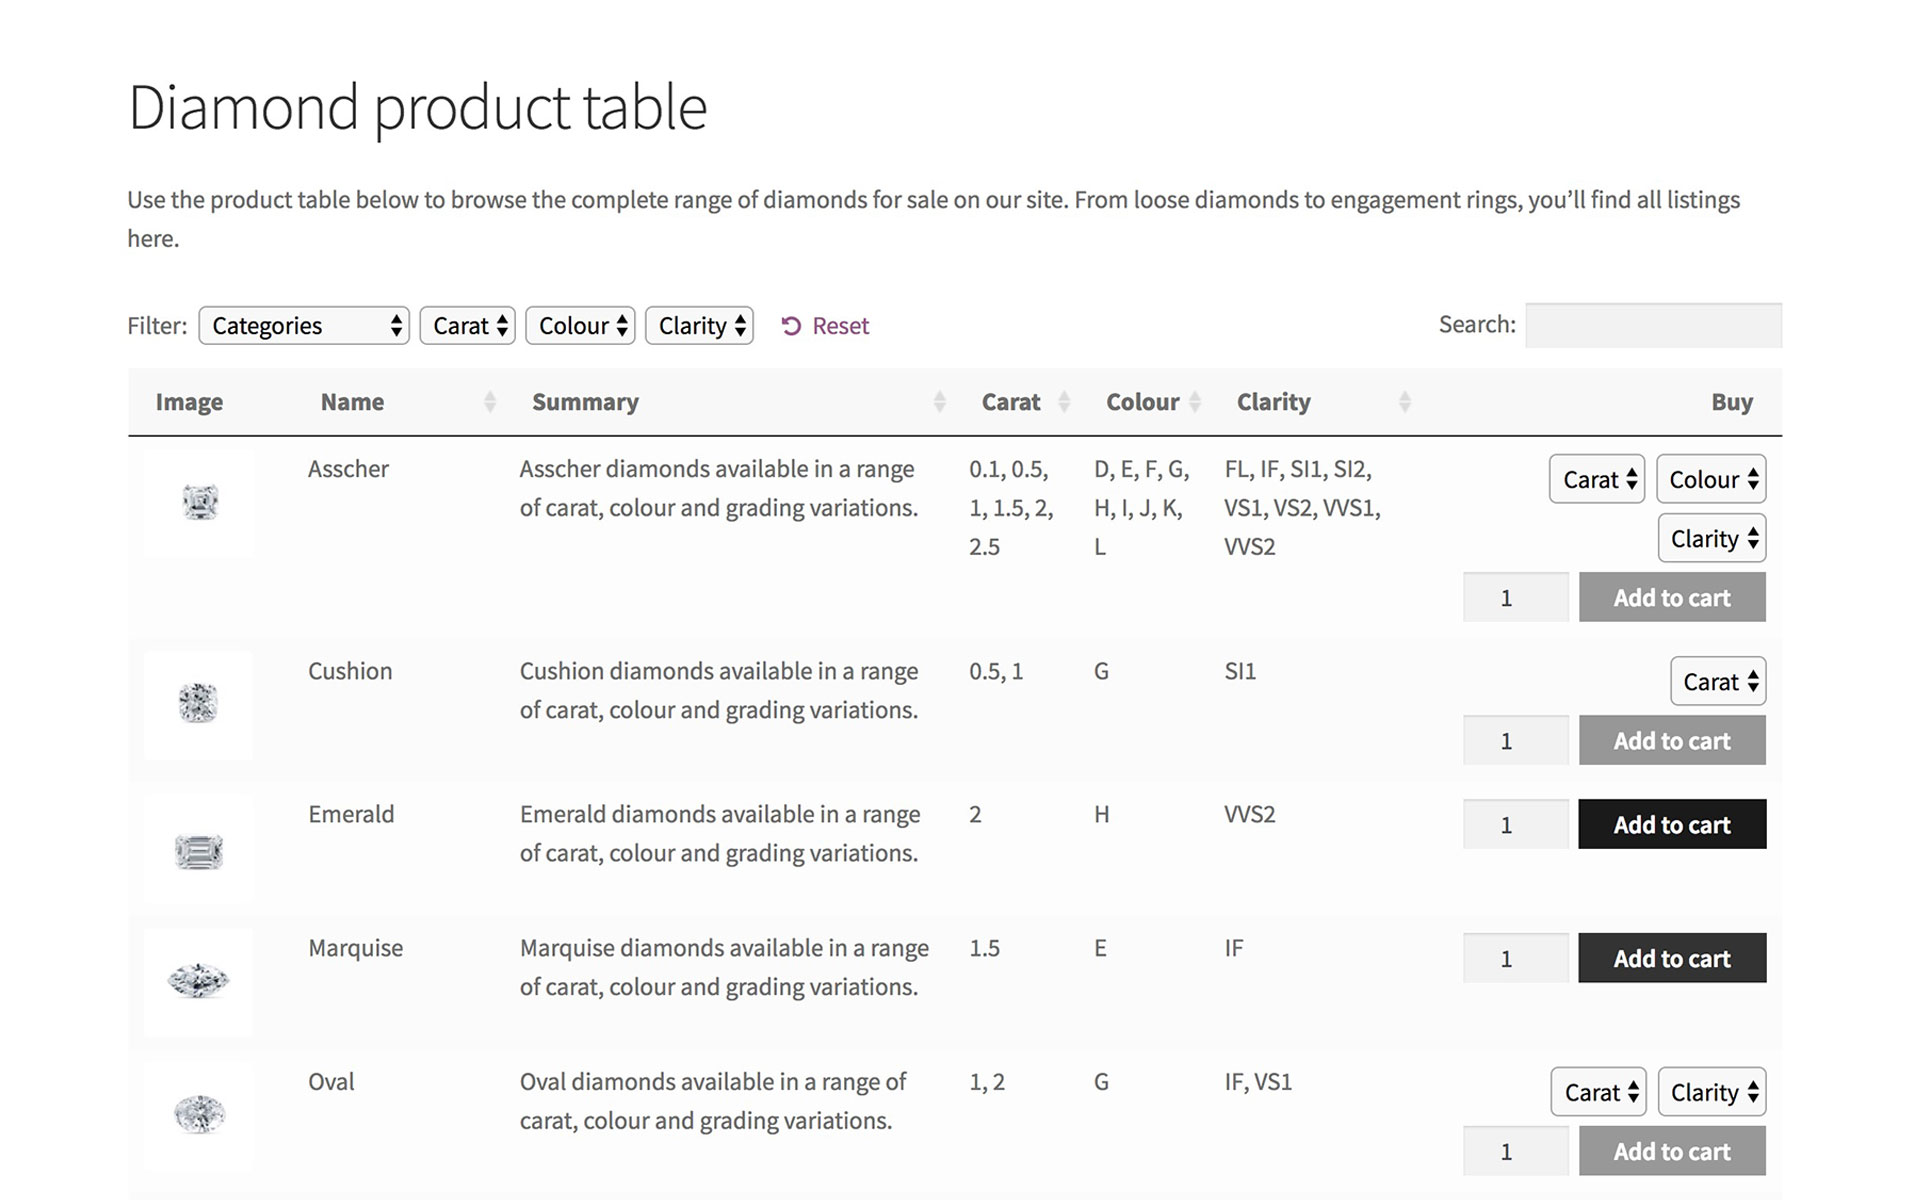
For example, you’ll want to choose which columns of data to include. You’ll also want to activate variations, if you want people to choose between different diamond options.
Keep experimenting with WooCommerce Product Table until your list of diamonds is exactly how you want it. There are plenty of other possibilities depending on the specialisms of your diamond selling business.
Listing diamonds from specific categories
Alternatively, if you wish to create multiple product tables on your site – each listing different products – then you can easily do this by following the instructions in the knowledge base:
Pushing for a purchase
You’ll probably need an add to cart column to sell your diamonds with WooCommerce. The add to cart button should be positioned on the right hand side of the table. This makes it easy for customers to purchase after reading about each diamond.
There are a few different options for the add to cart column. You’ll either have a standard add to cart button or multi-select checkboxes, or both can appear together if required.
Alternatively, you can use the free WooCommerce Add to Cart Button plugin, to replace the button with a cart icon.
For a WooCommerce diamond store, I’d normally recommend an add to cart button alongside each diamond.
There’s no need to multi-select checkboxes because people don’t tend to buy many diamonds at once. (The exception to this is if your target market is diamond retailers or resellers.)
Diamond selling businesses can also add a quantity selector to the add to cart column. This will allow customers to easily choose various quantities or variations on each individual diamond.
After adding diamonds to the cart, customers can then click through to the cart and checkout.
If you have too many product variations to include in the columns, you can either list each variation on its own row.
Alternatively, you can include links to the single product page where customers can choose their variations and buy. In these cases, the add to cart button will be replaced by a button allowing for clickthrough.
Filter dropdowns
To include filter dropdowns for the diamond products, you can set your filters on the plugin settings page. In this example, we’ve restricted this to categories. You can also add filters for tags, attributes, taxonomies, etc:
Filter widgets
The plugin also comes with filter widgets. These are useful if your list of diamonds has a left or right sidebar.
To add a widget to your product table page, first go to Appearance > Widgets in the WordPress Dashboard. From the list of widgets, look for the ones beginning with product table. You can then drag these widgets to the correct sidebar area.
Revolutionize your diamonds website with the WooCommerce Product Table plugin today
This tutorial is a basic guide to how to sell diamonds online using the WooCommerce Product Table plugin. However, it really is just the beginning. With WooCommerce, you’ll be able to perfectly customize your site to meet the requirements of your business.
For more information on the instructions listed here, or if you think we’ve missed out an important function for selling diamonds online with WooCommerce, check out the Product Table knowledge base.
If you feel WooCommerce Product Table is the right way to sell diamonds on your own website, why not take the plunge and try out the plugin demos, or purchase the product table plugin?

