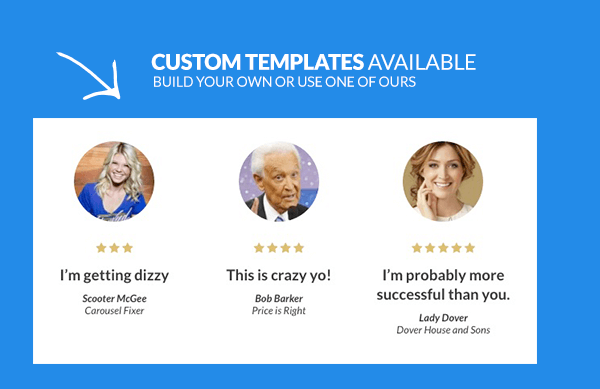
Add rotating testimonials
If you have a business website in WordPress, you need to know how to add rotating testimonials in WordPress.
When a customer searches for a particular service or product and lands on a website, the first thing he checks is review or testimonial.
Reviews and testimonials help in forming the trust factor and differentiate between different companies.
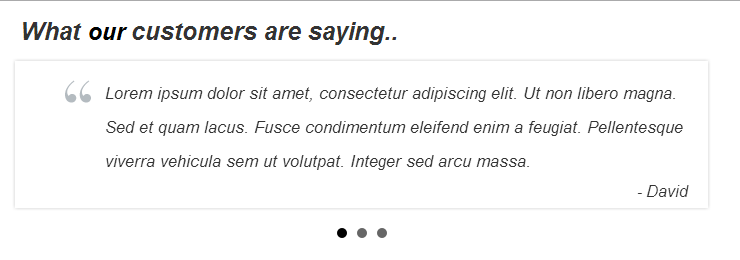
Static testimonials are dead because, in today’s scenario, galleries are getting replaced by sliders. Rotating testimonials are what every website is using now, and you need to follow the trend to stay on the same page.
You can add rotating testimonials in WordPress either by coding or by using plugins.
But to add rotating testimonials in WordPress using code, you have to write hundreds of lines and debugging could be a nightmare.
Therefore, using a plugin is the best way forward.
How To Add Rotating Testimonials In WordPress Using Plugin –
You would need to install Testimonial Widget plugin. Go to Admin Dashboard and on the left menu, go to Plugins. Click on Add New from the drop down menu and search for the plugin.
Install and activate. Upon activation, the menu option ‘Testimonials’ will appear on the left menu of the Admin Dashboard. The basic idea behind this plugin is that it creates a custom post type in WordPress for writing testimonials. The pre-built post types in WordPress are pages and posts that you use for your general article posting.
Creating Testimonials
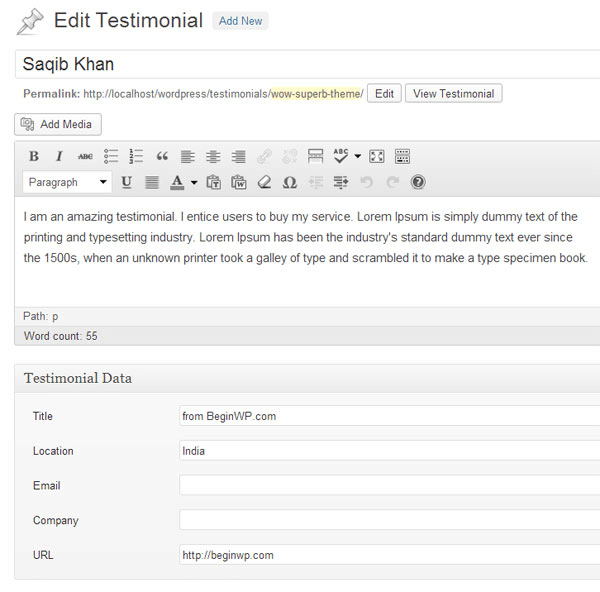
You need to go to the Dashboard and click on Testimonials on the left menu. Then click on Add New from the drop down. Then you will see a familiar screen just like adding a new post. This is where you have to fill up the text boxes carefully. In the title, you have to write the name of the client or customer who has provided the review or testimonials to you.
In the description box, add the testimonial that you want to show. Most of the testimonials are generally written by the website owners and then get approved by the client or customer. So, while making them, make sure you use SEO keywords for better on-page SEO score.
Below the description box, you will find several custom fields which are vital. The first field Title which is for writing the name of the company whose manager or representative has provided you the testimonials.
It is important to note that the title of the post which is the first textbox above description should be the name of the client or customer while this custom title text box below description box must have company name or designation of the person. The second field is Location where the address of the company has to be provided in short.
Make sure you do not provide any fake address where because you never know, your potential client may just check it online to understand your authenticity.
Finally, you can provide the Email address of the person. If you have given the designation of the person in Title, then you can provide the name of the Company else ignore it. Finally, you need to provide the URL which needs to be authentic, and a potential client will surely check it. Remember all these custom fields are optional.
To make your testimonials look more authentic, you can provide the photos of the clients who provided the testimonials under the description. The photos must be placed inside the description box just like your normal post. Once everything is done, click on Publish button.
Displaying The Testimonials
You can add testimonials on your website in two different ways. The first way is through widgets on the front page, sidebar, header or footer and the second way is by using shortcodes whereby you can show them in any post and web content.
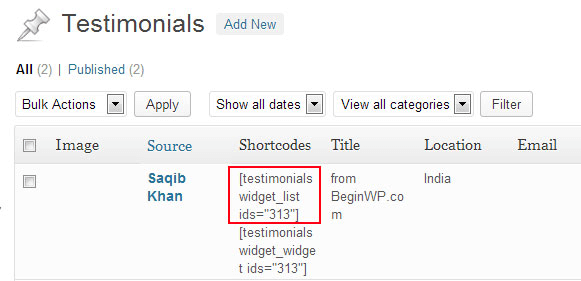
You can find the shortcode by going to Dashboard, click on Testimonials and under it Testimonials again. As shown in the image below, this is how you can find the shortcode of each testimonial.
To add it as a widget, go to Dashboard and then to Appearance and from the drop down, click on Widgets. Drag and drop the Testimonials Widget in any place you want to show it. If you want to show them on the homepage section, you should place the widget in Front Page Content Section.
The sections vary according to the different themes which you have to check to understand intuitively. Some people like to show it on the header as well as the top ad section.
There are various settings options available which are very handy. You can enter the minimum length, and width, the speed of rotation, character limit, ordering, and much more. You can even select the slider mode like carousel, fade, and transitions.
About The Plugin and Others–
Testimonials Widget is the best plug with over 50,000 installs and has very good rating. You can use the plugin as a slider to show video slides as well as a gallery to show sliding images which is better than traditional galleries.
Therefore, there is no need of installing a separate slider or gallery plugin. Instead of text testimonials, you can use direct images for better attraction and credibility.
Apart from that, there is another plugin named Testimonial Rotator which you may give a try in case the above does not work somehow. Testimonial Rotator has over 30,000 installs and impressive ratings.
It comes with next and previous buttons, rating options with hReview support and option for pagination in List format. Rest of the things is same, but it does not update the plugin regularly like Testimonials Widgets. You can reach out to them to solve any problem you could be facing with reliable Testimonial Widgets.
It is needless to mention that testimonials are critical to the success of your online website especially when you are providing services or selling products. Add rotating testimonials in your website today on the homepage where people can spot them easily and then watch your lead generation and conversion increase like never before.
Go ahead and install Testimonials Widget today. Thank you.
As a business owner, you know better than most as to how important testimonials are and a simple reference by word of mouth can start a literal stampede to your front door; now imagine, the effect that actual, verifiable testimonials will have on your website and your traffic.
And that’s why you need to check out some of our plugins for rotating testimonials in WordPress; these plugins have been vetted and happen to be some of the best.
Of course, if you are good at coding, then you can try it out yourself but it would be a much better idea to try the plugin as the process is automated and can help you save some valuable time in the process. If you are still wondering if testimonials matter, then read on.
- The need for testimonials: With so many websites propping all over the place and all offering the same service, it has become harder for clients to choose a particular website over another. And the fact that they all quote similar rates does not make the job easier.
However, with rotating testimonials in WordPress, you should be able to point out to prospective leads about your earlier work; you had collaborated with whom and that customer’s honest review of your company. This should go a long way to impressing an interested customer and more often than not, the mere confirmation of the quality of your services is enough to get their interest going and usually would result in a sale.
- Honest reviews: The one issue that most people had with testimonials in the past is that most of them turned out to be false. However, with this plugin, your client can post his testimonial and you can even display his name and company provided the client is okay with the same. Others can now vet your testimonial and confirm if it’s true or not.
The point being that if your website displays actual testimonials from real customers then this can help generate more sales.
- Easy set up: The process of setting up the plugin to display rotating testimonials is not that hard. Keep in mind that static pages are out so you are better off with rotating testimonial; just head over to the admin area and check under plugins.
Click on add new and search among the plugins for the right one and once you have located the right plugin, all you have to do is to download and install it, after which you need to activate it. Once you have activated it, you can head over to settings and customize it, as you see fit.
These are some of the reasons as to why it is important to display testimonials from your other clients.
Some may think that displaying testimonials is a bit sketchy but it is not; you are just letting your prospective clients understand you better and the quality of services they can expect from you in the near future.

