Add Videos to Your Own WordPress
There are different ways of adding videos to a Website page. It can be some Video Gallery plugins, some collective plugins where it is possible to add both Videos and Images (for example Portfolios) and adding videos with the help of Slider plugins.
Without any doubt, each of them can find its exact place on a website but it is rather difficult to use all them simultaneously. Any type of video gives some kind of motion to a webpage, while in the case of images a website is a little bit static and not flexible.
And as it is more interesting to have a dynamic and modern website, I’ll try to introduce three different ways of adding videos to a blog or website.
- adding videos with a Video Gallery plugin
- adding videos with a Slider plugin
- adding videos with a Portfolio plugin
It is worth to mention that video that should be used in these three tolls are taken from the YouTube and Vimeo, because for the mp4 file type videos it is necessary to use other plugins, which support this file type.

So, the first plugin logically and typically is a Video Gallery plugin, which is easy to find in a WordPress plugins directory, just searching it with an exactly same name.
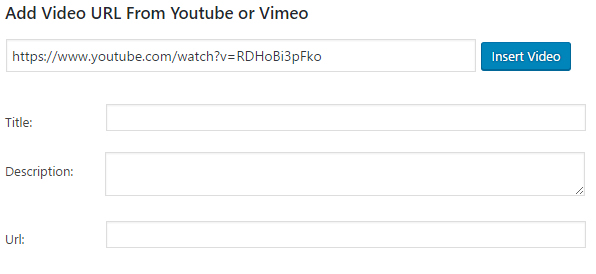
After searching and activating the plugin it is right time to add videos to the Video Gallery plugin. In this post the videos of Fall Winter 2017 and Spring Summer 2017 catwalks of a fashion show are presented. So, when a website creator is going to the page, from where the work will start “Add New Video Gallery” button can be found.
Unfortunately, it is possible to add only one video per time, but as for me it will be better if the option of adding multiple videos per time will be available in the future updates of the plugin.
Actually, as it is obvious from the screenshot adding title, description and URL link is available right after inserting the URL. But I prefer to do it after uploading all videos. So, after uploading vidoes the following video thumbnail picture will appear:
This plugin has a very interesting option, which can help a website owner to have some kind of statistics and even upload it to the PDF file. It is a “view” button under each video. So, when a website visitor will watch a video at the front end, information about the quantity of views will be stored at the backend.
It is a really useful option because if in the case of my gallery content and type it is not vital enough to follow this option, in other websites or blogs it can be used for getting precious information. For example, if someone has a journalistic blog he/she can observe the number of views of this or that interview or event.
In the screenshot the number of view is 0 only, because I don’t publish the page yet.
The URL option, which is again empty in my case, refers to some additional information. For example, if I would like to show more videos of Christian Dior’s catwalks or give some personal information about his life and work experince, his brand development etc. then the “view more” button (the same URL link) comes to help me.
After filling the whole information about videos: titles, descriptions and URLs it is an exact time of thinking about it design and appearance. There are 7 different and beautiful views, which can be applied to galleries.
The decisions of which one to choose completely depends on a user’s taste and preferences but besides it is more than important to take into account the whole website’s design, a character of a blog and its content.
So, when the Blog Style Gallery view cannot be applied to my type of blog, other views will look pretty good in displaying the videos. I don’t like Content-Popup view so much because of the hover magnifying glass and it is a little bit uncomfortable for my gallery style and type.
But actually it is possible to remove with the help of CSS codes.
While the Content Video slider, Lightbox and Justified views are very comfortable and compact. The Content Video slider view shows the video with its title and description, which is vital in my case.
While the Slider view just rotates videos with different transition effects. As for me, in the case of video gallery beautiful transition effects of the sliders are not important and relevant enough, while in the case of Images, they can make a page very unique and bright.
In the Content Slider view the only thing that disturbs my attention and maybe visitor’s’ attention is a play button. Actually, there is no option for changing this play icon but it is possible to do with the help of CSS codes again, just replacing the image icon with another image directly from the codes.
The Lightbox and Thumbnails views are displaying videos without descriptions, they just show titles while hovering on the videos.
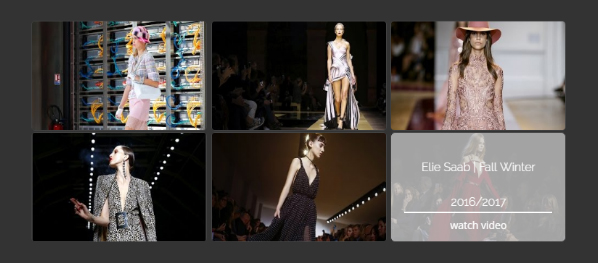
The Lightbox view is showing videos side by side and after clicking on them the lightbox will open a video and load them. The Thumbnails view is showing images with a background and after hovering on videos they are showing titles again, but in a more interesting and exquisite way.
As it is shown in the screenshot the play icon doesn’t persist in the last view and it makes the gallery more interesting and maybe not predictable because no one expects that they are actually videos but not images.
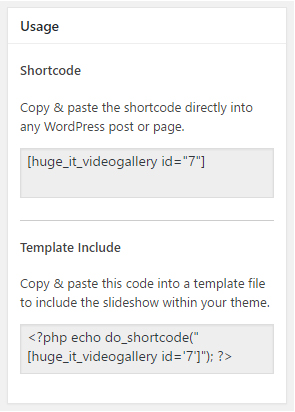
After creating a gallery it is an exact time to add it to the page, post or even template. In order to do this a website creator needs simply to copy a shortcode and paste it to the proper page or post.
Let’s now pass to the POWr Multi Slider plugin and see how is it possible to add videos with this tool. In this plugin not only videos are available but images, banners, documents and events are supported by this plugin as well.
In this article I’ll introduce three of them: videos, images and banners. Actually, only videos can be used here but in order to have more complete and beautiful slider it is vital to use other options as well.
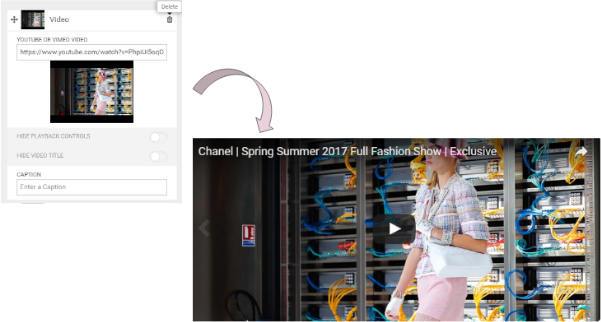
Let’s start from adding a video. In this case as in any other plugin a website creator can add a video to the plugin with the URL only. Unfortunately, there are only two functions of customizing a video slide: hide playback controls and hive video title.
A great advantage of this plugin is its preview option. So, when a user is adding a video, an image or anything else to a slider it appears right on the page where he or she is working. This is a very important fact because it gives an opportunity to make changes and correct mistakes in the preview that is in the draft of a slider.
As it is shown in the screenshot the play button is transparent and it doesn’t disturb visitors’ attention, it becomes red only after hovering on a video.
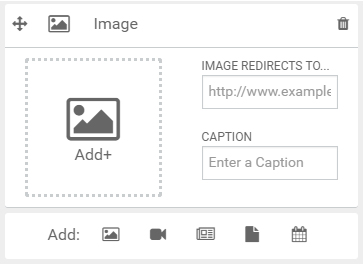
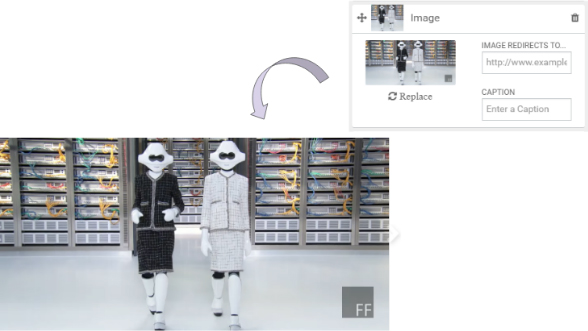
The next step is adding an image. I took an image right from the video.
In the case of images there are two main functions as well: redirection of an image and its caption. So, if someone wants to make an image clickable and redirect a visitor to some page, it is necessary just add a link to the required field.
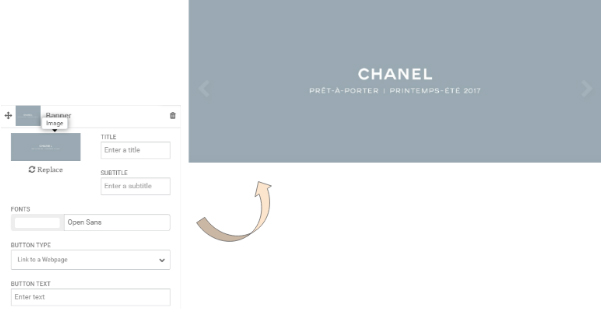
And the last one is adding a banner. It is working exactly in the same way as an image is, but it has a little bit more functions comparing with images.
Here not only a title can be added, but a subtitle as well. It has a very interesting option: a specific button can be added to the banner. Among them are link to a page and take a payment button.
As in my case the titles and subtitles are written on the image and unfortunately I cannot sell Chanel’s dresses then these two options are not applicable in my case.
Overall, after adding the content to the slider it is an appropriate time to work on its design. After testing some options, transition effects, arrows and other options the slider is completely ready. In order to save the slider, this plugin requires log in information to one of the user’s social account.
Frankly speaking, for me this is a little bit strange and not convenient. However, this is a plugin requirement and without it, the slider will not be published.
And the last tool for adding a video to a post or website is Responsive Filterable Portfolio plugin. In order to add a video to the plugin first of all it is necessary to go to the Manage Media at the left of the WordPress dashboard.
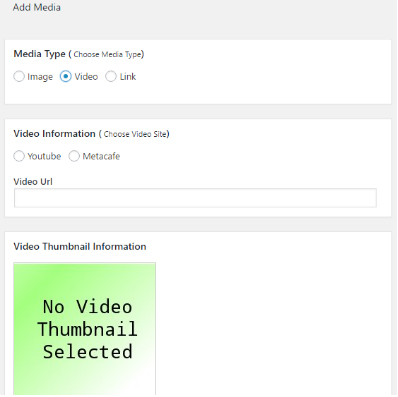
After pressing the Add New button the plugin offers three different media types, which can be added: images, videos and links.
The Video thumbnail image can be uploaded from the PC or taken from the YouTube. After clicking on “Click Here to get Video Information and Thumbnail Form” the YouTube’s thumbnail of the video will appear.
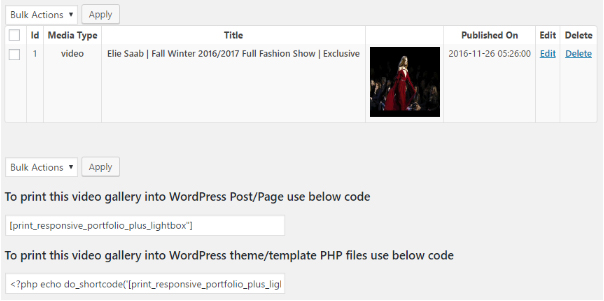
On the one hand in this plugin a huge variety of customizable options doesn’t persist but on the other hand it is easy to use from the aspect of video gallery creation. After all, the following page appears. Here the information about the post and shortcodes are added.
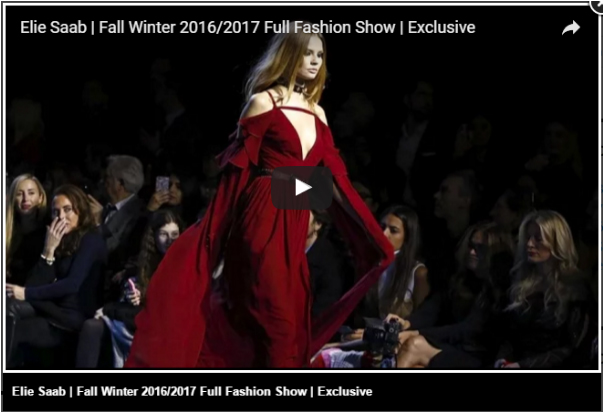
In order to add a video to the page the user just needs to take a shortcode and paste it to the post or page. The video is opening with a simple and compact lightbox.
Overall, in this article I have presented three different ways of adding videos to a website or post. Without any doubt, there are other ways of adding videos as well but these three ones seems the be the basic and the simplest ways.
I am sure that scrupulous and creative users will find more ways of creating video galleries and adding them to posts, they will enrich their knowledge and experience and come to the excellent conclusion which will amuse thousand of visitors.
They will not only learn but also teach their visitors with their great experience and results.
Bio:
My name is Anna. I adore creating and sewing dresses. For creating a commercial website (shop) and selling my dresses I use WordPress with its wonderful plugins. I am not a website developer or expert in creating websites, but all those plugins which I use are very simple and they help me in reaching my aims and even dreams.
So, if you have any suggestion or advice feel free to contact me on the LinkedIn.


