Adding captions to images is a way for you to add descriptions into your pictures.
Their job is to provide further details about the picture.
Table of Contents
Adding images and other forms of multimedia can improve the content quality.
It’s not that hard a task.
You may use the following guidelines to adding captions to images.
WordPress comes with the ability to do so. WordPress new editor Gutenberg tutorial is being used so the following applies if you use WordPress 5.0 or later versions since they ship with Gutenberg editor.
You can easily add a caption and other forms of metadata with title and alternative text for each image of your choosing.
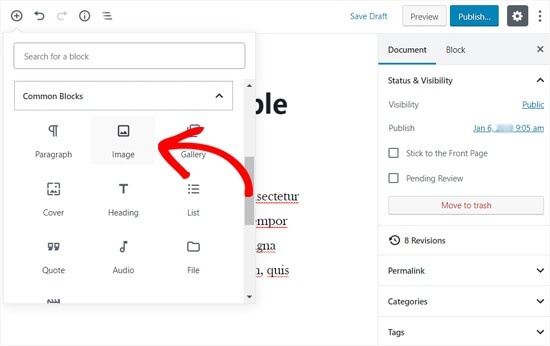
- Step one: First and foremost, you need to upload an image. There’s a post edit screen where you’re to click the “add block” icon. Select the “image” block. After doing that, the image will be added to your post area.
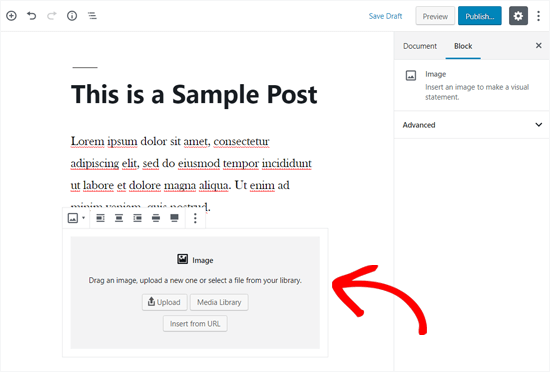
- Step two: You are now able to click on upload to select and upload a specific image on WordPress. You can also choose to select a previously uploaded image by merely going on the media library button.
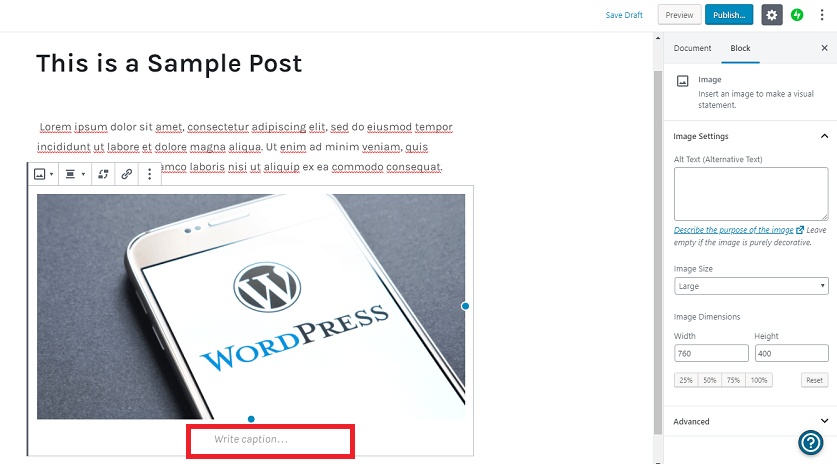
- Step three: As soon as you have done the above step, you will now be able to “write caption” on the image. It will be visible in the editor on the text box. Now, you may do the adding captions to images.
Upon doing the above stated, you can now save your post by clicking on the “update” or “publish” button. This action completes the process of image uploading.
However, there are multiple features of WordPress than what meets the eye.
Add Captions to your Gallery Images
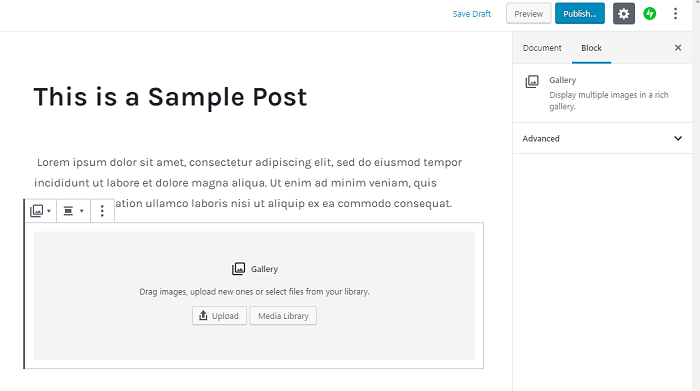
WordPress comes with another exciting feature enabling you to upload various amounts of images and display them in the form of a grid layout with rows and columns. This action is possible with a “Gallery block.” Here’s a guide on how to use it.
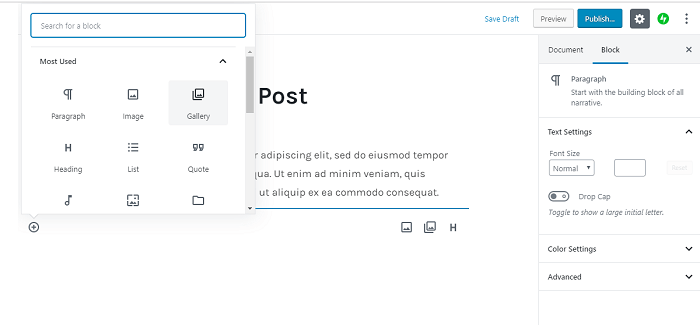
- Step one: To create a gallery, head to your page or your post edit screen, whichever is more feasible to you. Click the “Add Block” icon, after that click on “Gallery Block” which is in the standard blocks tab.
- Step two: You’ll now see the gallery block added into your page/edit area. From this point on, you can upload multiple images one by one from your computer. Or, you can choose to select the pre-uploaded ones from your media library.
If you are to upload images separately, then you can add a caption after uploading each one. When uploaded, click on it to “Add Caption to image“.
The field will appear after you click on that option.
If you choose to select the pre-uploaded ones, add a caption to them on the image metadata section on the right. However, if there’s a pre-existing caption, you don’t need to re-add a new one.
Adding Captions to Images in Media Library
WordPress can let you upload images directly to the media library without needing embedding in a post or page.”. The field will appear after you click on that option.
If you choose to select the pre-uploaded ones, add a caption to them on the image metadata section on the right. However, if there’s a pre-existing caption, you don’t need to re-add a new one.
You may use the following steps for this purpose.
- Step one: Visit Media. Then click on Add New Page in WordPress admin area.
- Step two: Now upload an image by dragging and dropping. You may add it through choosing one from your computer.
- Step three: Uploaded image will be under “upload new media” box. Now click on the “edit” link.
- Step four: You’ll see an edit page area in a new tab. It will look similar to that of the post edit screen. The reason is that WordPress treats attachment, e.g. images as a default post type. This technique allows it to store image metadata in the database. Examples of the meta-data include title, description, and caption of the image. You can edit your image title and add image metadata this meta-data can include the caption, alternative text, and description from this screen.
- Step five: Once you followed all the above instructions, you’re now able to update your image. This metadata is saved in your media library.
You may add this image on as many posts as you please. This inclusion can be done without needing to add the caption or metadata all over again. Whenever this image is used, it’ll come with everything saved.
Adding Captions to Images using Old Classic Editor in WordPress
You can adding captions to images through old classic editor using the following steps.
- Step one: Click on the Add media button positioned above the post editor to upload an image, or you may select one from the media library.
- Step two: Once uploaded, you may add the metadata you need conclusively, title, alternative text and a caption for the image.
- Step three: Go to the “insert into post” button and click on it. This process allows you to add the image to your post or your page.
- Step four: You’re now able to see the picture in your post editor along with your caption. You can choose to save it and preview it, to have a visual on how it would look on your live site.
Using Classic Editor to Put Gallery Images in WordPress
When creating a gallery, you are also able to adding captions to your images using Classic Editor on WordPress. Here’s all you need to know to do it.
- Step one: Upload and feel free to select various amounts of images. After that, click on the create gallery link situated on the left column.
- Step two: You need to click on the “Create a new gallery” button. This button can be accessed from the bottom right corner of the popup.
- Step three: You’re able to write captions directly below each image. You may click on an image to load its settings in the right column and then add the caption.
- Step four: You can select the insert gallery button to add it to your WordPress post or page.
Adding images can improve the quality of your content, post or blog. The instructions, as mentioned earlier, can be used as the necessary steps needed to add captions to images.
Also check out image optimization for search engines which will help you in optimizing your images for best possible search results.

