One of the best ways to boost conversions is to create a Call-to-Action Button. User’s attention can be redirected to the desired interaction as they are highly noticeable.
Table of Contents
You can also promote affiliate links of partner website, new products, and special offers through it. Without using any code this read will help you in adding them to WordPress.
Use the Default Editor to create a Call-to-Action Button
This method is used by most users because it is the easiest of all.

But it is essential that you have a new WordPress editor because it uses the built-in block feature.
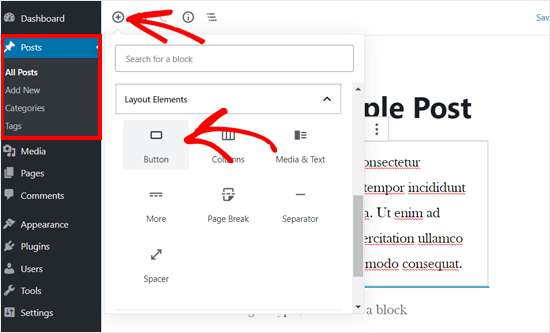
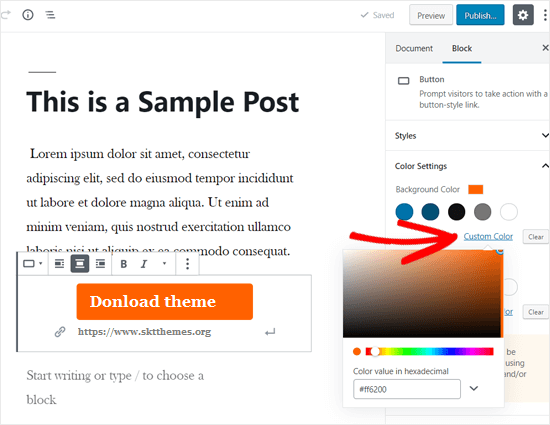
When you want to add this feature then select an existing post or create a new one. Click on the + icon on the post edit screen and under the layout elements section select the relevant block.
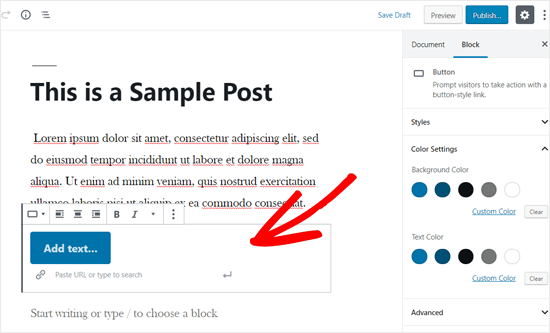
You will now see that the content editor will have the buttons block added.
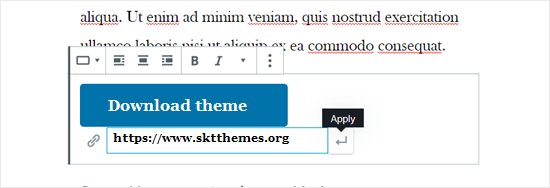
Enter the new text by clicking on the ‘Add Text’ option. To link the URL paste the link in the option and then click on Apply icon.
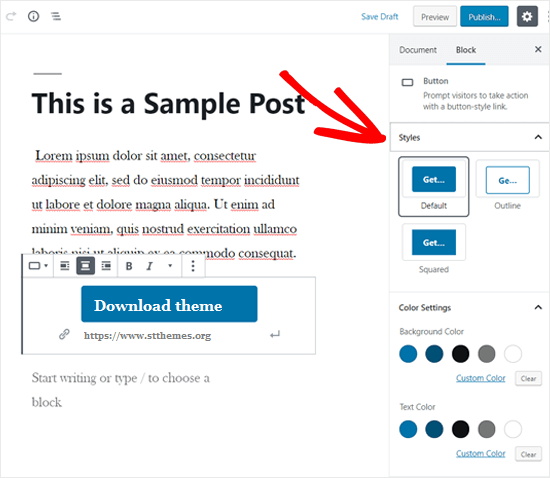
You can conveniently change the background color, customize the existing style, and change the text color from the right side through the block settings panel. Squared, default, and outline are three provided styles from which you can choose.
For background and text five color variants are available. You can choose the customized color by clicking on the custom color option.
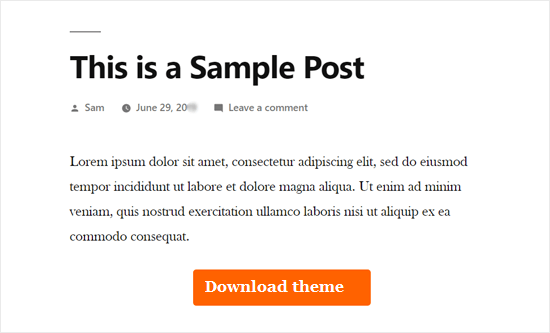
Save the post after the necessary modification from your end. When you click on the publish option you can see the live preview of your website. In case of any further modification re-edit the page and then save those changes. Publish the post again and your edits will be live.
Create a Call-to-Action Button in the Classic Editor
The first method is strictly for the users of the Gutenberg block editor. For other users who are still in love with the classic editor, there are three options for adding it i.e. HTML/CSS code, WordPress button Shortcode Plugin, and without using Shortcodes.
The HTML/CSS code method is not for beginners as it includes coding. Second is one of the widely used methods because the plugin provides the required shortcodes.
In the third method, you do not have to remember any shortcodes to add them to your posts and pages. Hence, we will discuss the third method which is the most convenient one.
To create a Call-to-Action Button in the classic editor without using shortcodes download, install, and activate the shortcode plugin.
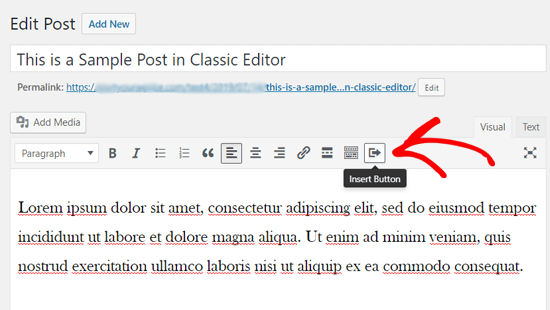
After the process, you will find the Insert option in the classic editor section when you go to the existing post or create a new post.
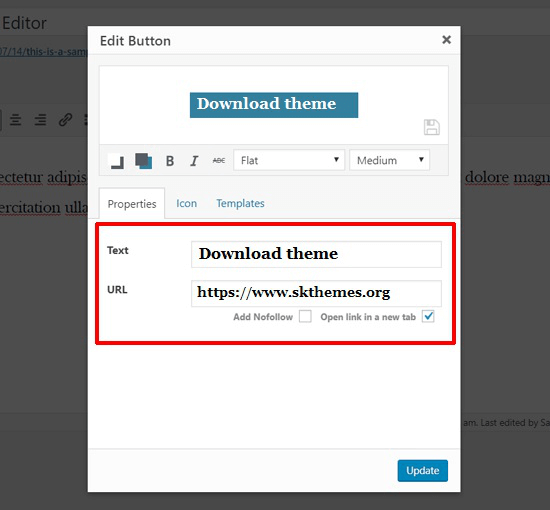
Click on the insert option in your post and in the generated pop up you will be able to design the field as required.
First, add the desired text and the URL for the same. You can choose the icons to be added before and after the text in the field by clicking on the icons tab.
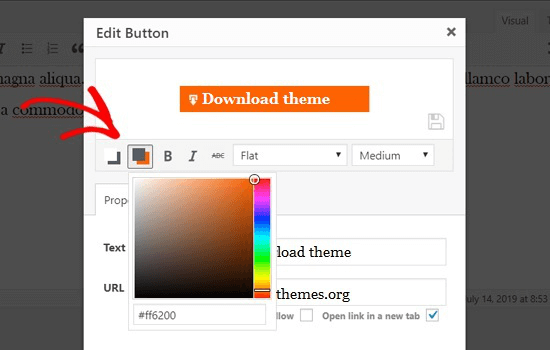
The color box icon will help you in modifying the text and background color. From the drop-down menu, you can easily select the new style from the eight different available styles. If required the size can also be customized.
After you complete editing, click on the ‘Update’ option. Inside the post editor, you can see the customized layout. Use the toolbar in the editor to set the alignment.
In case you want to re-edit the style just double click on the icon and the pop up will reappear. Click on the publish option and see it in action when you are satisfied with the appearance.
Click-to-Call Button
To boost conversions and leads, most people create a Call-to-Action button but you can also create click-to-call buttons for the same. With just a ‘tap’, the users can make a phone call to your team when you use the click-to-call option.
For any desired information the potential client can communicate with your team. This method is most helpful for a quote request, support issues, and pre-sale information.
Because the number of smartphone users is constantly increasing this method happens to be one of the most productive.
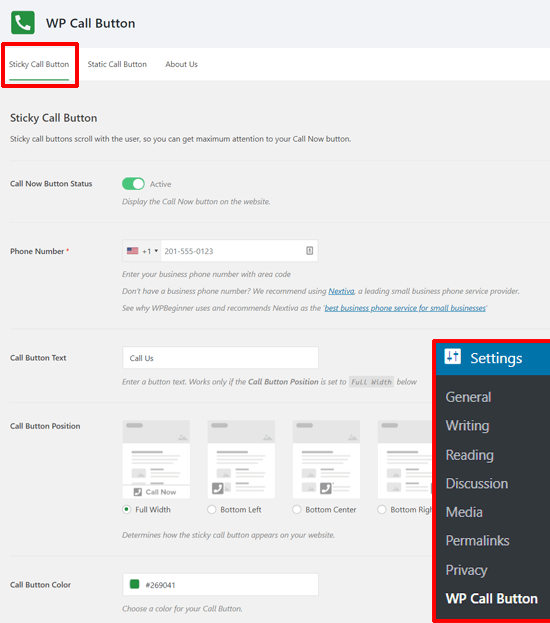
The first thing to do is to download and activate the WP Call button plugin after installing it. After activation, go to the WP Call button page from the settings menu. Here you can redesign the layout and even configure the plugin settings.
You will discover the sticky call button option which is a conversion optimized feature. This feature moves the field as the users browse through your site.
Clicking on the switch toggle you can activate the Call Now Button status. In the next step enter the contact number. This is a smart field with a country code option.
It is recommended that you add a business number. If you don’t have one then you can easily get it from the trusted sites online.
Edit the text, color, and position of the field. Also, select a relevant position for the sticky feature to display on your website.
By default, it will appear on all devices and pages. But if required you can modify it to be displayed only on mobile phones.
You can also manage the settings and exempt it from displaying on certain pages. Click on the save changes option after a thorough review of all options. Now visit your website and you will find it the button-in-action.
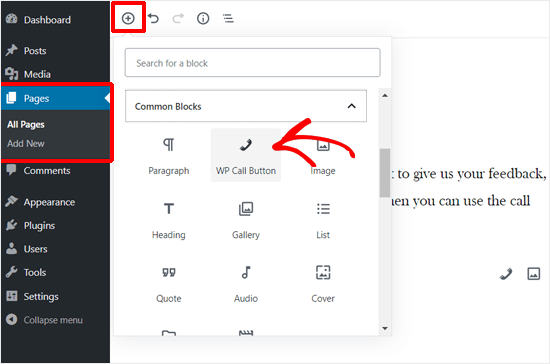
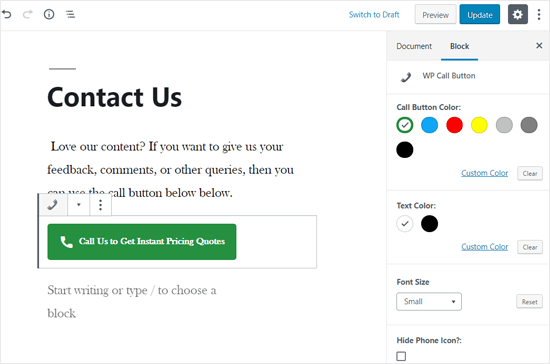
This plugin also enables you to add static call buttons on the sidebars, pages, and posts. For the users of the new WordPress block editor, it is simple. It can be easily done from the page editor where you should select the WP Call button block.
You can carry out the desired customizations and then publish the same.
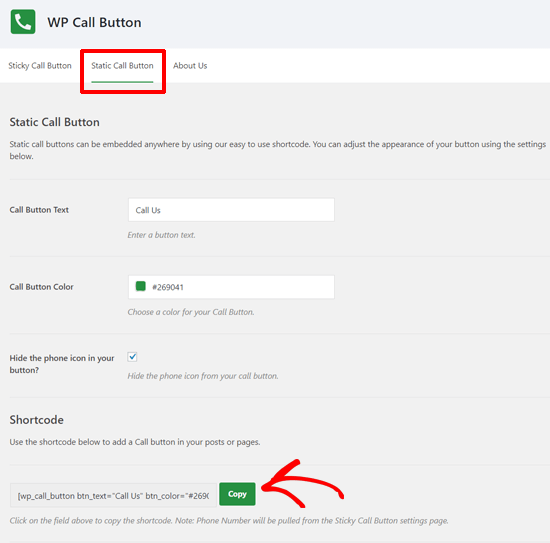
For a Classic Editor, it is essential to generate a shortcode using the Static Call Button generator. Once it is done you will find the option in the WP Call button section in the settings menu.
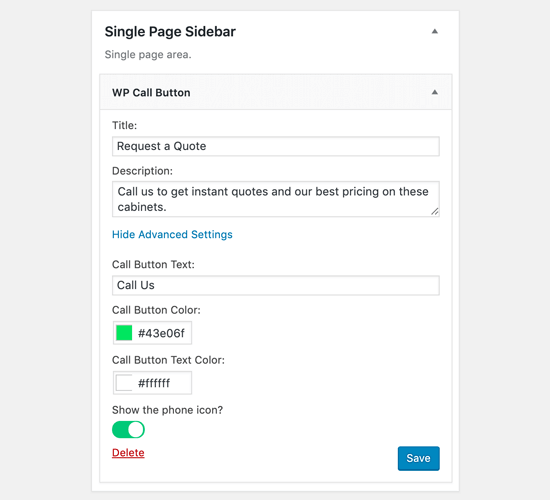
Customize the field as required and then drag the WP Call button widget to the area where you intend to display it. From the advanced section, it is possible to add a description and title for the same.

