Do you want to know how to customize a WordPress website easily? Are you sure you are going to sweat hard for it? We’ll prove you are wrong!
You have successfully created your WP website or blog and now want to start publishing your content.
But before passing to adding your valuable and user optimized content, you feel the necessity to change certain touches and elements of your site.
This is the point where you can highly benefit from the WordPress customization options.
WordPress provides you with boundless opportunities to safely tweak your website and customize it the way you want by using Customizer.
Technically, Customizer is a platform for making and live previewing all the changes you are doing and lives in the Appearance of your Admin Dashboard.
It’s a handy tool that can be found in every installed WordPress theme.

You don’t need additional processes in order to activate and use the Customizer. Once your theme is installed and properly activated, Customizer is ready to do its job perfectly.
Generally speaking, the Customizer does not only tell you how to customize a WordPress website. It also lets you make your changes and preview them instantly before putting a newly customized theme into action.
This functionality will enable you to detect any mismatches or inconveniences and eliminate theme before they can be accessible for the website users.
From a more practical viewpoint, Customizer is a multi tabbed page that grants you with lots of options to customize different parts and aspects of your WordPress powered site: from fonts and colors to layouts and widgets and more.
In order to access your site’s customizer part, you need to navigate WP Dashboard, Appearance, Customize. Now, you will appear in the Customizer interface with customizer menu on the left and theme live preview on the right sides of the page.
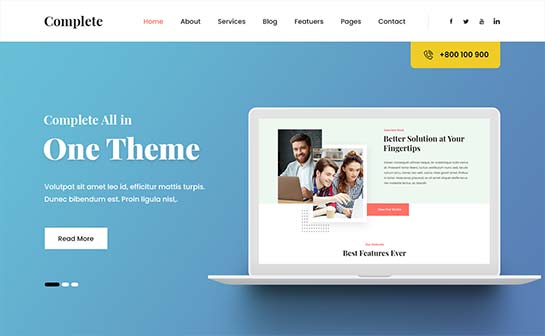
In this article, we’ll get down to using and customizing one of the top rated WordPress theme authored by SKT Themes:
SKT Complete Pro
(Although the majority of options scattered around the customizer are the same for different WP themes, there can be little differences and peculiarities to pay attention to. Each template can have its own blocks added to the Customizer and some other common blocks presented in a different way).
Now, let’s see how to customize a WordPress website based on SKT Complete Pro.
We’ll start with the homepage setup. Go to WP Admin Dashboard, Appearance, Customize, Front Page, Static Front Page. Here you can choose between 2 kinds of page displays: your latest posts and static display. Choose the one you need and go on.
As for the basic options, use the same path WP Dashboard, Appearance, Customize, Basic. Here you will find Site Layout, Colors Options, Fonts Typography, Custom CSS and Site Identity controls to manage.
Depending on the specific template you use and the plugins you have added to it, you can find more or fewer modules located here.
Choose the Site Layout you prefer. It can be full with or boxed with featured boxes appearing on the page.
Pass on to the Colors Options module to play with color gamut of your site. You can easily set the site background color, upload an image to be the site background image or to have fixed background image.
There are also other color options to be customized like site content text color, social icon background color, social icon hover background color, post title color and much more.
Next module is Font Typography where you can set the preferable fonts and its sizes to match the identity and look of your site.
Custom CSS enables you to quickly add some CSS to the theme. Whenever you add a valid CSS code to the given block, it will be instantly applied to your site’s live preview mode.
You can continue to add custom CSS codes to your site until you are pleased with the theme appearance. Alternatively, you can rely on Custom CSS plugins to add custom CSS to your site.
On Site Identity page, you are required to set your site icon matching certain criteria. It will be a special icon of your site showcased around browsers’ tabs, in widgets, apps, etc.
In order to customize header options, you need to visit Apperance, Customize, Header. However, our sample template also uses widget for header top left and or right.
You can find Widget controls in WP Dashboard, Appearance, Widgets. Here you will be provided with the list of available widgets or can pass on to manage them in Customizer.
In Site Title and Logo part, you need to add the title, tagline, as well as upload the image of your logo. Once you are done with this part, you need to choose the header layout.
If you want to know how to customize a WordPress website footer area, here is a quick guide for you. Go to WP Admin Dashboard, Appearance, Customize, Footer, where you will find Footer Style, Footer Columns, Copyright Area and Social Links modules.
Begin with stylizing your footer area. Choose footer area background color, footer text color, footer title color and footer layout with 1 or more columns.
In Footer Columns section, edit content and add your own one to appear in the footer area. Just like the header, there is also a widget for each footer column instead of customization options for them.
As for the Copyright area, it’s the bottom section of the footer. Here you can edit the copyright text, as well as set copyright area background and text colors.
Finally, let’s see how to customize a WordPress website post and page options using customizer. Go to Appearance, Customize, Post & Page.
The first module is Posts Settings, where you can control whether the post info will be showcased or hidden, whether post comments will be showcased or hidden, as well as whether next and previous posts will be displayed under single post.
Further, you can customize single post layout, page header to have featured image or a background image, control blog page settings, blog page post count, etc.
In contact page settings part, you can add your contact details, company address, phone number, email address, company URL, as well as Google Map.

