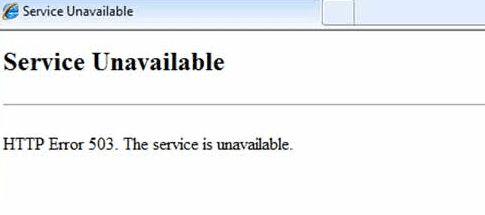
If you are brand new to WordPress and have just setup your website, chances are that you may already be hitting the panic button if your website pops out a 503 at you.
Table of Contents
Basically, your website is still there but continues to remain inaccessible for one reason or the other. And you need to tackle this issue right away, since the downtime translates to loss of potential customers.
The good news is that this error can be resolved easily, all you have to do is to check out the following steps and you should be set.
But before that, it is a good idea to learn what may have caused this error in the first place since you can take some proactive measures.
A 503 service unavailable error in WordPress basically occurs for some of the following reasons
1. Themes or Plugins Error:
There is a problem with one of the themes that you have installed on your website or with one of the plugins, resulting in a PHP error. Simply put, your themes or plugins are not able to load correctly, resulting in the error.
2. Custom scripts:
You may have added custom scripts to your website which can cause it to malfunction and prevent it from being rendered.
3. Server downtime:
Most hosting companies provide uptime of 98% and above. But if your servers down as a result of scheduled downtime, then your website will not be accessible.
4. DDOS attacks:
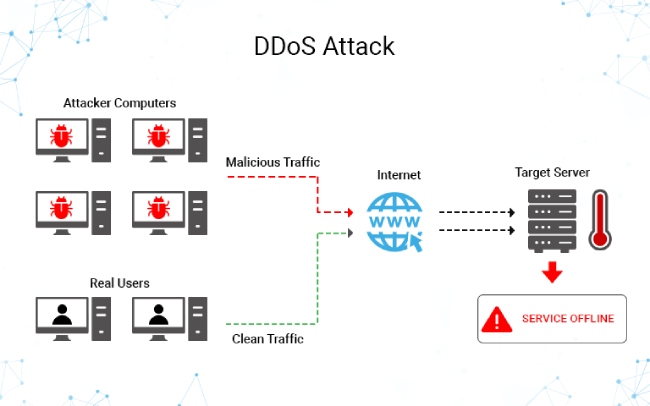
Your website is the prime target of a DDOS attacks. Because of the massive traffic being directed towards your website, your website would remain inaccessible with a 503 error.
The first two, are as a result of various issues that you can tackle on your own. Just follow the steps listed below and you should be able to resolve this error at the earliest. But before you begin, as always, you must back up all your core files.
5. Disable your active WordPress theme:
If deactivating the plugins had not worked and you are still seeing the same issue, then you need to check your theme and disable the current one. Again, access your server using the FTP client, and check out the root directory to your website.
Now, head over to wp–content/ themes directory. You should be able to locate your theme folder; the file should be in the same name as your current active theme. Now, right click on it and choose the “rename” option.
Now, rename your file and you will find that the theme has been disabled. Check and see if this takes care of the 503 service unavailable error in WordPress issue and that you are able to access your website, as usual.
Do note, that if your website starts to work again it may look a different because WordPress would have installed a default theme in place of the disabled one.
Do note that if you continue using the recently disabled theme, then the chances for the service unavailable error in WordPress to occur again is quite high.
A better idea would be to download the theme from its provider and ensure that you are using the latest version. Or you can go in for alternative themes and choose one that you prefer
6. Disable your plugins:
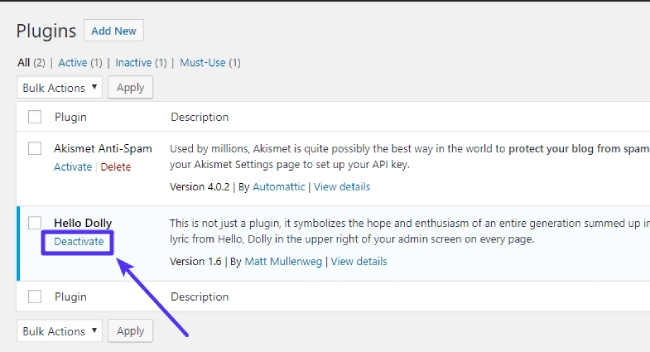
The first thing that you need to do is to disable your plugins. At this stage, you may not be able to access your admin dashboard. So download a FTP client like Filezila, use the same to access your server with the credentials that your web host had shared with you. Once you do, log into your server and access your root directory and locate the plugin folder under wp- content.
Change the name of all the plugins you had installed recently – just change the name and that should disable the plugin. Now, load your website to see if that takes care of the issue. If it does not then the 503 error could be on account of some other factor.
7. Enable WordPress debug feature:
If the 503 issue still persists, then it may be time to enable the WordPress debug feature and find out exactly what is causing this service unavailable error in WordPress in the first place.
This is especially useful as this feature can tell you if a custom script is causing the error in which case you can remove it altogether.
The debug feature is turned off by default, and you need to enable it again. Access your root directory with the help of FTP client, access your root and more specifically, wp-config.php file.
Right click on it and it should display “view/edit” option which will open the file in the text editor. Now add this code just before the end “@ini_set( ‘display_errors’, 1 );”.
Now, save the file and upload it using FTP back to the wp-config file. Now, visit your website which should cause your WordPress website to send you a detailed summary as to what’s wrong.
This should provide you with all the information you need to ensure that your website continues to function normally
8. Contact web host:
If these steps do not work then it is perhaps time for you to contact your web hosts and let them know regarding the issue. You may also want to list out the various measures that you had taken on your own to resolve the issue.
Your web host would definitely get back to you regarding the issue and may even upgrade you to help combat DDOS attacks effectively.
They may also have additional suggestions regarding the issue and how to prevent the same thing from happening in the future.
This platform is a robust, strong platform and one that your business needs, to grow. And moreover, this particular error is endemic not just to WordPress but to all the websites out there.
And given the adaptability of this platform as well as the fact that it comes with all the requisite tools that you need, you should be able to resolve this issue at the earliest. Soon, your customers should be able to access your website in full without any error cropping up.


