When it comes to the author name of a WordPress blog post, you might feel the need to change it if the situation approaches. While a post already has one user who has uploaded the post, you can change it to another author if needed. But it can be a slightly tricky task for you.
Table of Contents
Simply copying the post and pasting it to another account is not the solution, though it sounds too simple! But why would you go for copy-pasting when you can easily do it on the same post using a few simple clicks? So, how to change author in WordPress for a post?
Here is a simple guide for you.
Things to consider before you change the author in WordPress:
If the post is written by another user and you want to change it to your name, it is very simple to do. But when you want to show a completely different user as the author, you need to ensure that you have that user’s account on your WordPress site.
While you want to view or manage all of your users from your WordPress site, you can easily do so by visiting the ‘Users’ Menu while logging in with your administrator account on WordPress.

How do you change the author for a Single WordPress Post?
So how to change author in WordPress? Here is how simply you can do it:
- First of all, you need to start with opening the post or page on which you want to change the name of the author.
- From your post edit screen area, you need to ensure that you are selecting the right post. You can easily select the post from the right-hand sidebar area.
- As you are done, you have to locate the author from the section of Status & Visibility. After that, you have to select the new author name from the dropdown menu area.
- As you select the new author name, you will see a list of all the available authors from where you can choose the name of your preferred one.
- After you are done with selecting, you need to ensure that you are clicking on the ‘Update’ or ‘Save Draft’ to save all the changes you have made.
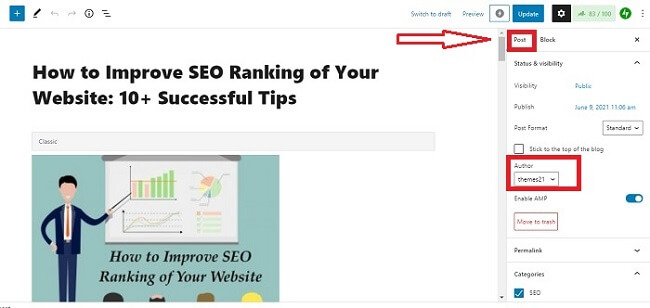
You are done! You have successfully changed the author for your post on WordPress.
How do you change the author for multiple WordPress posts?
Modifying the author name for a single post on WordPress is quite easy. There is simply no need to do a lot of tasks. But on the other hand, changing the author for multiple WordPress posts is not tough either. So how to change the author in WordPress for multiple posts? Here is your answer:
- First, you need to click on the ‘Posts’ menu item from your WordPress admin menu area. This is going to list all the posts on your WordPress site.
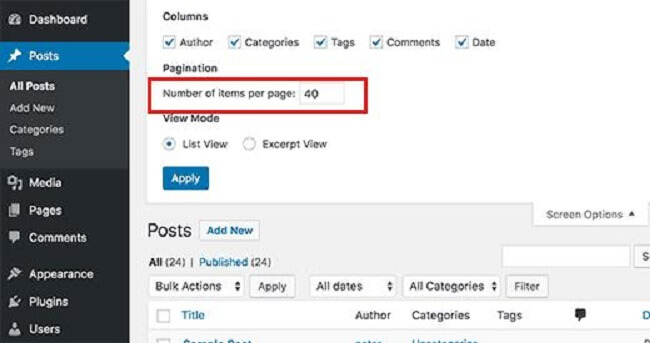
- On the other hand, WordPress, by default, shows 20 posts per page. In case you intend to display more posts, then you need to click simply on the “Screen Options.’ Then you can change the number of the post that you want to display with a different author name.
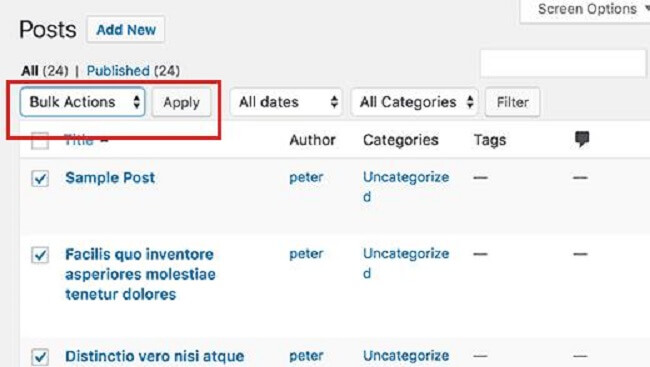
- Now you need to select the posts for which you want to change the author.
- As you are done with selecting the posts, you have to select the Edit from the ‘Bulk Actions Drop Down menu. After that, simply click on the ‘Apply Button.’
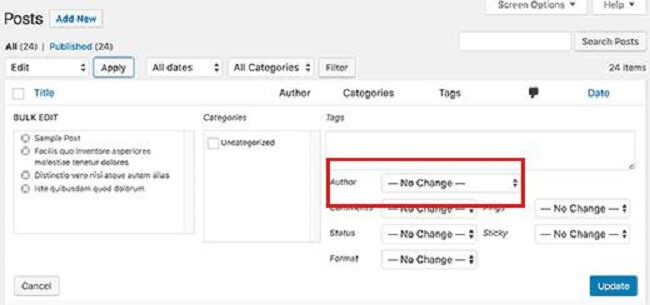
- After that, WordPress will show you the meta box for the ‘Bulk Edit.’
- Then you can go forward by selecting the new author. Click on the dropdown menu, which is next to the Author option.
- As you are done, make sure you are clicking on the Update button to save all of your alterations.
Congratulations! You have thus successfully changed the author for your multiple numbers of WordPress posts!
How do you keep your Author Profiles completely optimized for SEO purposes?
Optimizing your Author Profiles is a good idea, as it benefits your SEO ranking. The author profile appears at the bottom area of the published blog post. So, you can add more value to this place by entering the author’s bio, links, and social media profiles.
It helps you to let your readers know more about the author. At the same time, it enhances the credibility of your site.
With the help of the WordPress author bio plugin, you can add your social media links, which makes the area look more organized. You can also improve your Author archive pages which is the place for displaying a list of the post which is written by a particular author.
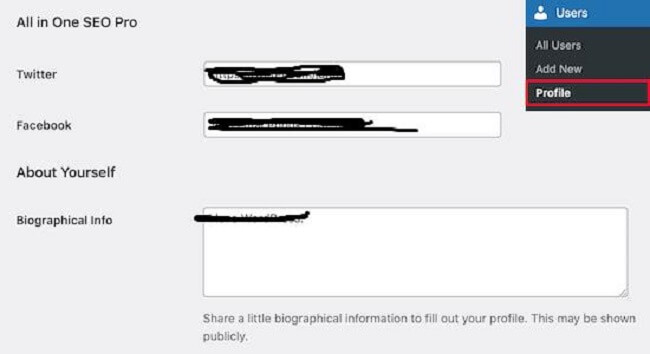
For better optimization, you can use the All-in-One SEO. As you activate the plugin, go to the Users >> Profile to make the necessary edits to your author profile.
After making all the necessary changes, click on the ‘Update Profile’ from the bottom area of your page. Users can now see a completely new author bio from the bottom area of the post.
Conclusion:
As you know how to change author in WordPress, you can flexibly change this area at your convenience.
Whether you want to change a single post or you want to change a few more posts, there is no need to open a completely new account and copy-paste the content. You can use the above-mentioned techniques to make your job easier and faster.

