How do you install WordPress in a subdirectory?
How do you install WordPress in a subdirectory? Well, this is not at all a hard task to do when you know the proper method for it. But why would you consider installing WordPress to your subdirectory?
Table of Contents
Installing WordPress in your subdirectory lets you run various WordPress instances under one domain or even with a subdomain. At the same time, it makes things easier for you to work.
Moreover, it also helps in SEO management. So, how do you do it properly? This is exactly what we will discuss in this article. So, let’s proceed.
Subdomain or subdirectory, which one should you consider for better SEO?
Usually, most of the users tend to start with a WordPress website with a domain name. However, sometimes you can also consider creating an additional website using the same domain name. You can easily do it by installing WordPress in the subdomain or using a subdirectory.
But which one is good for SEO? That’s the main area of concern. It is important to make sure that the method you are picking is suitable for SEO. It will also give you the probable answer for whether you shall install WordPress in a subdirectory or not?
Search engines opt for treating the subdomains differently from their root domain names. Then it offers the subdomain the corresponding ranking as a separate website.
On the other hand, the subdirectories directly benefit from the other domain authority of the main domains. Hence the subdomains can rank higher in most cases.
If you want to create separate WordPress sites in both the subdirectories and in a subdomain, then you can proceed to install from the WordPress multisite network.
What do you require to install WordPress in a subdirectory?
The installation of WordPress in a subdirectory does not come up with many special requirements. If you already have a WordPress website with the root domain name, you can easily proceed with it.
Using one of the top WordPress hosting companies to install WordPress in a subdirectory makes the process much easier. With a good hosting service, you can easily install multiple WordPress websites with the help of the same hosting account.
However, before proceeding, you should keep in mind that most of the shared hosting accounts come up with limited resources for the server. Hence, attempting a sudden spike in one of your websites can affect the performance in many ways. It can also hamper the speed of all other websites using the same account.
So how do you install WordPress in a subdirectory?
It can be done easily if you are following the correct set of steps one after another. Here is how you do it:
Step 1: Start with creating a subdirectory under the root domain name
The first step you need to take is, considering creating a subdirectory or a folder using the main website. You can create it under the root website. Here you can install all your WordPress files.
You have to connect with your WordPress hosting account with the help of an FTP client or a File Manager in the cPanel area.
As you are done with connecting, you need to go to the root folder on your website. Usually, it comes as the /public_html? Folder, in case you are already having WordPress installed in your root folder. Then you can see all your WordPress files and the folders at this place.
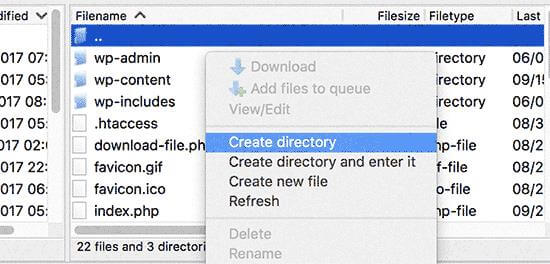
After that, you need to right-click and select the “Create a new directory” option from the menu. While doing the tasks, be careful as you have to choose a name for your subdirectory, which is effective. It will be part of the URL for your new WordPress site. Also, your visitors will type it to reach out to your website.
Step 2: You need to upload the WordPress files:
The subdirectory you have created is empty. You have to change it by uploading your WordPress files. For this, you have to visit the WordPress.org website, then click on the download button.
Your browser is now going to download that zip file that contains the latest WordPress software to your computer. As you are done downloading the file, you can select and extract it.
Mac users can also do it easily by double-clicking the file to extract it. For Windows users, it is recommended to right-click and then select “extract all”.
As you are done with extracting the zip file, you can see that the “WordPress” folder is containing all the files of your WordPress.
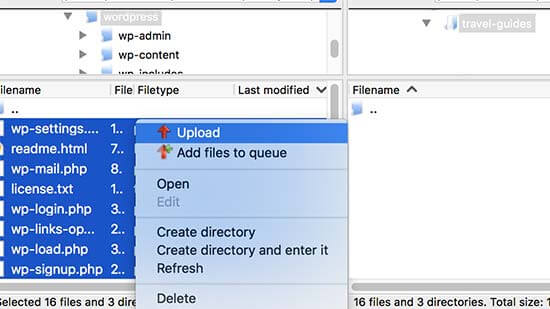
Now, you have to upload these files to your new subdirectory. After that, you can simply connect to your website with the help of an FTP client. Go to the subdirectory area that you have created earlier.
From the local files panel of the FTP client, you need to go to the “WordPress” folder that you have extracted earlier. Go on to select all the files inside the folder. Then upload them using your new subdirectory.
Step 3: Opt for creating a new database:
You have to create a completely new database to install WordPress in a subdirectory. WordPress usually stores all the content in a database. Thus, you need to create a completely new database with the new WordPress site installed in your subdirectory area.
You need to start with logging in to the cPanel dashboard of the hosting account. Click on the MySQL Databases from the database section.
The cPanel dashboard will create a new MySQL Database. Then click on the Go Back button for returning to the Databases page. Then you have to add a username and a password to the database area.
Go to the MySQL Users section and offer a new username and password. Then you have to click on the Create User button. Go to the Add user section of the database area.
Select MySQL username and then select the database that you have created. After that, click on the Add button option to continue. cPanel will now grant MYSQL users full access to the new database.
Step 4: Complete it by installing WordPress:
The next step is to install WordPress. Visit the directory that you have created earlier in the web browser area. You have to type the URL: http://example.com/your-subdirectory-name/.
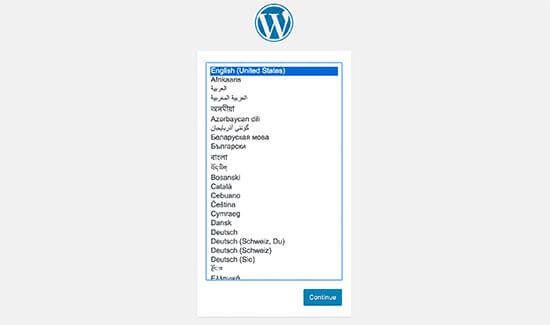
It will help you to get the WordPress installation wizard. Then you need to select the language for your WordPress website area and click on the continue button.
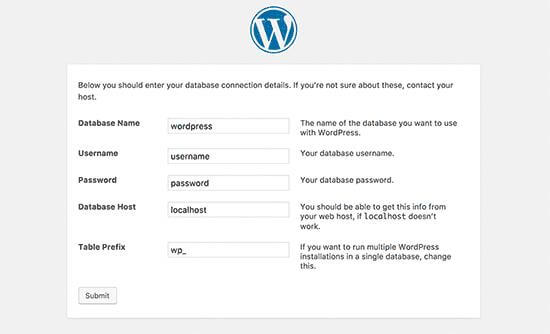
Then you have to provide your WordPress database name, username, host, and password. After that, simply enter the database details and further click in the submit button area.
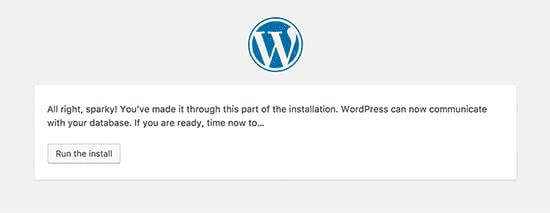
WordPress will now connect with your database. After that, you have to click on the ‘Run the install’ button to continue further.
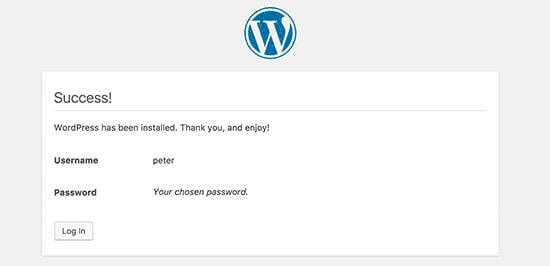
From the next screen, you need to choose an admin username, password, and email address. Then click on ‘Run install’ to continue.
Step 5: Fix the permalinks:
If you have a separate WordPress install in the root directory area, then .htaccess files of the subdirectory can create obstacles. It will result in 404 errors in your website area. To solve this, you have to edit the .htaccess file in the subdirectory. You have to replace the code.
So, here is the code you can add:
# BEGIN WordPress
<IfModule mod_rewrite.c>
RewriteEngine On
RewriteBase /your-subdirectory/
RewriteRule ^index\.php$ - [L]
RewriteCond %{REQUEST_FILENAME} !-f
RewriteCond %{REQUEST_FILENAME} !-d
RewriteRule . /your-subdirectory/index.php [L]
</IfModule>
# END WordPress
Make sure you are replacing /your-subdirectory/ with your subdirectory name.
Wrap up:
To install WordPress in a subdirectory, you need to make sure that you are following all the essential steps. While doing it, make sure your host has the essential resources to support this new install so that you can enjoy smooth access and work.

