WordPress is now too easy to manage on the cloud-based Microsoft Azure. This is specially meant for the developers who believe in expanding their business with better organic traffic and lesser investment on the back-end of managing the WordPress servers.
Table of Contents
Moreover, at least 1/3rd of the internet websites are run on WordPress themes. Then it’s imperative for business owners and trendsetters to follow their data management system to reach up to the cloud computing level.
That is why we are going to explain the crux for the topic of Install WordPress in Microsoft Azure in details.
Quick Steps To Install WordPress In Microsoft Azure
1. Get Your Own Azure Account
With Azure’s computing services, you will be ready for the future data-based services; you can trust this cloud service as others are already doing it.

There are multiple free plans available on Microsoft Azure website. For starters, you must open up an account with ease. It’s not a rocket-science when you fill up your details and choose the free version as per your convenience.
Once you get your account ready, browse the portal clearly for knowing the other benefits as well before knowing how to install WordPress in Microsoft Azure.
2. Sort Your WordPress Resource On Azure
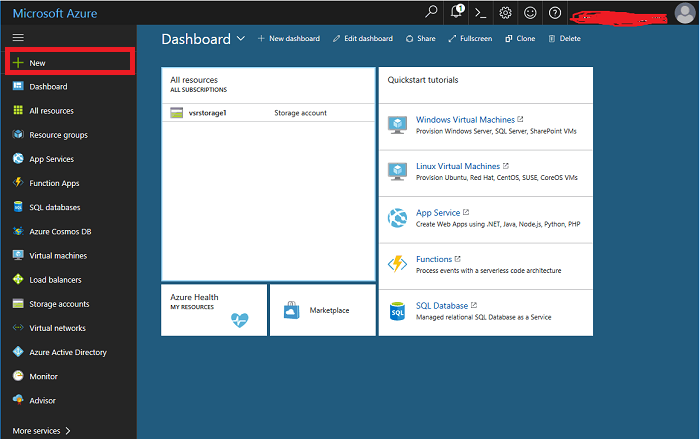
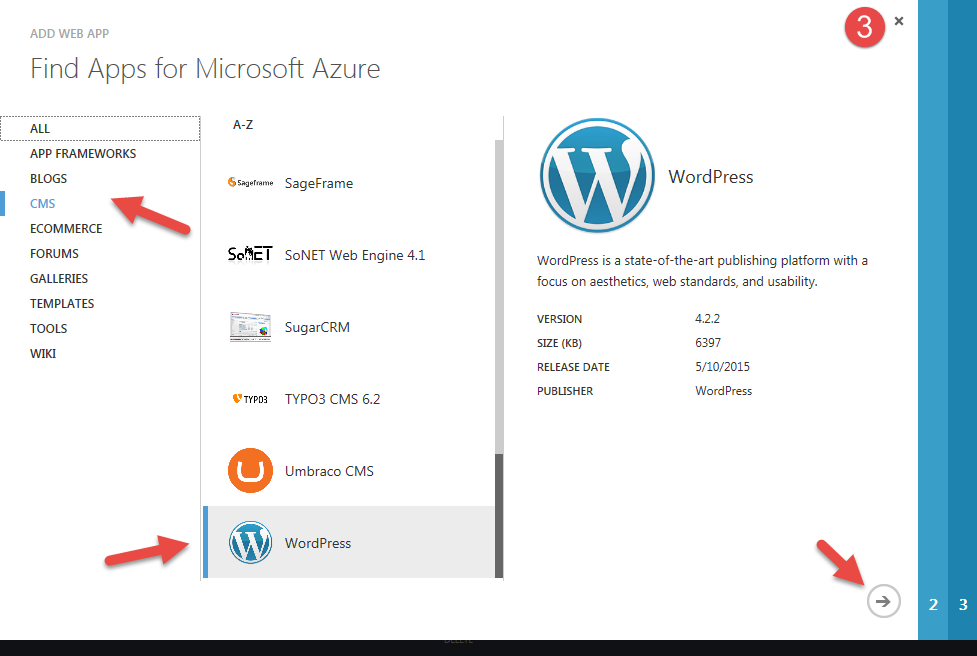
So, now you will have to find the button named “Add a resource” or “Create a resource” for adding WordPress as a resource in this cloud-computing portal. You need to select the WordPress option from the drop-down menu.
If there is any confusion, then you can find the WordPress option by the icon the website uses. It will be then easier to know which option is for WordPress to add as a resource.
3. Fill Up The Necessary Information
Once you are done with step 2, another window will be seen where you will be asked to follow and fill a certain piece of information. This helps in a holistic approach in knowing how to install WordPress in Microsoft Azure.
These items are:
Name of the application
You can choose a catchy name for your Website or the application based on WordPress.
Choose the relevant research group
You get to select the group where you want to include the WordPress in. Or else, Azure can choose it for you if you got no clue, have no time, or there’s no specification for now.
Choose the service app location
Further, you will be asked in a drop-down menu to choose a location for your plan and service to run. Different locations will bear different costs as you go about the locations to operate it.
Selecting the location helps you as a developer and a business owner to map into a customized set of market. In future, this location-based service plans boost your traffic and sales even through local SEO services and plans.
Properly choose the service plan
After the location and the operating system are selected, you must also choose the method to pay for the services you are about to take. These plans can be paid monthly or at an hourly rate.
Select the currency option well
While you are choosing the plan, kindly see that you have chosen the right kind of currency. Obviously, you do not want to end up paying the wrong amount through unwanted international currencies to bear a high cost.
So, while learning how to install WordPress in Microsoft Azure, keep in mind that you are selecting the right plan for the right time with the right currency as a medium for the payment.
4. Choosing Components For The Service Plans
The service plans have multiple options from isolated to shared. These plans cover factors like:
- the amount of disk space
- automatic scaling
- network isolation required
- the number of applications you have already
- the degree of domain customization required
- hybrid connectivity enabled or not
So, as a business owner or a blogger hoping to run a regular website for your viewers, customers, and readers, you need to decide how many solutions do you want in one plan.
When your business is increasing all these factors matter a lot. For example, the disk space and the network connectivity required or their scalability will define the ease of the business for the users.
If your disk space is lower or the network connectivity is not that strong, your website will not be able to reach to the targeted audience.
Or else, if customers want to interact with your regularly, but you do not support automatic scaling, and neither is your disk space larger to store continuous feedback, then it’s no point of such plans.
Hence, you need to carefully think where will be the prime focus of your website. Then you should choose carefully while learning how to install WordPress in Microsoft Azure.
The major benefit for these schemes is that you can always scale up and buy more space or better network connectivity later on. It would be a lucrative deal every time your business rises to a new height.
5. Allow Azure To Create The MySQL Database For Your Website/Apps
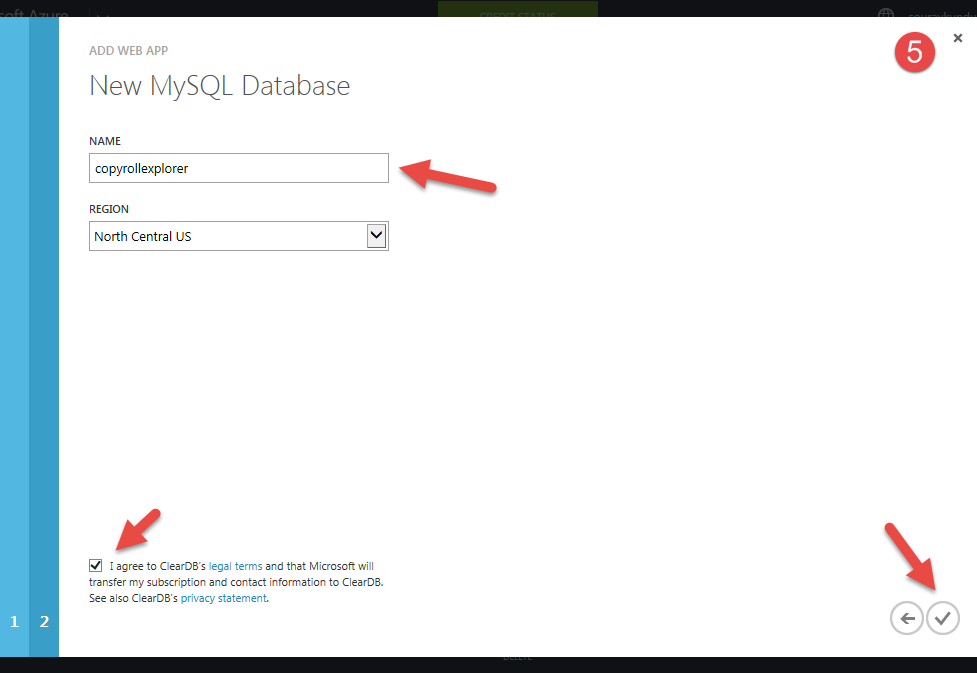
Azure stores, manages, and processes the information your website or apps collects through the MySQL database. The same is not too hard to avail yourself online on this portal.
What you have to do is search and click the “Azure Database for MySQL” services. Its process is straightforward and quick to follow. Within minutes, you will have a database ready to work along with your plan which you purchased already.
What you will need is to fill your credentials while selecting the MySQL according to your website and buy the database manager as soon as possible. The pricing for this database might vary. You can look it up on the official website of Azure when you make an account.
6. Start The Testing
Now, we are almost at the end step for learning how to install WordPress in Microsoft Azure. This step is fairly adaptable and comfortable—even for the beginners to follow through.
The URL will be provided for the testing before you begin the final step.
7. Complete WordPress’ Installation Process
When you choose to begin the installation of WordPress, the wp-config window is skipped. Azure’s portal already keeps it downloaded for you. Now, wait a few minutes, and voila! WordPress will be successfully installed in Microsoft Azure.


