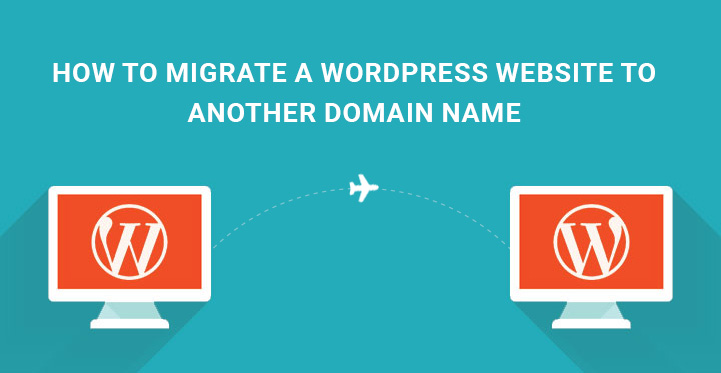
Migrating a WordPress site can feel overwhelming, but with the right steps, it’s a straightforward process. Whether you’re switching hosts, upgrading your server, or rebranding your online presence, this guide will walk you through the manual migration process in 2025. We’ll also explore alternative methods to make your migration smoother and stress-free.
Table of Contents
Even though it is not a good idea to migrate a WordPress website to another domain name, but sometimes it becomes necessary.
You may have multiple reasons to change the domain name which could be a legal problem, a better domain name for better SEO that you can find at Hostinger’s post on best domain name generators and web traffic or another company taking over your website.
Most people are scared to migrate a WordPress website to another domain name because they feel all the hard work they put in SEO will be lost.
Essentially, all off-page SEO works get reflected by your domain name and when you change it, it is quite logical to think that SEO value of your website will vanish.
But it is not the case as we are going to show you to migrate a WordPress website to another domain name without losing any SEO value.
Pre Preparation of Migrate a WordPress Website
The first thing to note is the fact that when you migrate a WordPress website to another domain name, you are not changing the web host. You can have the same web host and all you have to do is to point your website to another domain name which could be from the same web host or a different one.
The second thing is your SEO value will get affected temporarily and over the time, it will get recovered and will be back to its old value.
There will be some negative SEO value when you migrate a WordPress website to another domain name. You can reduce this negative SEO effects significantly with various measures.
Should I Migrate My WordPress Site Manually or Automatically?
Before diving into the migration process, it’s essential to decide whether a manual or automatic approach is best for you.
- Manual Migration: Best for users who want full control over the process, have technical expertise, or are working with a highly customized site. It’s also ideal if your new host doesn’t support automated tools.
- Automatic Migration: Perfect for beginners or those looking for a quick, hassle-free solution. Plugins and hosting migration services can handle the heavy lifting for you.
How to Migrate Your WordPress Site Manually
1. Export Your WordPress Database
Your WordPress database contains all your posts, pages, settings, and user data. To export it:
- Log in to your hosting control panel (e.g., cPanel).
- Open phpMyAdmin and select your WordPress database.
- Click Export, choose the Quick method, and select SQL as the format.
- Click Go to download the database file.
2. Download Your Site Files
Your site files include themes, plugins, uploads, and core WordPress files. To download them:
- Connect to your site via FTP/SFTP (using FileZilla or similar tools) or use the File Manager in your hosting control panel.
- Navigate to the root directory (usually
public_htmlorwww). - Download the entire WordPress folder to your computer.
3. Choose a New WordPress Host
Select a hosting provider that meets your needs in terms of speed, security, scalability, and support. Popular options include Bluehost, SiteGround, and WP Engine.
4. Create a New SQL Database on the New Host
- Log in to your new hosting control panel.
- Create a new database and user.
- Assign the user to the database with full permissions.
- Note down the database name, username, and password.
5. Upload Your WordPress Site Files to the New Host
- Connect to your new host via FTP/SFTP or use the File Manager.
- Upload the WordPress folder you downloaded earlier to the root directory of your new host.
6. Edit the wp-config.php File
- Locate the
wp-config.phpfile in your uploaded WordPress folder. - Open it in a text editor and update the following lines with your new database details:
<span style="color: #000000"><span class="token function">define</span><span class="token punctuation">(</span><span class="token string single-quoted-string">'DB_NAME'</span><span class="token punctuation">,</span> <span class="token string single-quoted-string">'new_database_name'</span><span class="token punctuation">)</span><span class="token punctuation">;</span>
<span class="token function">define</span><span class="token punctuation">(</span><span class="token string single-quoted-string">'DB_USER'</span><span class="token punctuation">,</span> <span class="token string single-quoted-string">'new_database_user'</span><span class="token punctuation">)</span><span class="token punctuation">;</span>
<span class="token function">define</span><span class="token punctuation">(</span><span class="token string single-quoted-string">'DB_PASSWORD'</span><span class="token punctuation">,</span> <span class="token string single-quoted-string">'new_database_password'</span><span class="token punctuation">)</span><span class="token punctuation">;</span>
<span class="token function">define</span><span class="token punctuation">(</span><span class="token string single-quoted-string">'DB_HOST'</span><span class="token punctuation">,</span> <span class="token string single-quoted-string">'localhost'</span><span class="token punctuation">)</span><span class="token punctuation">;</span></span>
- Save the changes and re-upload the file if necessary.
7. Import Your Original Database
- Log in to your new host’s control panel and open phpMyAdmin.
- Select the new database you created.
- Click Import, choose the SQL file you exported earlier, and click Go.
8. Configure and Change DNS Settings
- Log in to your domain registrar (e.g., GoDaddy, Namecheap).
- Update the nameservers to point to your new host or modify the A record with the new host’s IP address.
- Allow 24-48 hours for DNS propagation.
9. Update URLs (if Necessary)
If your domain or directory structure has changed, update the URLs:
- Use a plugin like Better Search Replace to find and replace old URLs with new ones.
- Alternatively, run a SQL query in phpMyAdmin to update the
wp_optionstable.
10. Test Your Migrated Site
- Clear your browser cache and visit your site.
- Check for broken links, missing images, or functionality issues.
- Test forms, plugins, and themes to ensure everything works correctly.
The Easiest Way to Migrate a WordPress Site
If manual migration seems too complex, consider outsourcing the migration of your WordPress site can be a smart decision, especially if you lack technical expertise or time to handle the process yourself. SKT Themes, a well-known provider of WordPress themes and services, offers professional assistance to ensure a seamless migration. Here’s why outsourcing with SKT Themes might be the right choice for you:
Benefits of Outsourcing WordPress Migration with SKT Themes
- Expertise and Experience
- SKT Themes has a team of WordPress experts who are well-versed in handling migrations, ensuring your site is transferred without errors or downtime.
- Time-Saving
- Instead of spending hours learning and executing the migration process, you can focus on your business while SKT Themes handles the technical work.
- Custom Solutions
- Whether you’re moving to a new host, changing domains, or upgrading your server, SKT Themes provides tailored solutions to meet your specific needs.
- Minimal Downtime
- Their team ensures that your site experiences little to no downtime during the migration, preserving your SEO rankings and user experience.
- Post-Migration Support
- SKT Themes offers ongoing support to resolve any issues that may arise after the migration, such as broken links or functionality problems.
When to Consider Outsourcing to SKT Themes
- You’re not comfortable with technical tasks like database management or DNS configuration.
- Your site is large or complex, with custom themes, plugins, or integrations.
- You want to avoid downtime and ensure a smooth transition.
- You prefer professional support to handle potential issues during and after migration.
How to Migrate Your WordPress Site Using Plugin?
1. Take A Complete Backup –
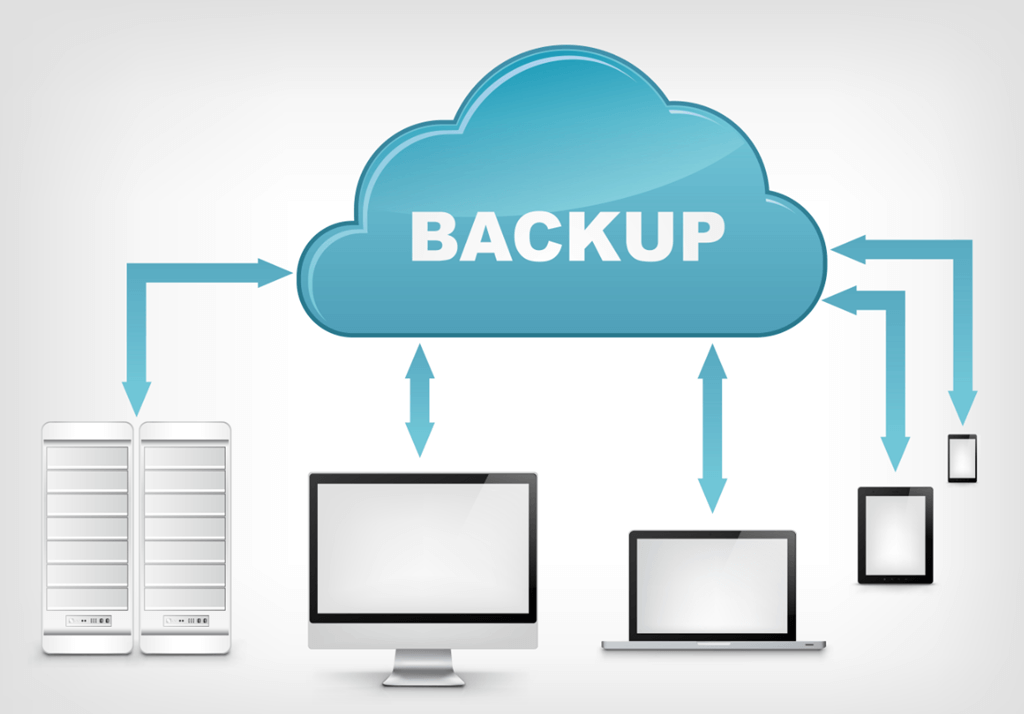
Assuming that you have already bought the new domain name, the first thing to do is to take a full backup of your website. There are many plugins available for this job like VaultPress or BackupBuddy.
To install the plugin BackupBuddy, go to Dashboard and Plugins from the left menu and then click on Add New. Search the plugin, install and activate it.
A menu option BackupBuddy will appear on the left menu of the Dashboard. Go to that and click on Backup from the drop down. You may have to fill up some fields in a wizard. Once the actual screen comes, click on Complete Backup button.
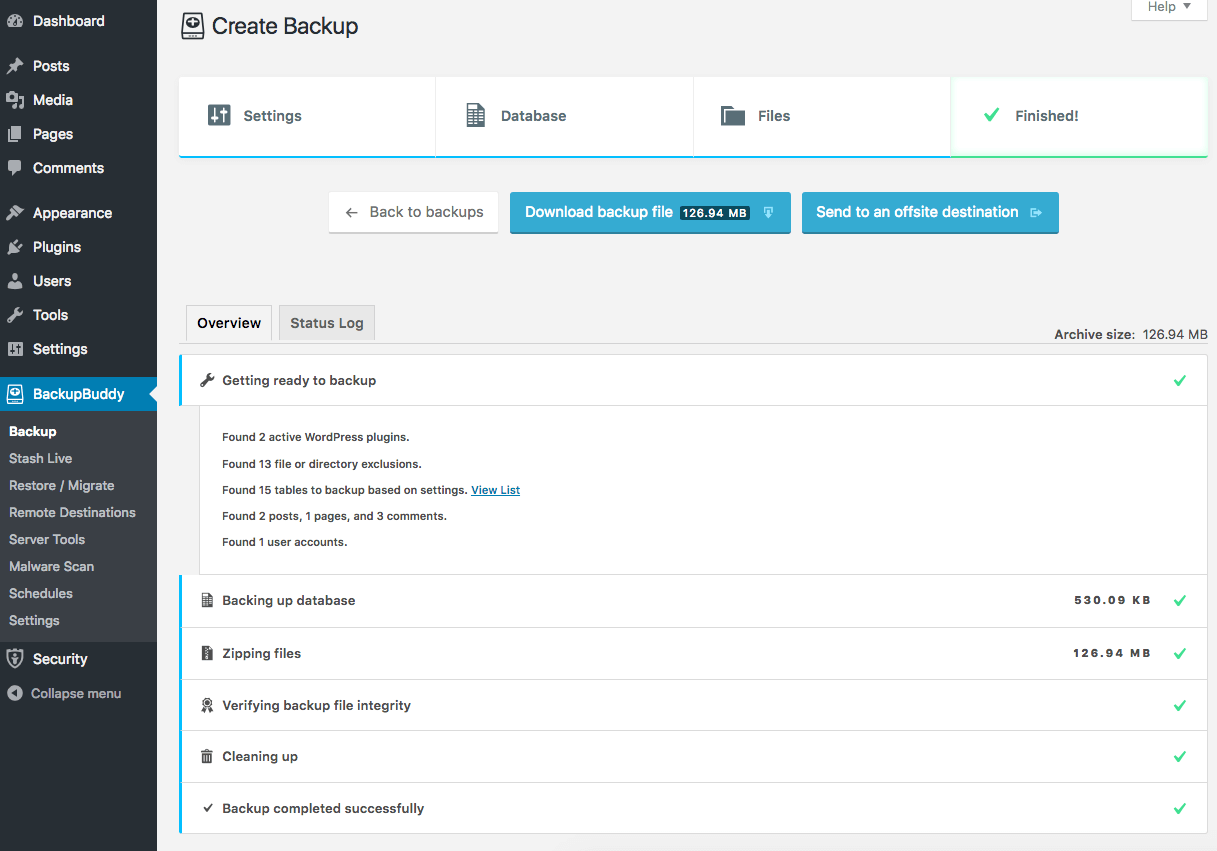
You have a wait a few moments for it to take a full backup and a button will appear with label Download BackupFile. Click on that and download the backup on your hard drive and store it safely.
2. Migrating The Website –
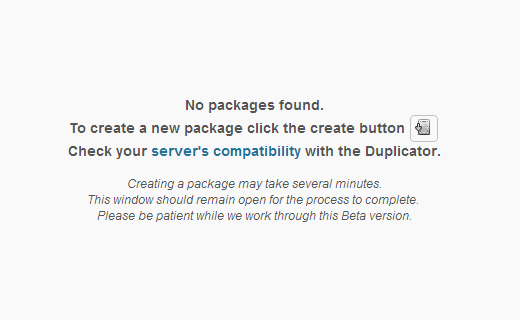
For migrating the domain name, you would need a plugin named Duplicator. Go to Dashboard and Plugins from the left menu and click on Add New. Search the plugin by name, install and activate it.
After activation, menu option Duplicator will appear on the Dashboard’s left menu. Click on that option and you will see a screen that will read No Packages Found.
The Process Begins –
Click on the Create Button present and it will start the internal process of duplicating your website. Basically, it creates a compressed(ZIP) package file comprising your WordPress website files and database.
You may be asked to provide the name of the package file which you can specify as you wish or just leave it in its default name. The process might take a few minutes depending on your file structure and volume.
Once done, you have to download the package and associated files(installer.php) on your hard drive.
Uploading In New Site –
Now, it is time to upload the compressed package and associated files. Connect your FTP software(preferably FileZilla) to your new domain name settings.
Go to the root directory and make sure there is no file. Start uploading the package and files there. Once done, you need to open your web browser and type in www.newdomainname.com/installer.php and press enter.
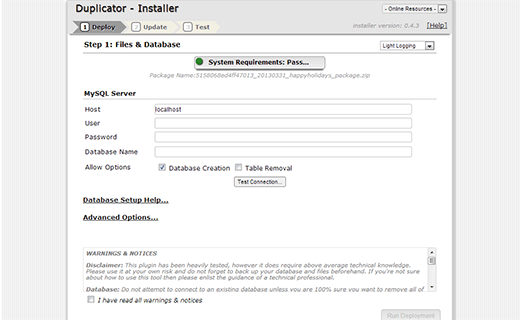
Install The Website –
A new screen will appear on the web browser where you will be asked to provide the details of your database settings. Provide the details and enable the checkbox table removal and tick mark “I have read all messages & notices”. Then click on Run Deployment.
The installer will un-package and install your database from the old website. Once done, you will reach the Update page. Check the fields containing old and new URLs and paths. If any modification is required, do so manually and click on Update button.
Post Installation Tasks –
Once the installation process is over, you need to do some modifications. The first thing to modify is the permalink.
Go to Dashboard and then to Settings and click on Permalink. Modify the structure of the permalink to be the same as the old permalink you had and click on Save button.
Go to FTP software, refresh it and remove the files installer.php and other files starting with ‘installer’ name. This is for the safety of the website.
Technically speaking the process of migration is complete here. But there are a few things you need to do to avoid negative SEO effects. You need to set up 301 redirects and notify search engines about the change.
3. Permanent 301 Redirects –
With permanent 301 redirects, you will be able to send your users from old website to the new one. As a matter of fact, ever search engine crawlers will get redirected.
For that, you need to go to the .htaccess file located in wp-admin folder in your web host. Edit that using FTP and write the following code.
#Options +FollowSymLinks
RewriteEngine on
RewriteRule ^(.*)$ http://www.newdomainname.COM/$1 [R=301,L]
Replace the ‘newdomainname’ with your new domain name for your website. Once done, save the file and go to your old domain name through the web browser. You will see that you are getting redirected to the new domain name.
4. Notify Google and Users
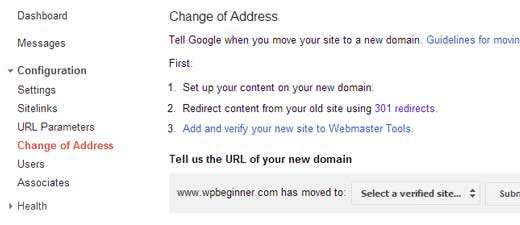
Go to Google Webmaster Tools and go to Configuration from the left menu. In the drop down option, click on Change of Address. You have to write the new domain name and verify it.
Apart from that, you must notify your users a few weeks before the change through social media, email newsletter and various other means. Hope you found the article useful, if you face any problem during migration, let us know. Thank you.
Conclusion
Migrating a WordPress site doesn’t have to be stressful. Whether you choose a manual or automated approach, following the right steps ensures a smooth transition. Always back up your site, test thoroughly, and monitor for issues post-migration.
![]() Sonl Sinha is a passionate writer as well as WordPress and WooCommerce rockstar who loves to share insights on various topics through his engaging blog posts. He runs a successful website design and digital marketing company. With 15+ years of experience in WordPress theme development, he strives to inform and inspire readers with his thought-provoking content. He helps thousands of small and medium businesses and startups create a unique online presence. Follow Sonl Sinha for your regular dose of knowledge and inspiration.
Sonl Sinha is a passionate writer as well as WordPress and WooCommerce rockstar who loves to share insights on various topics through his engaging blog posts. He runs a successful website design and digital marketing company. With 15+ years of experience in WordPress theme development, he strives to inform and inspire readers with his thought-provoking content. He helps thousands of small and medium businesses and startups create a unique online presence. Follow Sonl Sinha for your regular dose of knowledge and inspiration.
Do check out our free WP themes and WordPress themes bundle