Migrating Your WordPress Site into New Hosting
This fact cannot be negated that transferring the website to a new host can prove to be really stressful and tiring.
Table of Contents
However, if you follow a series of well defined and structured steps then it can be done very easily. In this scenario, it is suggested that you spend some time to prepare your own website. This will simplify everything and you won’t have to worry about the relevant issues.
Keeping in mind the utmost need of instructing people on this matter, we have written this article to provide assistance.
1. Back Up Your Website’s Files
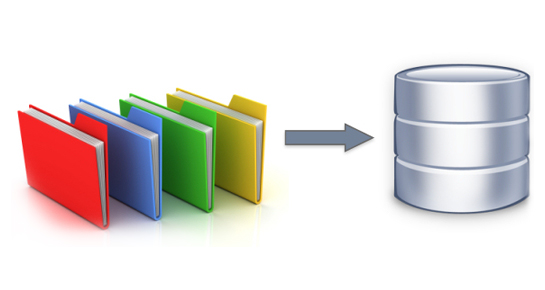
The first and foremost step to migrating your WordPress site into new hosting is to ensure that you back up all the aspects of your website. You should know that this step is not only a good practice but a crucial requirement when you are trying to migrate the WordPress website.
In this regard, there are a lot of plug-ins which can help you back up the website. But, you should know that you will be required to perform the procedure in a manual way. Use an FTP Program like FielZilla , connect to your web server and copy all the files to your local computer.
At this point, it is to be noted that you should copy all the files including the ones that are hidden. For example, .htcaccess file is hidden.
Take help from the FTP program that you are using and retrieve it. This process can take some time. It totally depends on the media uploaded on your website.
2. Export the WordPress Database
This is a very simple process. Just follow the given instructions.
- Open the cPanel
- Login
- Access the phpMyAdmin application
- There will be a database that will contain your WordPress installation
- Select that and click the “export” tab present on the navigation menu
Now click the Go Button
Now, the export process will get initiated. It should be noted that once you are done with this step you should move on to the next one.
3. Create the WordPress Database on your New Host Server
Before the migration, it is important that proper environment is created for the installation of WordPress. For this purpose, it is recommended that you create a database that can store all your SQL data.
At first you are required to login to your cPanel. It is to be noted that this guide serves the purpose of performing database creation through MySQL Databases application.
If the web host does not support this method then you should get in touch and ask for their procedure.
The steps are:
- Open MySQL Database
- Have a new database created
- Choose an appropriate name
- Have a new user created
- Now, this user account is to be added to the new database with all the privileges
Ensure that you save the name of database, new MySQL username and its password. It will be needed soon.
4. Edit the wp-config.php File
Open the local folder which you downloaded on your computer. Locate teh wp-config.php file. This controls the access between the database and WordPress.
Copy this file and have it stored in another location on your computer. It will be used as a backup if something goes wrong during the process. Now, open the file in the original location with a text editor.
Make the changes given below:
A. Change the name of DatabaseYou have to locate
define('DB_NAME', 'db_name');
Change the db_name to the new name you just created
B. Change the Database UsernameBelow the above line, there will be.
define('DB_USER', 'db_user');
Change the db_user to new usernme.
C. Change the User PasswordHave the third line edited.
define('DB_PASSWORD', 'db_pass');
Change the db_user to new password that you created.
5. Import your Database
After having a new database, we can finally get started with the process of importing. Follow the given steps:
- Access cPanel
- Launch phpMyAdmin
- Select new database (present on the left hands side bar)
- After it opens, select the Import tab (navigtion menu)
- There will be Choose File i the File to Impor section. Click that
- Choose the SQL File that was exported
- Uncheck the Partial Import
- Set the format to SQL
- Click Go button
The import will now initiate.
6. Upload the WordPress Files to New Host
After all the aforementioned steps, you can finally start to upload your website files.
- Use the FTP program to connect to the server
- Go to the folder that will contain the website files. It is usually the public_html folder
- Now upload the files
7. Linking to New URL and Defining New Domain
The process of searching and replacing the old domain and having it replaced by the new one will come with other tasks as well.
For example, the alternation in the values of site URL and home URL. This will ensure that you are not directed to the old domain while logging through the new one.
8. The Final Touches
There are two main components of this step and the span between them lasts for several days.
It is necessary that the domain’s DNS settings are reconfigured before the site can be used on the new host. The process is dependent on location where the domain is registered.
It should be noted that the domain registrar should have all the necessary details in order to make this change.
At this point, it is important to note that the changes made in the DNS can take about 48 hours for the complete propagation. Moreover, it should be done when the traffic is less.
During this span, no changes should be made to the website. Once, 48 hours have passed you would now access the new web host on connecting to your website.
Upon confirmation that it has been successfully, you can go to the old host and delete all the relevant files and database. However, there should be a backup in case anything goes wrong.
Although the steps given above are tedious they are probably the best way for any WordPress developer and probably the only way they are going to shift websites for their clients by creating dump of database and files and then moving from one host to another.
With CLI access in most and majority of the WordPress hosting companies many coders and WordPress developers now use CLI interface which makes copy and paste very simple and easy and effectively reduces the time duration as well.
Thus this is another step as well by which one can shift WordPress based websites.
Most hosting companies nowadays provide easy and free migration for their users when they purchase a fresh account from them.
Thus most users rely on hosting to actually do the move of website from their previous hosting to current hosting for them.
Last method which is for users who aren’t really developers and do not want to go through the hassle of the above steps and don’t have much money either to hire a developer to move their website between hosts is by use of plugins.
Several plugins are there which does the job of moving and migrating your WordPress site from one place to another some of them to be named are All in one migration, Duplicator, WordPress Move and others.
These plugins make the life easier for a novice developer or for users who don’t want to use steps like the above and still want to migrate websites on their own without waiting for hosting either.
When it comes to migrating your WordPress site into new hosting, the process can seem long, nerve wracking and even tedious at times.
That’s why we developed this short guide post to help you along with the process. Migrating your WordPress site into new hosting is not something simple that can be automated or achieved through third party plugins, rather there’s a fair amount of manual work that you would have to carry out. So let’s get started, shall we?
- Back up all important files: The first thing that you need to do is to back up all the important files that relates to your website. Remember the ones you used for installing WordPress and creating your own database? You need to back it all up. Use FTP programs like Filezila and connect to your server and download all the important files including hidden ones and save it.
- Export the WordPress database: You need to export your WordPress database; at this point, you must already be familiar with your phpMyAdmin application so use the same to export the database. And once the process has been initiated, you can then move on to the next step.
- Create the database on the new host server: However, before you can migrate to a new host, you need to create a suitable environment for your WordPress database. So you need to create a database that can store all your SQL data safely.And when creating your database, name it accordingly and at the same time, create a new user id and password for yourself. You’ll need to retain this carefully, as you will need this information later on.
You also need to edit the wp-config.php file, as this controls the access between your WordPress and your database.
You need to open the file in its original location and change the name of the database, user id and password, the same ones that you had selected earlier on.
- Import: You can now import your database and migrating your WordPress site to the new host.
- DNS settings: You also need to configure your DNS settings so that you are able to access the right website and not redirected to the old one.DNS registries can take a while to update their records but should have the same updated in 48 hrs or so. So essentially, it should take no more than two days for you to completely migrating your WordPress site to the new host.
- This is also where you need to update your DNS records (as you are changing the domain). After publishing the new records, check with a DNS propagation checker to confirm whether all records have propagated or not.
Granted the process may seem cumbersome but there’s no getting around the fact that this has to be done manually. If you find the process overwhelming, you can always ask a programmer to lend a hand and help you get it set up.
It is pretty much straightforward and before you begin the process, you need to make sure that you keep backup copies of all the important files.
And also in case of any further issues or clarifications, you can always contact WordPress support or check out their help files.


