Minification of WordPress CSS and JavaScript files is an often-recommended step given to website owners as it speeds up the website. But it is not that easy a task so many website owners get frustrated when they try to minify their files and end up breaking their website.
Table of Contents
We understand that it is not easy to Minify CSS / JavaScript Files, it requires lots of effort and experimentation. Below, we have listed the best ways to minify files. You can make your work easier by following these ways.
What is Minification?
Before getting into the methods of minification, let us first understand what minification means. So, minification means removing the unnecessary parts of CSS and JavaScript to reduce the size of the files.
When programmers write the code, they use white space, comments, line breaks, etc to make the program easier to read. However, these signs are not required by the browser to execute the code, thus, the presence of such signs makes the loading time longer.
Minification works by analyzing and rewriting the codes after removing all the unnecessary characters from the program. This process reduces the size of your files making them load faster on the user’s browsers. Thus, any website owner to Minify CSS / JavaScript Files must give the best experience to the users.
Benefits of minifying CSS/ JavaScript Files:
It is very important to minify CSS / JavaScript Files as it helps your website get a higher rank in search and provides the users with a better experience.
According to various research and statistics, it has been found that almost 40% of people do not wait more than 3 seconds for the homepage of any website to load, and Google also recommends that sites should only take 2-3 seconds to load.
You can Minify CSS / JavaScript Files for the following benefits:
- Decreased download size of the site.
- Faster experience for the users.
- Visitors will not have to download bigger files.
- Since less data is transferred over the network, so fewer bandwidth costs.
First Method: Minify CSS / JavaScript Files in Word press by using the WP rocket
It is the easiest and most recommended method for all users. It works with every Word press host. To use WP Rocket, you have to first install and activate the plugin of the WP rocket site.
WP Rocket is considered the best WordPress caching plugin that is available on the market. By using this you can easily add caching to your word press files and can significantly improve the page loading time as well as the website speed.
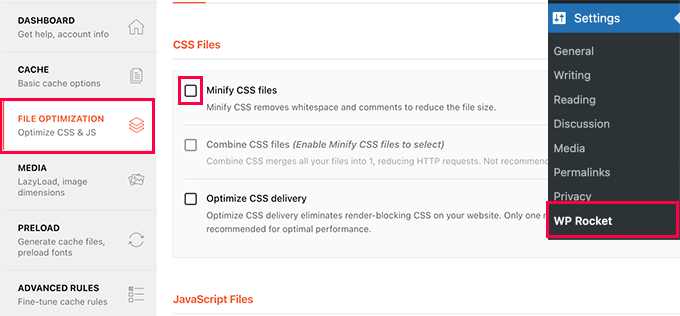
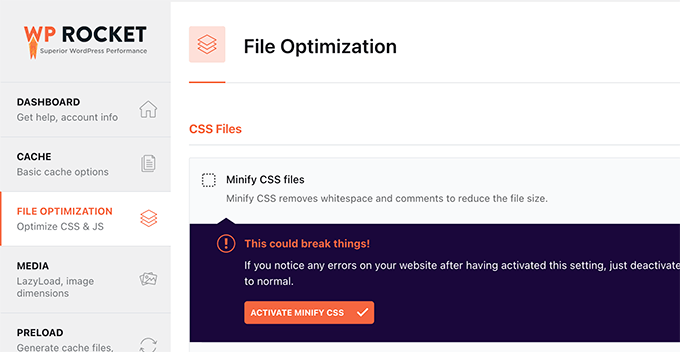
After the plugin is activated, you need to go to the settings on the page of WP rocket and switch to the tab of ‘file optimization’. Then you have to tap on the ‘activate minify CSS button.
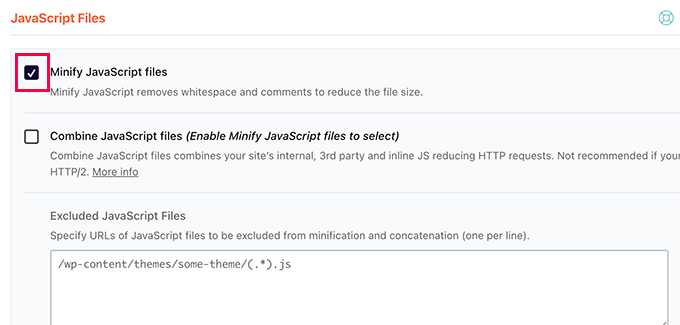
After this scroll below to the javascript files section, and check the box present next to the ‘minify javascript files’ option. And at last, after you are done with all these steps tap on the save changes button to save all your settings. And then WP rocket will start minifying your javascript and CSS files.
Second Method: Minify CSS/JavaScript Files in the Word Press by using SiteGround.
If you are using the site ground application as your hosting provider in the word press, then you can minify your CSS files by using the SiteGround optimizer plugin.
The site ground optimizer is basically a performance optimization plugin and it works only on the platform of the site ground application. It works extremely well with the Ultrafast PHP of the site ground to improve and reduce the loading time of the site.
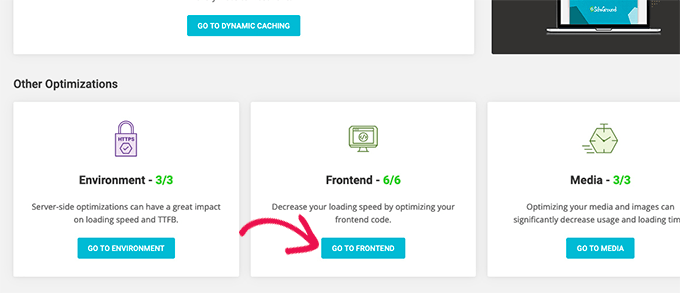
To use the site ground optimizer and Minify CSS / JavaScript Files you simply need to install and activate its plugin on your WordPress website. And after that, all you need to do is tap on the SG optimizer menu in your WordPress admin sidebar.
Then you will be taken into the settings of the SG optimizer, from the settings you need to click on the ‘go-to frontend’ option.
And on the next screen, you just need to switch the toggle next to the minify CSS files option. And at last, you have to switch to the tab of javascript and turn on the option of ‘minify javascript files’.
Third Method: Minify CSS / JavaScript Files using the Autoptimize option.
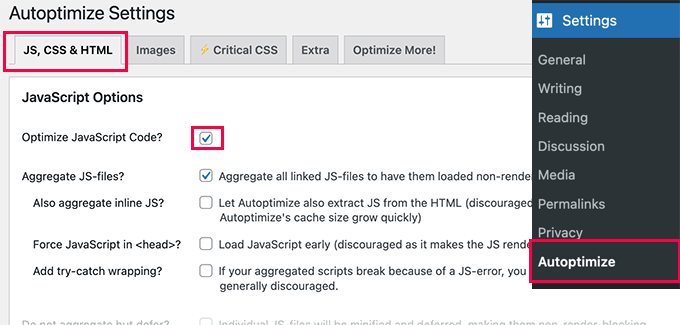
This method is used by the users who don’t use WP Rocket and site ground site for minifying their files. To use this site, you need to install and activate the plugin of Autoptimize. After the activation, you have to visit the settings and from there you need to configure the plugin settings.
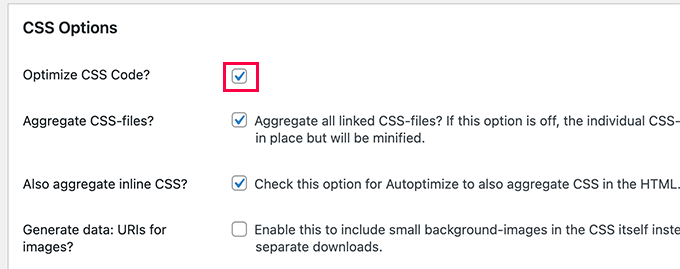
Then you have to check the ‘optimize javascript code’ under the options of javascript. And after that just scroll down to the CSS options and see the box that is next to the ‘optimize CSS code’ option.
After doing these things make sure that you click on the save changes button to save all your settings. Then after that, you can start using your minified files by clicking on the empty Cache button. The Autoptime plugin is also used to fix render-blocking CSS and Javascript in WordPress.
Conclusion
We have discussed all the necessary things on how to Minify CSS / JavaScript Files and even more. This article would definitely help you if you were also struggling with the slow speed of your website.
In addition to using the methods given above, you should also check what works best for your website because every website is different from the other.

