Step to Set Up Shopify with WordPress
If you’re looking to create an online store, you might be considering using Shopify as your e-commerce platform. However, you may also want to leverage the content management capabilities of WordPress to create a unique and personalized storefront.
Table of Contents
Thankfully, integrating Shopify with WordPress is a straightforward process that provides the best of both worlds: the powerful e-commerce capabilities of Shopify and the flexibility and customization options of WordPress.
This integration allows you to use WordPress to manage your website content while using Shopify to manage your product catalog and payment processing.
In this article, you will be guided through the step-by-step process of setting up Shopify with WordPress, from creating a Shopify account to adding the Shopify Buy Button to your WordPress website. So, let’s dive in!
Step 1: Set up a Shopify store
In today’s digital age, e-commerce has become a thriving industry, and setting up an online store has never been easier.
Whether you are looking to start a new business or expand an existing one, setting up a Shopify store can be an excellent way to enter the world of e-commerce.
In this step, we will provide you with an overview of the essential processes required to set up a Shopify store. With the right approach and guidance, anyone can create a successful Shopify store and begin selling products online.
Create a Shopify account
This step is not necessary if you previously signed up with Shopify. If you don’t have an account, visit the Shopify website and look for the “Start free trial” option on the home page to create a new Shopify account.
On the following page, click it, enter your email address, and then click “Start free trial.” The sign-up form will then ask you to provide your accurate information. To finish setting up your Shopify account and begin creating your online store, click the “Create your store” option.
Set up payment gateways
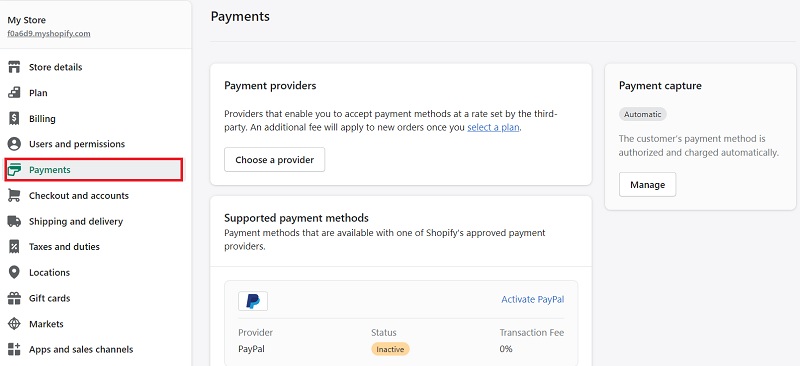
In the process of integrating Shopify with WordPress, setting up payment gateways in your Shopify store is a crucial step to start accepting payments from your customers. First, go to the “Settings” section, locate and click on the “Payment ” option to view the available payment gateways you can use for your store.
Next, from the list of payment gateways available, select the preferred payment gateway that suits your business needs the most. Shopify offers a wide range of payment gateways, including PayPal, Stripe, and Apple Pay.
Set up shipping options
Setting up shipping options in your Shopify store is essential to ensure that your products get delivered to your customers in a timely and efficient manner.
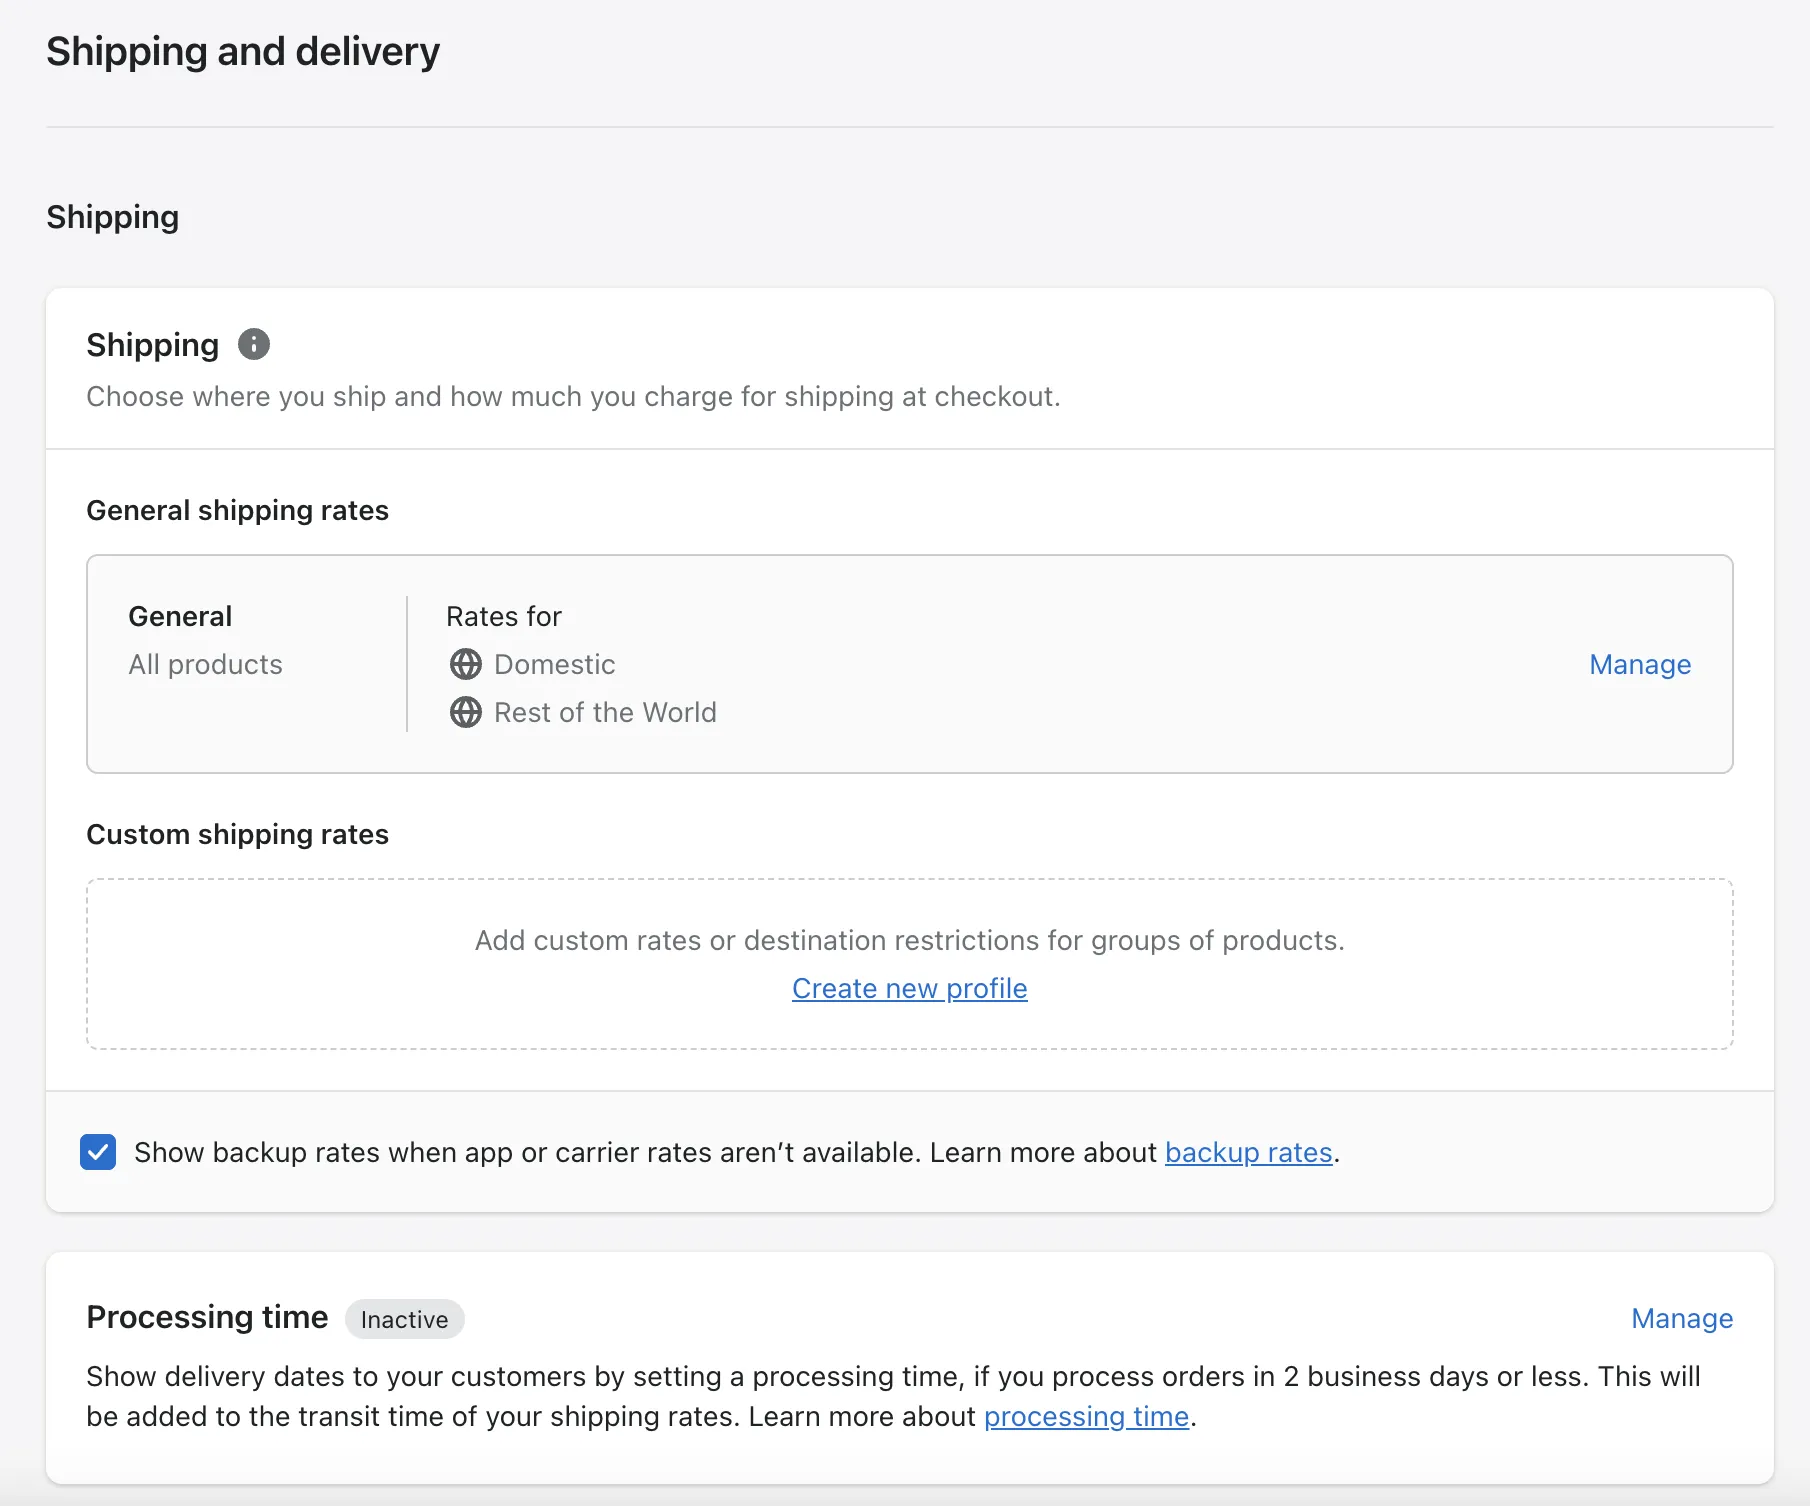
To get started, navigate to the “Settings” section of your dashboard. From there, click on “Shipping and delivery” and select the shipping zones you want to offer.
Set up your shipping rates based on weight, price, or a combination of both, and choose the shipping carriers you want to use. With the right shipping options in place, you can provide a seamless and efficient experience for your customers and grow your business with ease.
Choose your Shopify plan
Shopify offers a range of pricing plans to suit different business needs, from new startups to established businesses with high-volume sales. These plans include Basic Shopify, Shopify, and Advanced Shopify, each with different features and pricing.
Basic Shopify Plan:
Cost: $39/month
Features: Sell unlimited products and access 24/7 support.
Shopify plan:
Cost: $105/month
Features: Gift cards, abandoned cart recovery, and the ability to create discount codes.
Advanced Shopify Plan:
Cost: $399/month
Features: All the features of Shopify, plus advanced reporting and third-party calculated shipping rates.
Step 2: Add products to your Shopify store
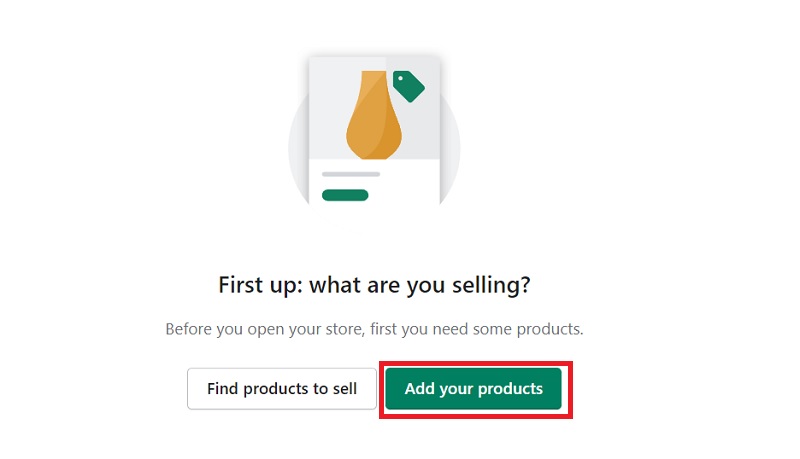
You have to first add products to the Shopify store to integrate Shopify with WordPress. Adding products to your Shopify store is a straightforward process. First, navigate to the “Products” section of your dashboard.
From there, click on the “Add product” button to create a new product listing. Fill out the product information, including the title, description, price, and product images.
You can also set up variants for your product, such as different sizes or colors, and add tags to help customers find your product.
Once you’ve entered all the product information, click “Save” to add the product to your store. You can continue to add more products by repeating this process.
Step 3: Activate and Customize the Shopify Buy Button
Shopify Buy Button is a powerful tool that enables you to sell your products on any website, blog, or social media platform. In this step, we will discuss how to activate and customize the Shopify Buy Button to suit your business needs.
Activate Shopify Buy Button
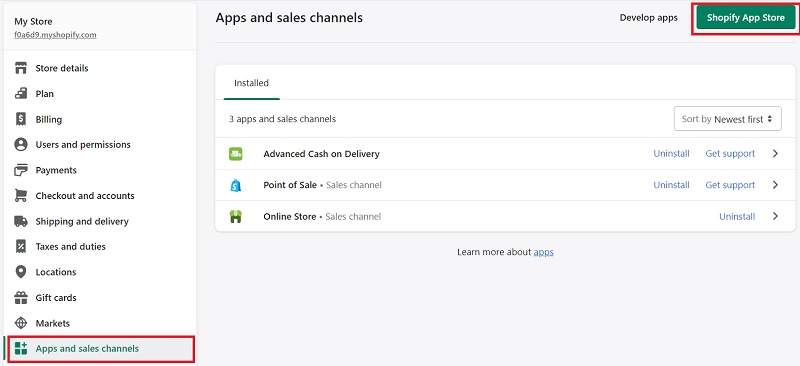
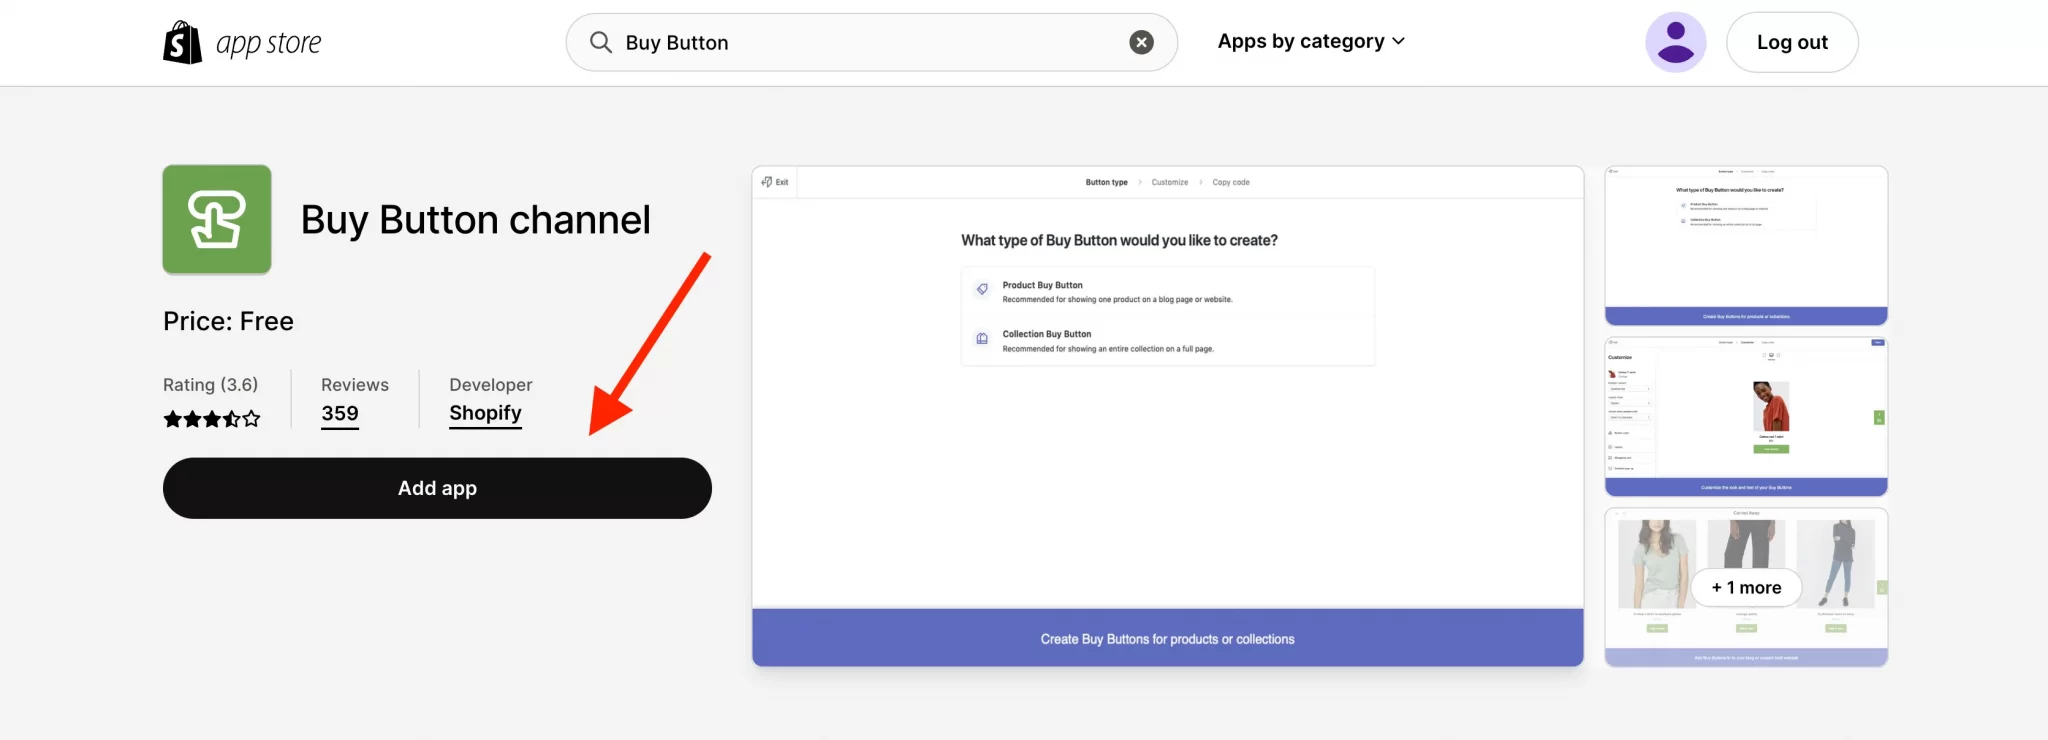
To use the Shopify Buy Button, you first need to activate it in your Shopify account. To activate Shopify Buy Button, log in to your Shopify account, go to the ” Apps and Sales Channels” section of your dashboard, and click on “Buy Button.”
Once you’ve added the Buy Button, customers can click on it to add the product to their cart and complete the checkout process on Shopify.
Customize Shopify Buy Button
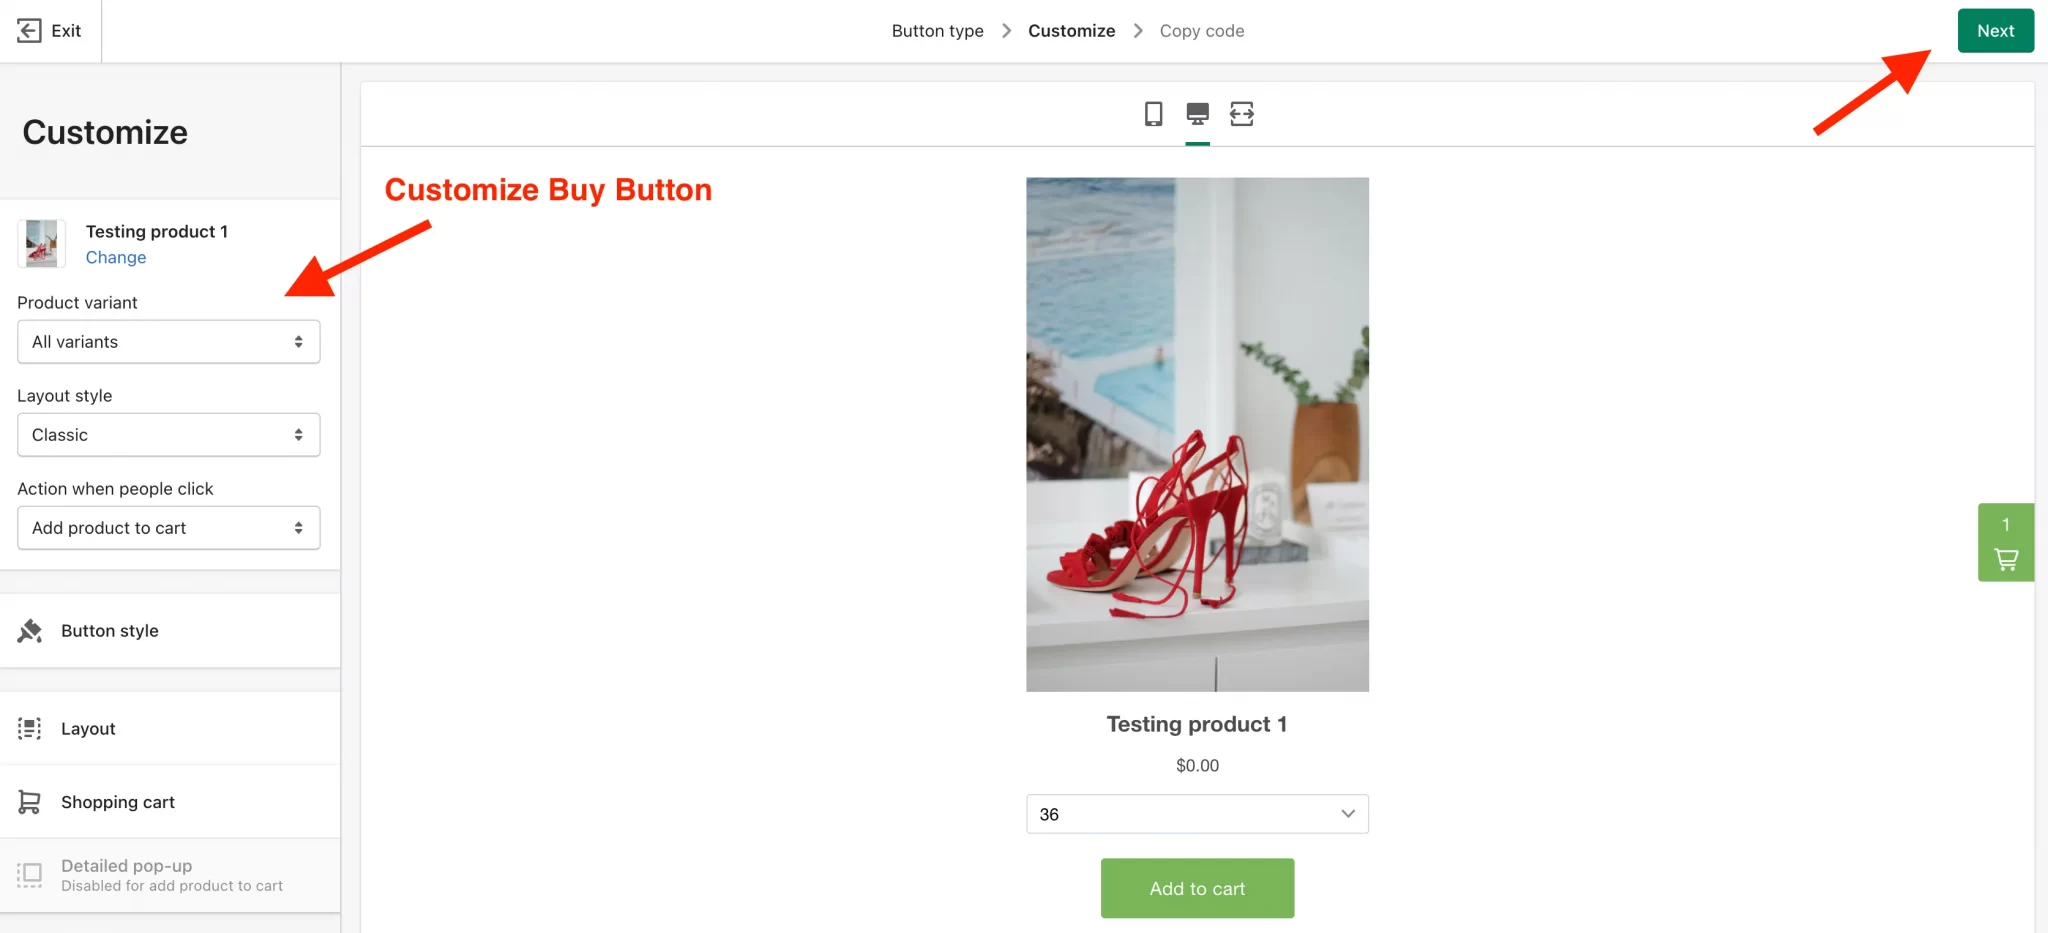
Customizing the Shopify Buy Button is a straightforward process. After selecting the product you want to sell with the Buy Button, you can customize the button’s appearance and functionality to match your branding and business needs.
You can choose from a range of options for the button’s size, color, and text, as well as customize the checkout experience by choosing whether to open the cart page in a new tab or the same tab.
You can also set up advanced options such as customizing the checkout language, enabling inventory tracking, and adding custom fields for customer information.
Once you’ve customized the Buy Button to your satisfaction, you can generate the code for the button and add it to your website, blog, or social media platform.
Step4: Add the Shopify Buy Button to WordPress
Here is a step-by-step guide on how to add a buy button to Shopify with WordPress:
- First, go to the “Buy Button” section. Then, choose the item you want to sell using the Purchase Button and alter its style and features to suit your branding and company requirements.
- Click the “Copy code” button after you have modified the button. You can copy the resulting code fragment to your clipboard.
- Next, go to the page or post where you want to add the Purchase Button by opening your WordPress dashboard.
- Put the code you copied from the Shopify Purchase Button section into the “Text” editing mode. The Purchase Button should display properly when you save the changes to the page or post and preview it.
Advantages of WordPress Shopify Integration
Integrating Shopify with WordPress can offer several benefits to businesses of all sizes. Here are some advantages of WordPress Shopify integration:
1. eCommerce Functionality:
WordPress is a powerful content management system (CMS), while Shopify is a leading e-commerce platform. Integrating the two allows you to leverage the strengths of each platform.
WordPress provides a flexible and customizable platform for your content, while Shopify provides robust e-commerce functionality such as shopping carts, payment processing, and order tracking.
2. Improved User Experience:
By integrating, you can provide a seamless shopping experience for your customers. Your website visitors can browse your products and make purchases without having to leave your website. This helps to improve user experience and may lead to increased sales and customer loyalty.
3. Increased Flexibility:
One of the key advantages of integrating Shopify with WordPress is increased flexibility. WordPress is known for its flexibility and customization options, and integrating it with Shopify can provide even more flexibility.
With Shopify, you can manage your inventory and process orders, while WordPress allows you to customize your site’s design and functionality to match your business needs.
With access to thousands of WordPress plugins and themes, businesses can create a unique and personalized storefront that aligns with their brand identity.
4. Access to Analytics:
Both WordPress and Shopify provide built-in analytics tools that allow businesses to track their website traffic and sales data.
By integrating the two platforms, businesses can gain a deeper understanding of their website’s performance and use this information to optimize their marketing and sales efforts.
5. Better Content Management:
WordPress is one of the most popular content management systems available, with a user-friendly interface and a wide range of features. You can use WordPress to manage your website content, including product descriptions, images, and videos.
This provides a more streamlined and efficient way to manage your online store, as you can easily edit and update content without having to navigate through Shopify’s backend.
Related Post: Best Reasons To Choose WordPress To Build Your Website
Conclusion
In conclusion, setting up Shopify with WordPress can offer businesses a range of benefits, including increased flexibility, powerful e-commerce capabilities, and better content management.
By following the step-by-step process outlined in this article, businesses can create a seamless integration between Shopify and WordPress, allowing them to sell products online and leverage the advanced customization options of WordPress.
With this integration, businesses can create a unique and compelling online presence that meets their specific needs and drives sales and revenue. As e-commerce continues to grow and evolve, integration of Shopify and WordPress is becoming an increasingly popular solution for businesses of all sizes.

