How to take a screenshot for your blog posts
In many blogs, individuals are often confused about how to add a screenshot? It is possible to add an image snapshot of your mobile device screen or desktop in a related blog post or article.
Table of Contents
To eliminate this confusion we have covered all the details regarding it in this article.
There are multiple ways, methods, and techniques of taking a screenshot and hence we have attempted to create a stepwise guide which can help you in the process.
Take a screenshot for your blog posts – CloudApp
CloudApp is amongst the most popular screen capture apps in the market. It allows you to easily share and capture the screenshot from your computer. The link of the screen capture is automatically saved in the clipboard by CloudApp.
It enables you to easily manage your screenshot and also share them on all platform including WordPress and your drive.
A selected area or a screen can be easily captured in a Mac or Windows through CloudApp. Integration with popular communication apps like Trello, Stacks, Asana, and others is also possible with this app.
Simultaneously use ‘Command+Shift+5’ and ‘Alt+Shift+5’, for Mac and Windows platform respectively to capture a screenshot in CloudApp. While capturing a screenshot it is possible to view the live size in the bottom left corner.
This helps you in taking a perfect screenshot of the exact required size. For creating quick video tutorials with audio one can use this app.
CloludApp is by far the fastest app to create and share a screenshot and it is also a freemium app. It helps in increasing productivity and collaboration of blog posts. You can incline towards native functionality if you don’t intend to use this app.
Take a screenshot for your blog posts on Mac
There are several options to take a screenshot if you are using Mac. The Mac devices enable you to screenshot the entire screen, a particular window, a selected portion, and more.
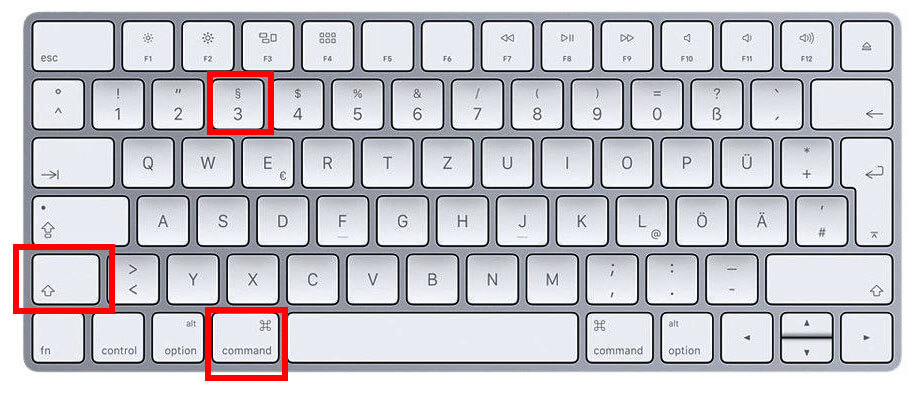
Simply press ‘Shift+Command+3’ on your Mac and it will capture the entire screen. The combination of ‘Shift+Command+4’ will help in taking a screenshot of the selected portion on your Mac. Click and drag the pointer to take a screenshot of the selected area.
To capture a screenshot of a specific window on your Mac press ‘Shift+Command+4+Spacebar’. You will notice that the pointer will turn into a camera icon. To highlight and capture a window drag the camera icon on it.
Sometimes some apps will prohibit you from taking a screenshot. In such cases, you can choose to take a screenshot of the selected portion and then crop it as required.
All the captured screenshot will be saved on the desktop by default. It will carry a default file name i.e. capturing time/date. It will be saved in the .png extension.
Take a screenshot for your blog posts on Windows
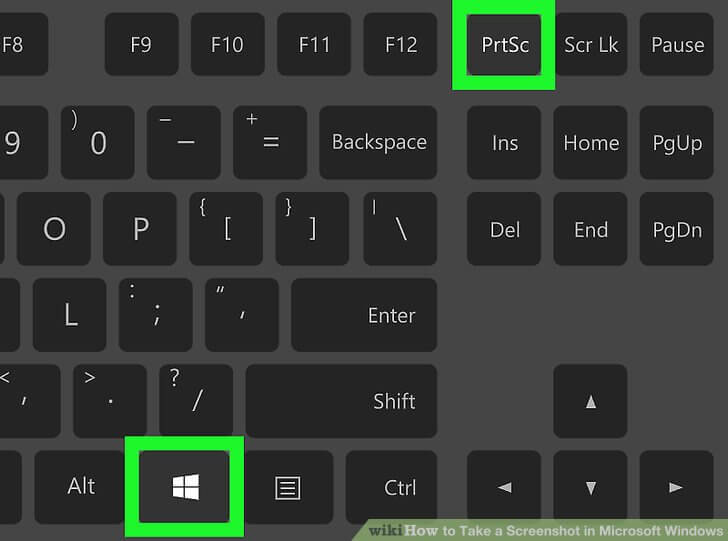
In order to capture a screenshot on your Windows PC press ‘Ctrl+PrtSc’. This will ensure that the entire screen is captured. To open this screenshot you will require editing software like Adobe Photoshop where you can crop, edit, and save this screenshot.
You can also use Paint for editing and saving the screenshot although it will lack advanced editing features compared to Photoshop.
If you are using a higher version of the Windows Platform like Windows 7 Ultimate or above then use the Snipping Tool. It is provided by Windows to take screenshots.
You can automatically save the captured screen part which can be full or partial in your desired location with the help of snipping tool.
The shortcut for accessing the snipping tool is ‘Windows+Shift+S’. Simply click and drag the area that you want to capture and as soon as you leave the click the selected portion will be captured.
It is one of the best and most acclaimed features for taking a screenshot in Windows platform.
Related Post: Best Free Screen Capture Software for Getting Screenshots or Recordings
Take a screenshot for your blog posts on Chromebook
With Chromebook, you can either take a screenshot of the selected area or the entire screen. To capture the full-screen press ’Ctrl + Switch Window’.
You can press the ‘Power + Volume Down’ buttons to capture your entire screen when you are using Chrome OS 64.0 or later.
Press ‘Ctrl + Shift + Switch Window’ keys to take a screenshot of a selected area. After selecting the area that you want to capture click and drag the pointer.
On the right corner of your screen in the bottom, you will see a notification at the end. The notification will denote that your screenshot is saved in the ‘Downloads’ folder.
Press ‘Ctrl + F5’ to take a screenshot, if you’re using a Chromebox with a general keyboard attached to it.
Take a screenshot for your blog posts on an iPhone
It is a simple process to take the screenshot a smartphone. When you are using an iPhone and you intend to take a screenshot then first open the blog post.
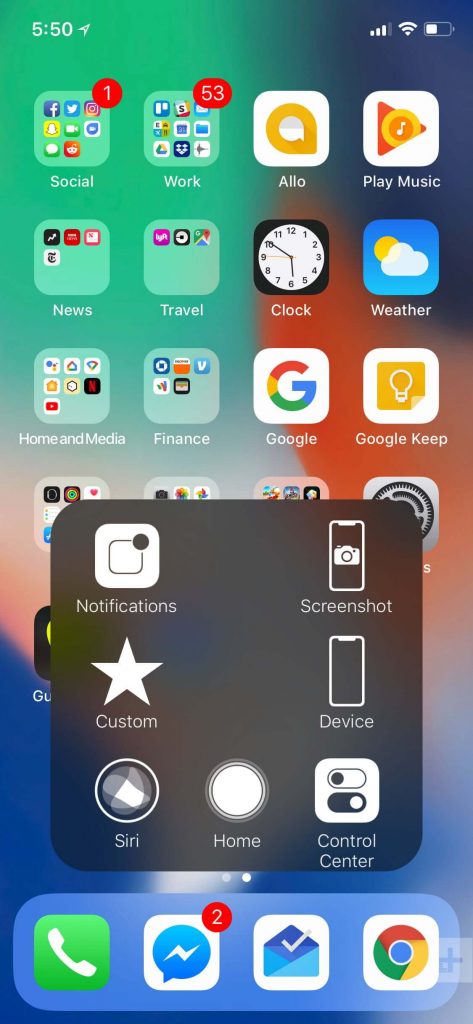
Press the Volume-Up button on the left side and side button on the right side if you are using an iPhone X to take the screenshot. When both the buttons will be pressed at the exact same time the screen will be captured and saved in the screenshot folder.
If you are using an earlier model of iPhone press the Power + Home button after going to the desired blog posts for taking a screenshot.
Take a screenshot for your blog posts on an Android Device
Users around the globe user android phones from various manufacturers like Samsung, One Plus, Oppo, Vivo, Motorola, Google, Xiaomi, and others. In most of the devices, there is a common pattern for taking the screenshot.
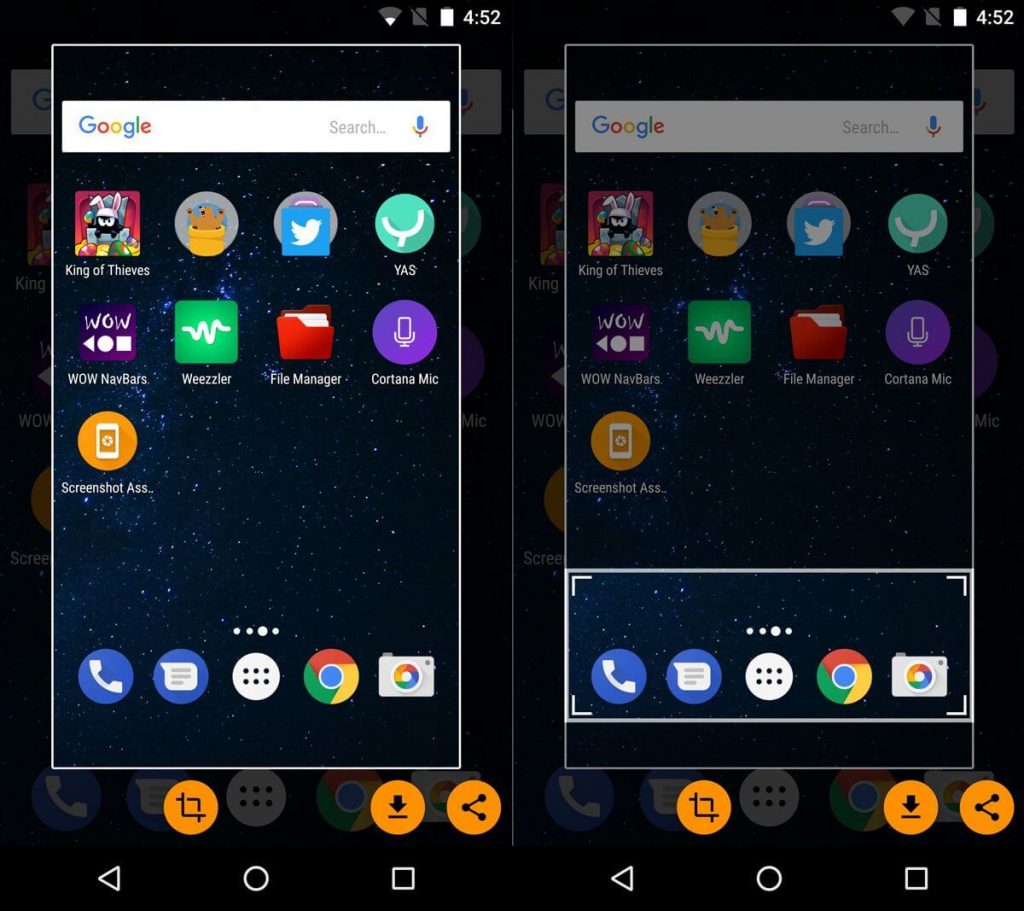
After opening the screen of your blog posts that you want to capture, press Power + Volume Down Button together. The screenshot can be accessed from the gallery or from the Screenshots folder in the local storage.
For Android users with Android Oreo or higher version taking screenshots will be an easy task. You can swipe three fingers on the screen and capture the screenshot. This feature is one of the most popular with new and high-end android phones.


